
We got home from staying close to home in TX in late April to stay at home orders here in Minnesota. So we have.
We have been ordering groceries on line and picking them up. We tried the two local grocery stores and Walmart. Cub Grocery uses InstaCart. That was disappointing. Coburn’s has their own service that delivers groceries for a fee. It was better than InstaCart. And Walmart grocery shopping has proven to be reliable, free and accurate. We order very specific items that we know and do not allow substitutions. We schedule a pickup the next day. Perfect every time.
We make a trip to the grocery store once a week or so for fruit and vegetables. Somehow we expected more people to be wearing masks. The people working in the stores wear masks. Almost everyone our age does too. We try to stay away from those not wearing masks. Survival of the smartest sort of thing. And now the state has mandated masks indoors. Almost everyone wears one.
A couple trips to the hardware store too. We wear our masks everywhere we go away from home.
We were going to go to Glacier NP, North Cascades NP, BC, Vancouver Island, Olympic NP, the Washington coast, down into Oregon, back to Grand Teton NP and finally to Custer State Park in SD for the Buffalo Roundup. All of that has been canceled except for the Tetons (we added time there) and Custer State Park. The Canadian Border is still closed to non-essential travel.
Habitat for Humanity closed down all volunteer opportunities until the middle of July. We work in crews of 6-8 now instead of 15-18. And the day has been shortened. I have worked twice now, lots of pent up hammer energy for many fewer spots.
Driving home from TX we composed a list of things to do to stay busy. It was long and likely tough to complete.
Finish up the downstairs vanity.
We built a new vanity for the bathroom down stairs with a nice top and two sinks. It was all in place when we left in January. Plumbing remained to complete. We moved electrical outlets as well and repaired the wall so some painting required as well.
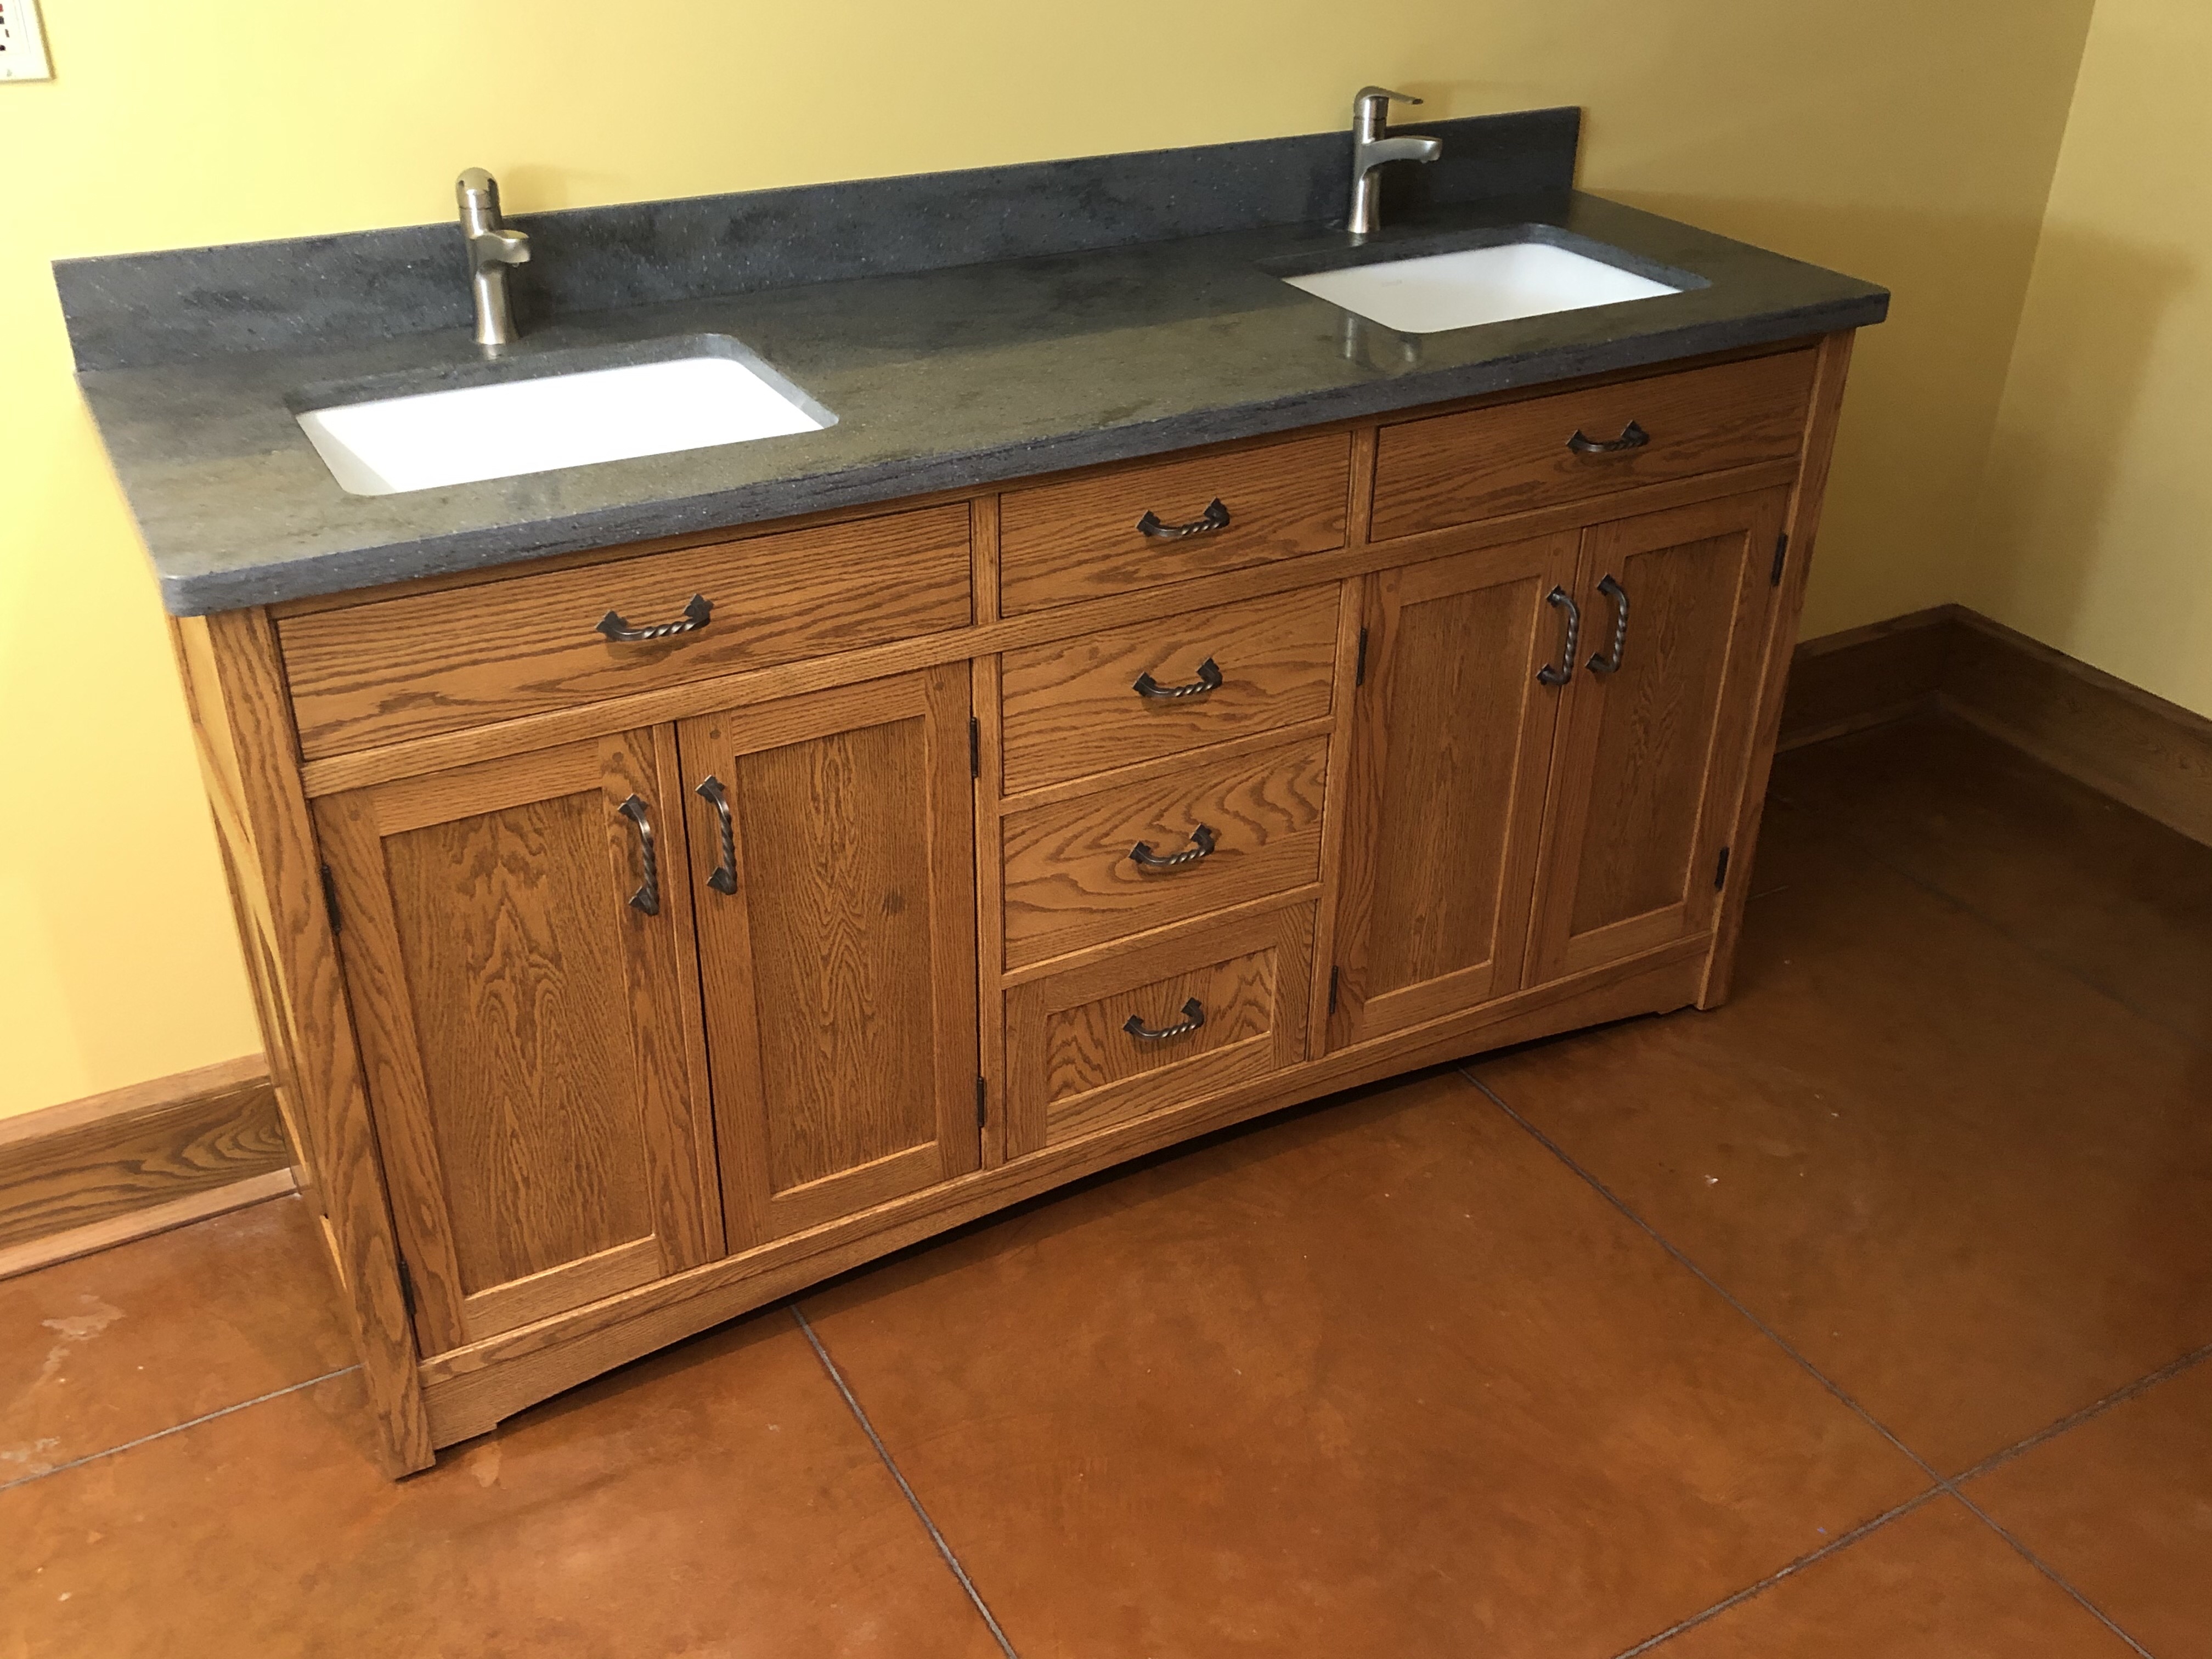
It came out pretty nice.
A Garden Bench
This is a project started more than 20 years ago. I made some garden benches for a landscape and garden store. I still have all of the jigs and templates and had rough cut another set of pieces. So these were going to get finished into a bench for Susan’s garden or the front porch. There were several pieces left to make and fit, many mortices left to cut, lots of sanding and a final dry fit before the glue up. There are 46 mortice and tenon joints so gluing it up was done in steps.
It is made from white oak and styled after late 1800s English Garden benches. White oak is naturally resistant to rot so these can be expected to last 75 years or more in the garden.
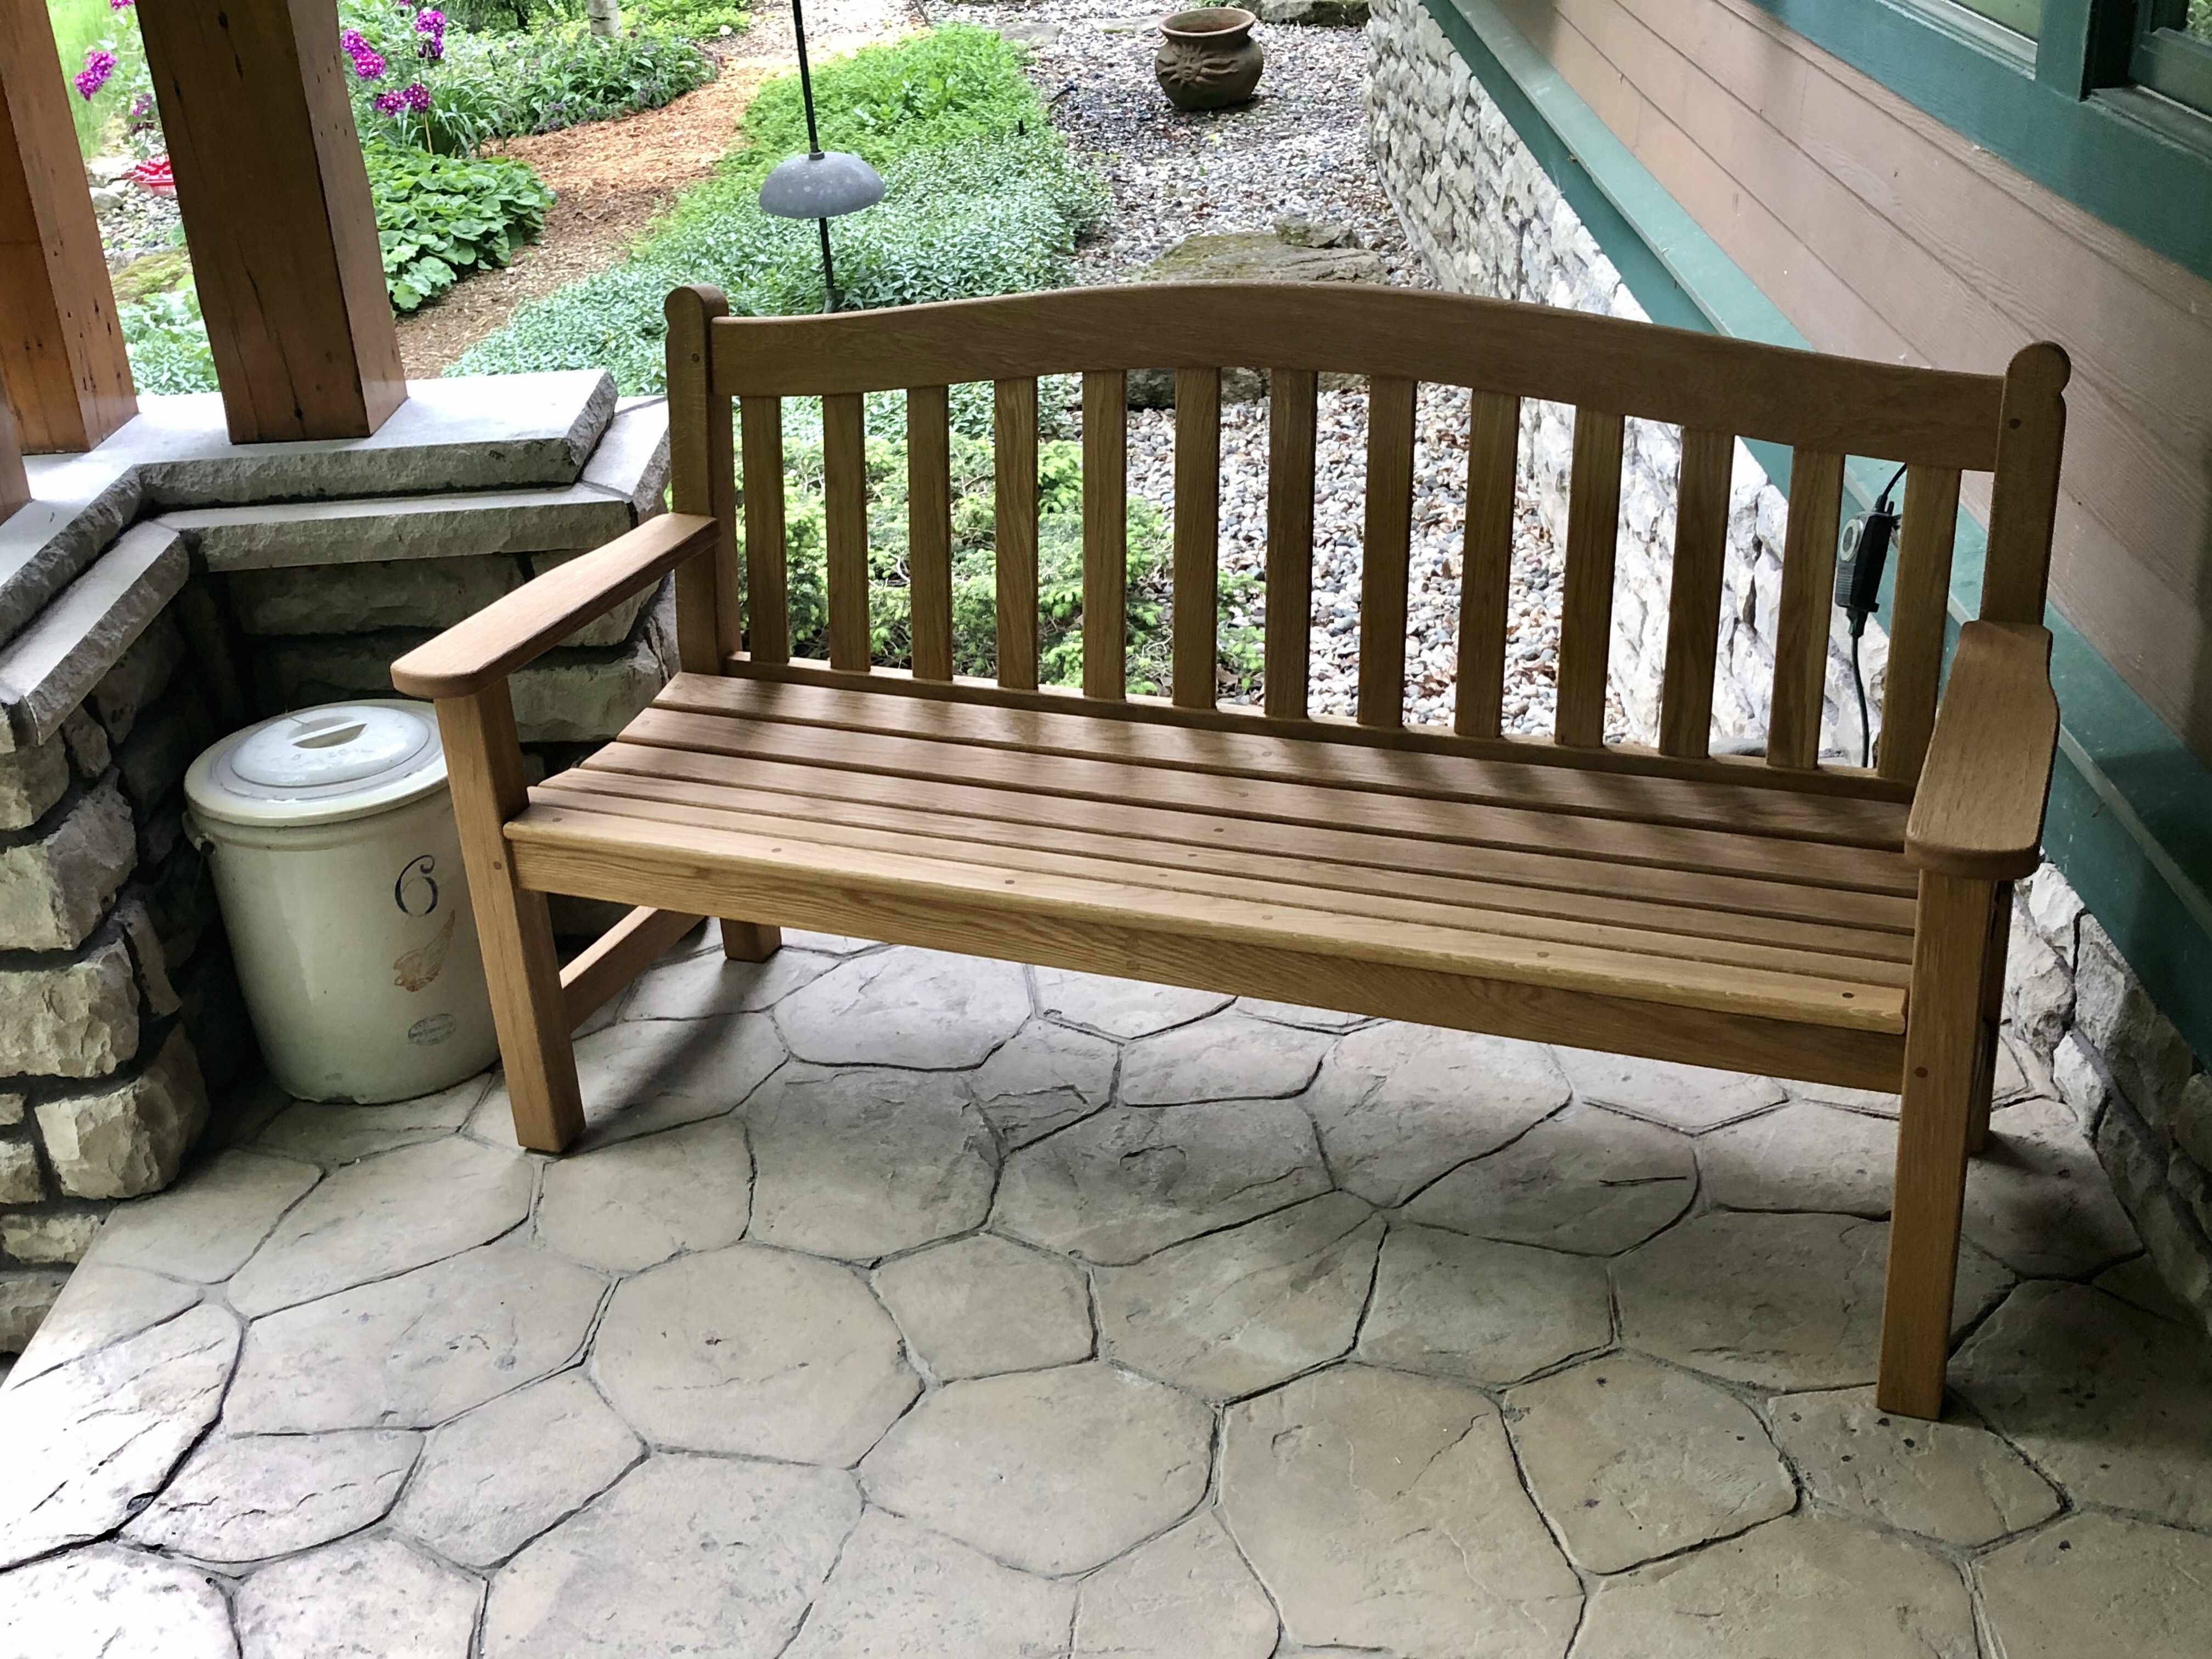
It is on the front porch for now, a comfortable place to sit.
Hot Tub is Gone.
We had a 44″ deep, 60″ diameter Japanese style soaking hot tub on our deck. We had it there for almost 20 years. Like many of these it got used much more when it was new and less as time went on. One winter when we were traveling the heater failed and we got home to a hot tub with about 6″ of ice around all the side and bottom. Only the pump continuing to pump water kept it from freezing solid. After that we emptied out the tub when we were going to be gone in the winter. That reduced use further. In the last few years we didn’t even refill it.
So we decided to remove it, keep the redwood side slats and cover pieces for a later project and get rid of the rest.
And removing the tub revealed some damaged deck boards. So that meant replacing several pieces. And when that was done we had new boards, boards that had been under the tub and the rest of the boards had been refinished several times. So the deck now had a patchwork of different looks. What to do? Sand the entire deck down to bare wood and refinish it once more.
So a couple days of sanding got the deck to the point where we could apply the finish. It looked nice and the deck looks much bigger without the hot tub.
My Knee
Somewhere along the way I cranked my knee one way or another. It was pretty sore. This is the knee where I fractured the knee cap a couple years ago. My Ortho Doc gave me a cortisone shot which relieved the acute pain for a while.
A month later it was hurting again, worse. Another visit to the Ortho Doc for another shot and an MRI. The MRI indicated a torn meniscus. Plus arthritis deposits and a rough edge where the knee cap had healed back together. So I scheduled an arthroscopic procedure to fix the three problems.
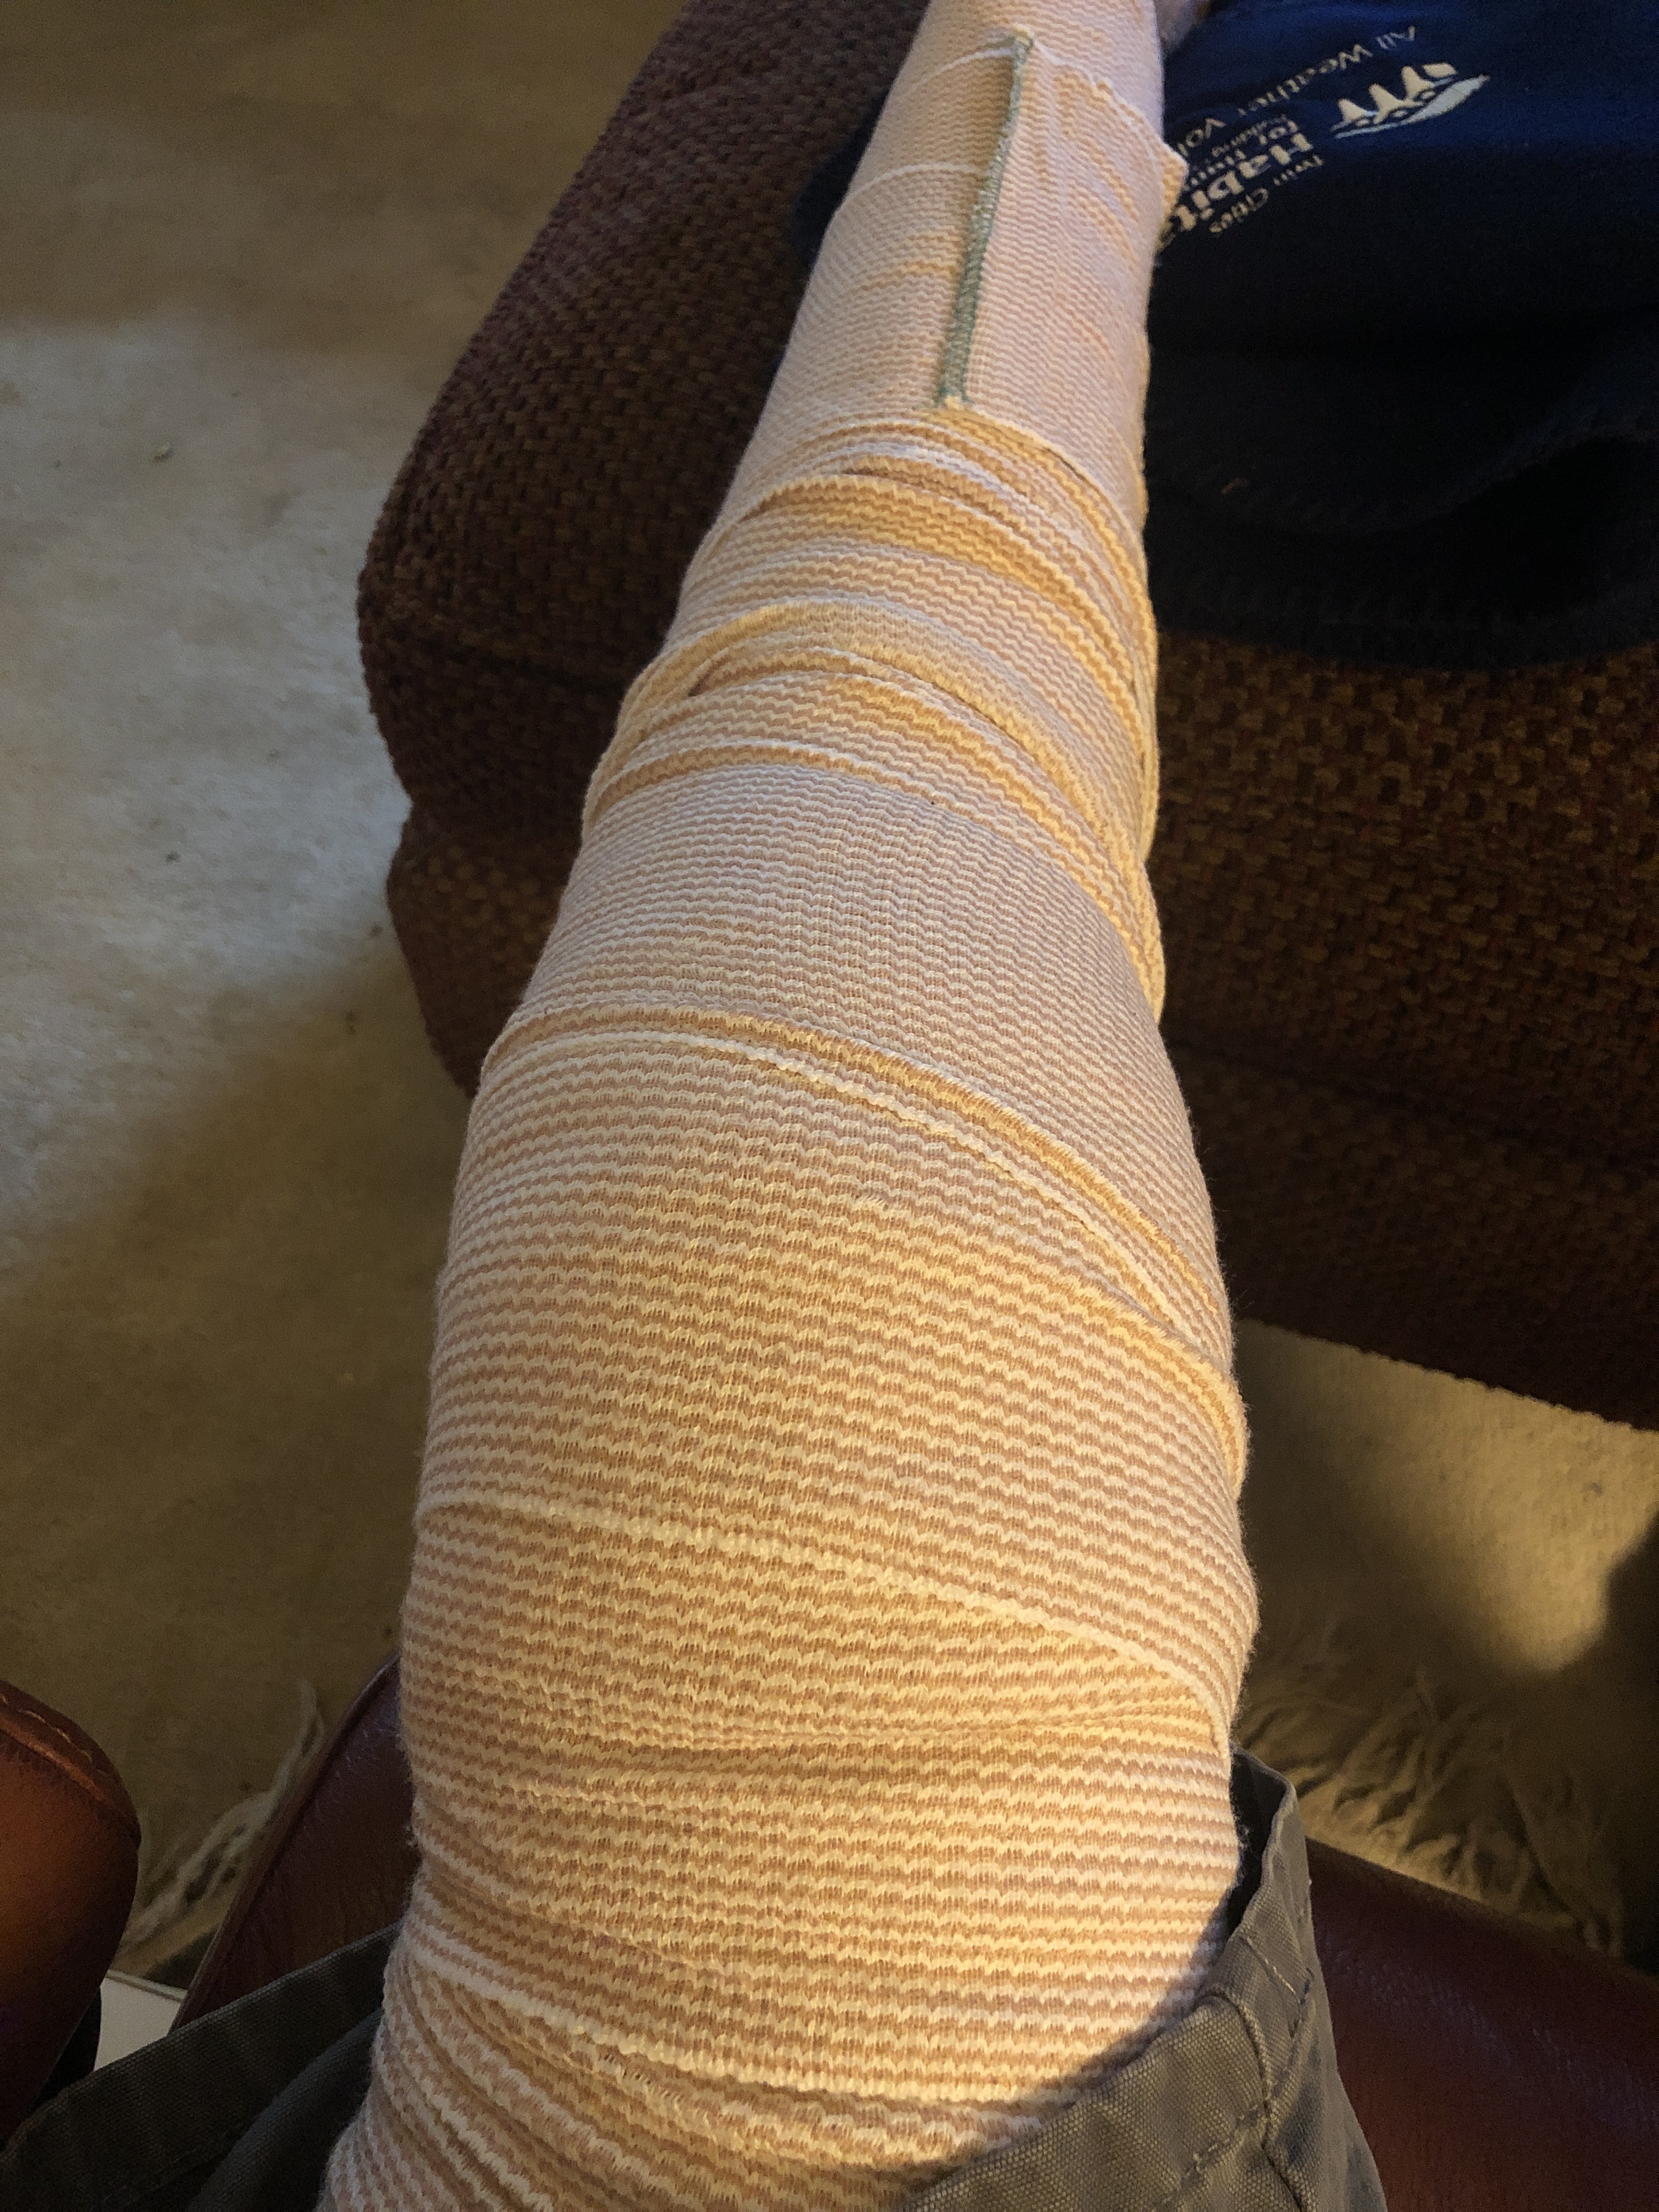
It only took a couple hours from prep to ready to leave. The procedure took about 45 minutes through two small 1/2″ incisions, one on each side.
I looked like the Mummy for three days. Wrapped up snuggly. The wraps and bandages came off. The SteriStips over the incisions stayed on for another week. My knee was pretty stiff in the morning and ached (quite a bit) by the end if the day. Drugs helped. This slowly got better over the next three weeks until I saw the Ortho Doc’s team again. I got 👍👍 up, she told me I was doing well and that it could be 6-8 weeks total to get to 100%. Somehow I expected it to only be two weeks. Silly me.
I am at about 5 weeks now, back to Habitat for Humanity construction work. I walked 15,966 steps last Friday. My knee was tired but OK. No more pain meds.
A New Water Pump and Accumulator Tank.
The accumulator tank in the coach’s water system failed. It doesn’t leak it just makes the pump run more ofter. It turned out that ordering a complete pump assembly was not much more that the tank so I did. It was not particularly hard to replace.
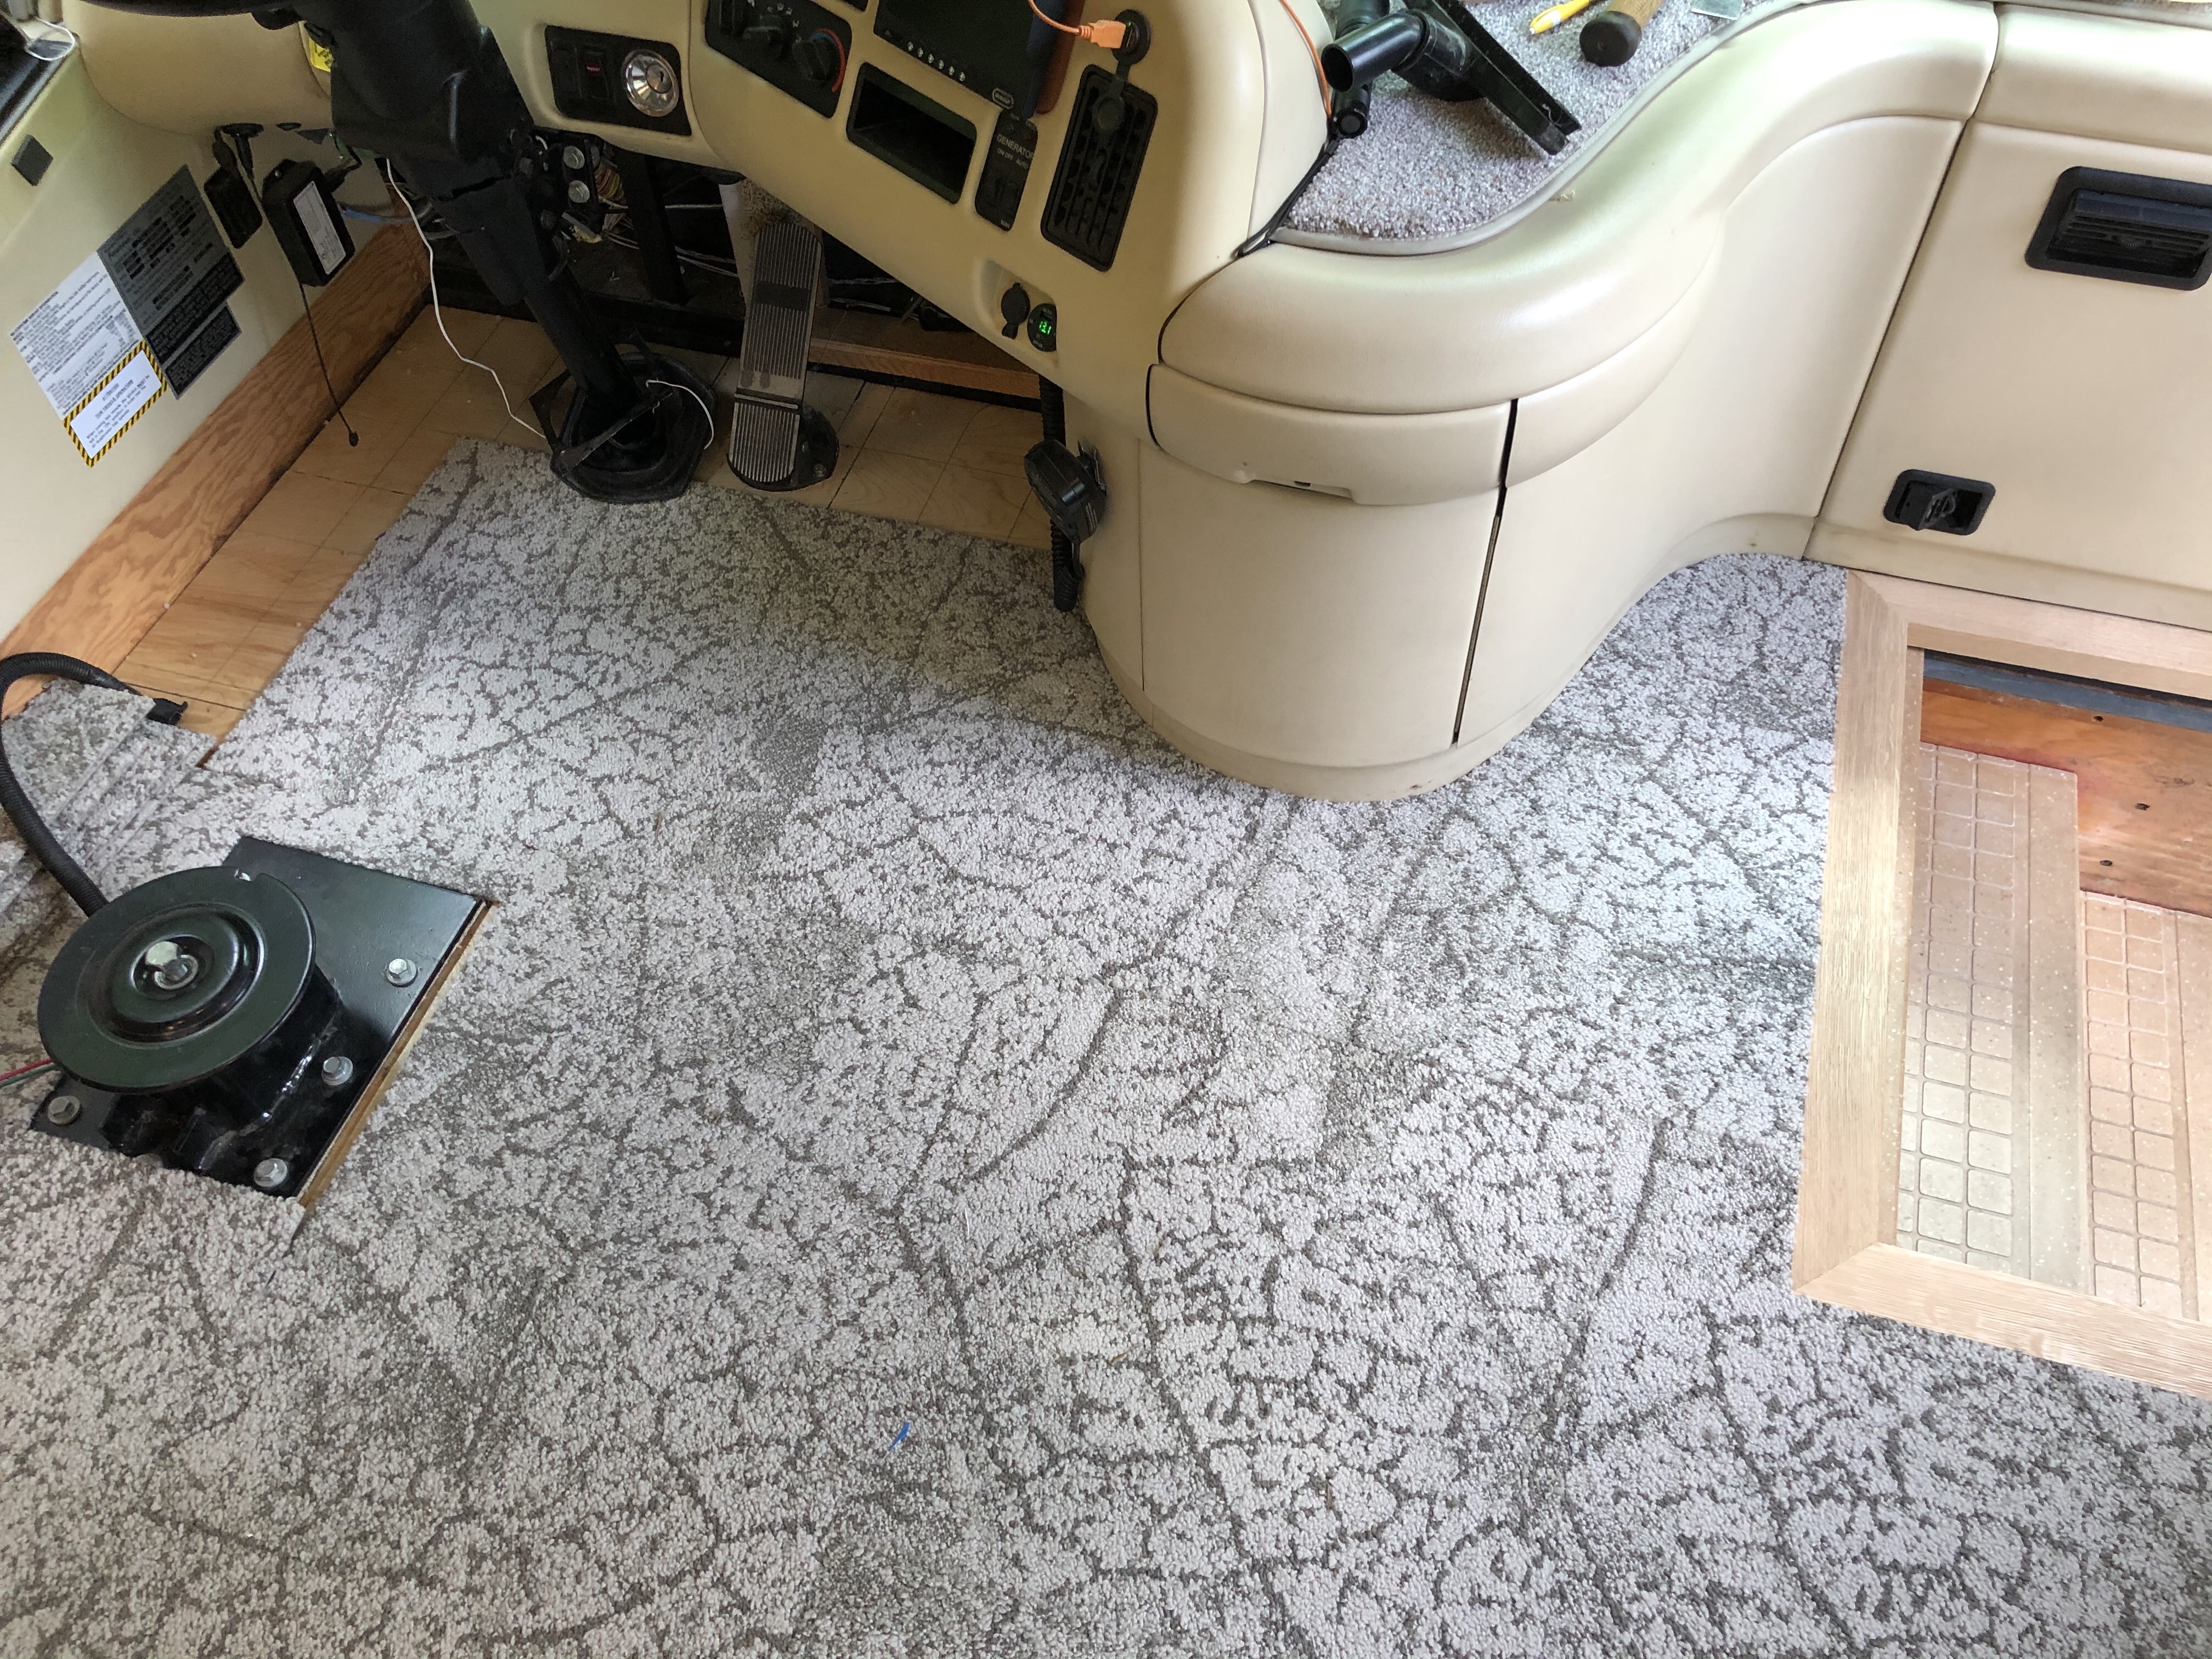
New Floor in the Coach
We had been talking about a new floor in the coach for some time. The original 20 year old tannish beige carpet (actually an indescribable color) looked like 20 year old carpet. It was not stained, vacuumed up OK but it was just old.
We considered a new wood floor or a vinyl plank floor or maybe ceramic tile. Ceramic tile went away quickly, it is cold, heavy and hard. Wood floors are expensive and very labor intensive as are vinyl plank floors. The vinyl plank floor manufacturers warned against installing it in a coach that would see very cold temperatures with no heat on. Not good if we left the coach in the barn during the winter.
We have FLOR carpet tiles in the kitchen and they have done well. So we looked at these for a while until we found a pattern and color we thought would work. We ordered samples and spent lots of time talking to the technical support folks at FLOR about the “how to” stuff. Before we left Fredericksburg in April we had decided to give it a try. We ordered all of the tiles and supplies we needed. Everything we needed arrived shortly after the deck project was done and after my first cortisone knee shot. Ready to go.
We got the coach out into the driveway in front of the barn and made ready.
First step, out with the driver and passenger seats and the old carpet.

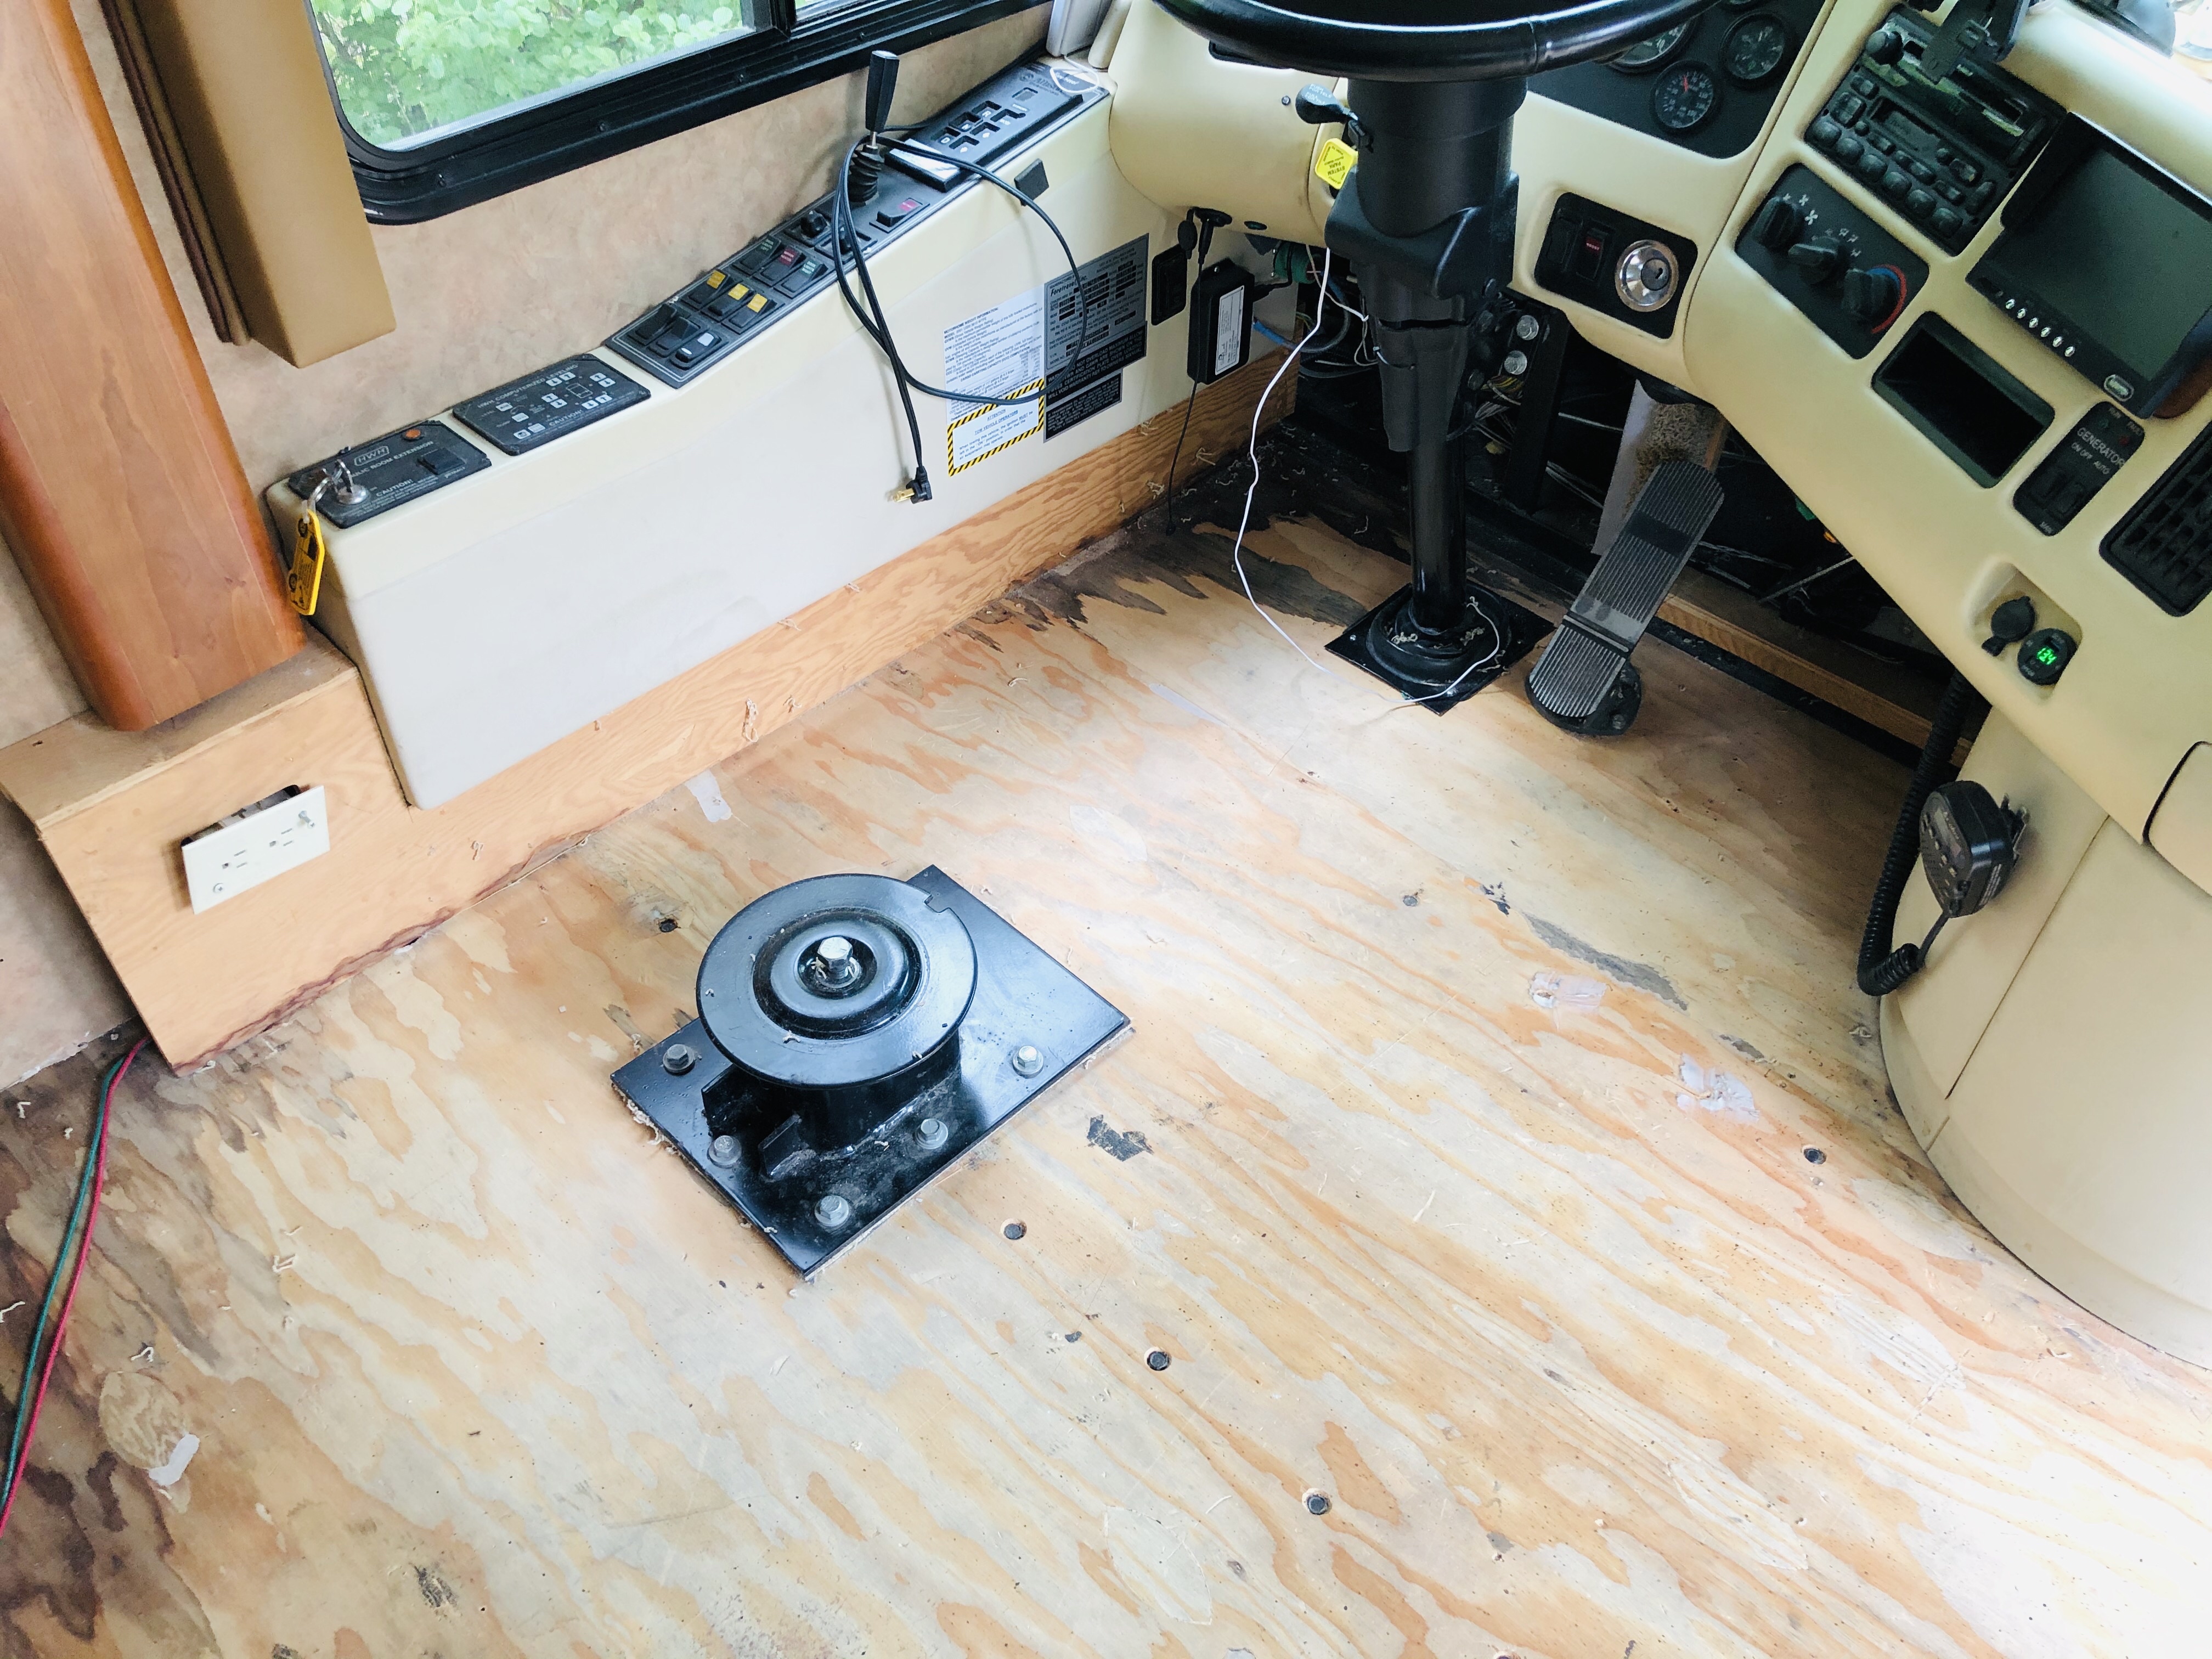
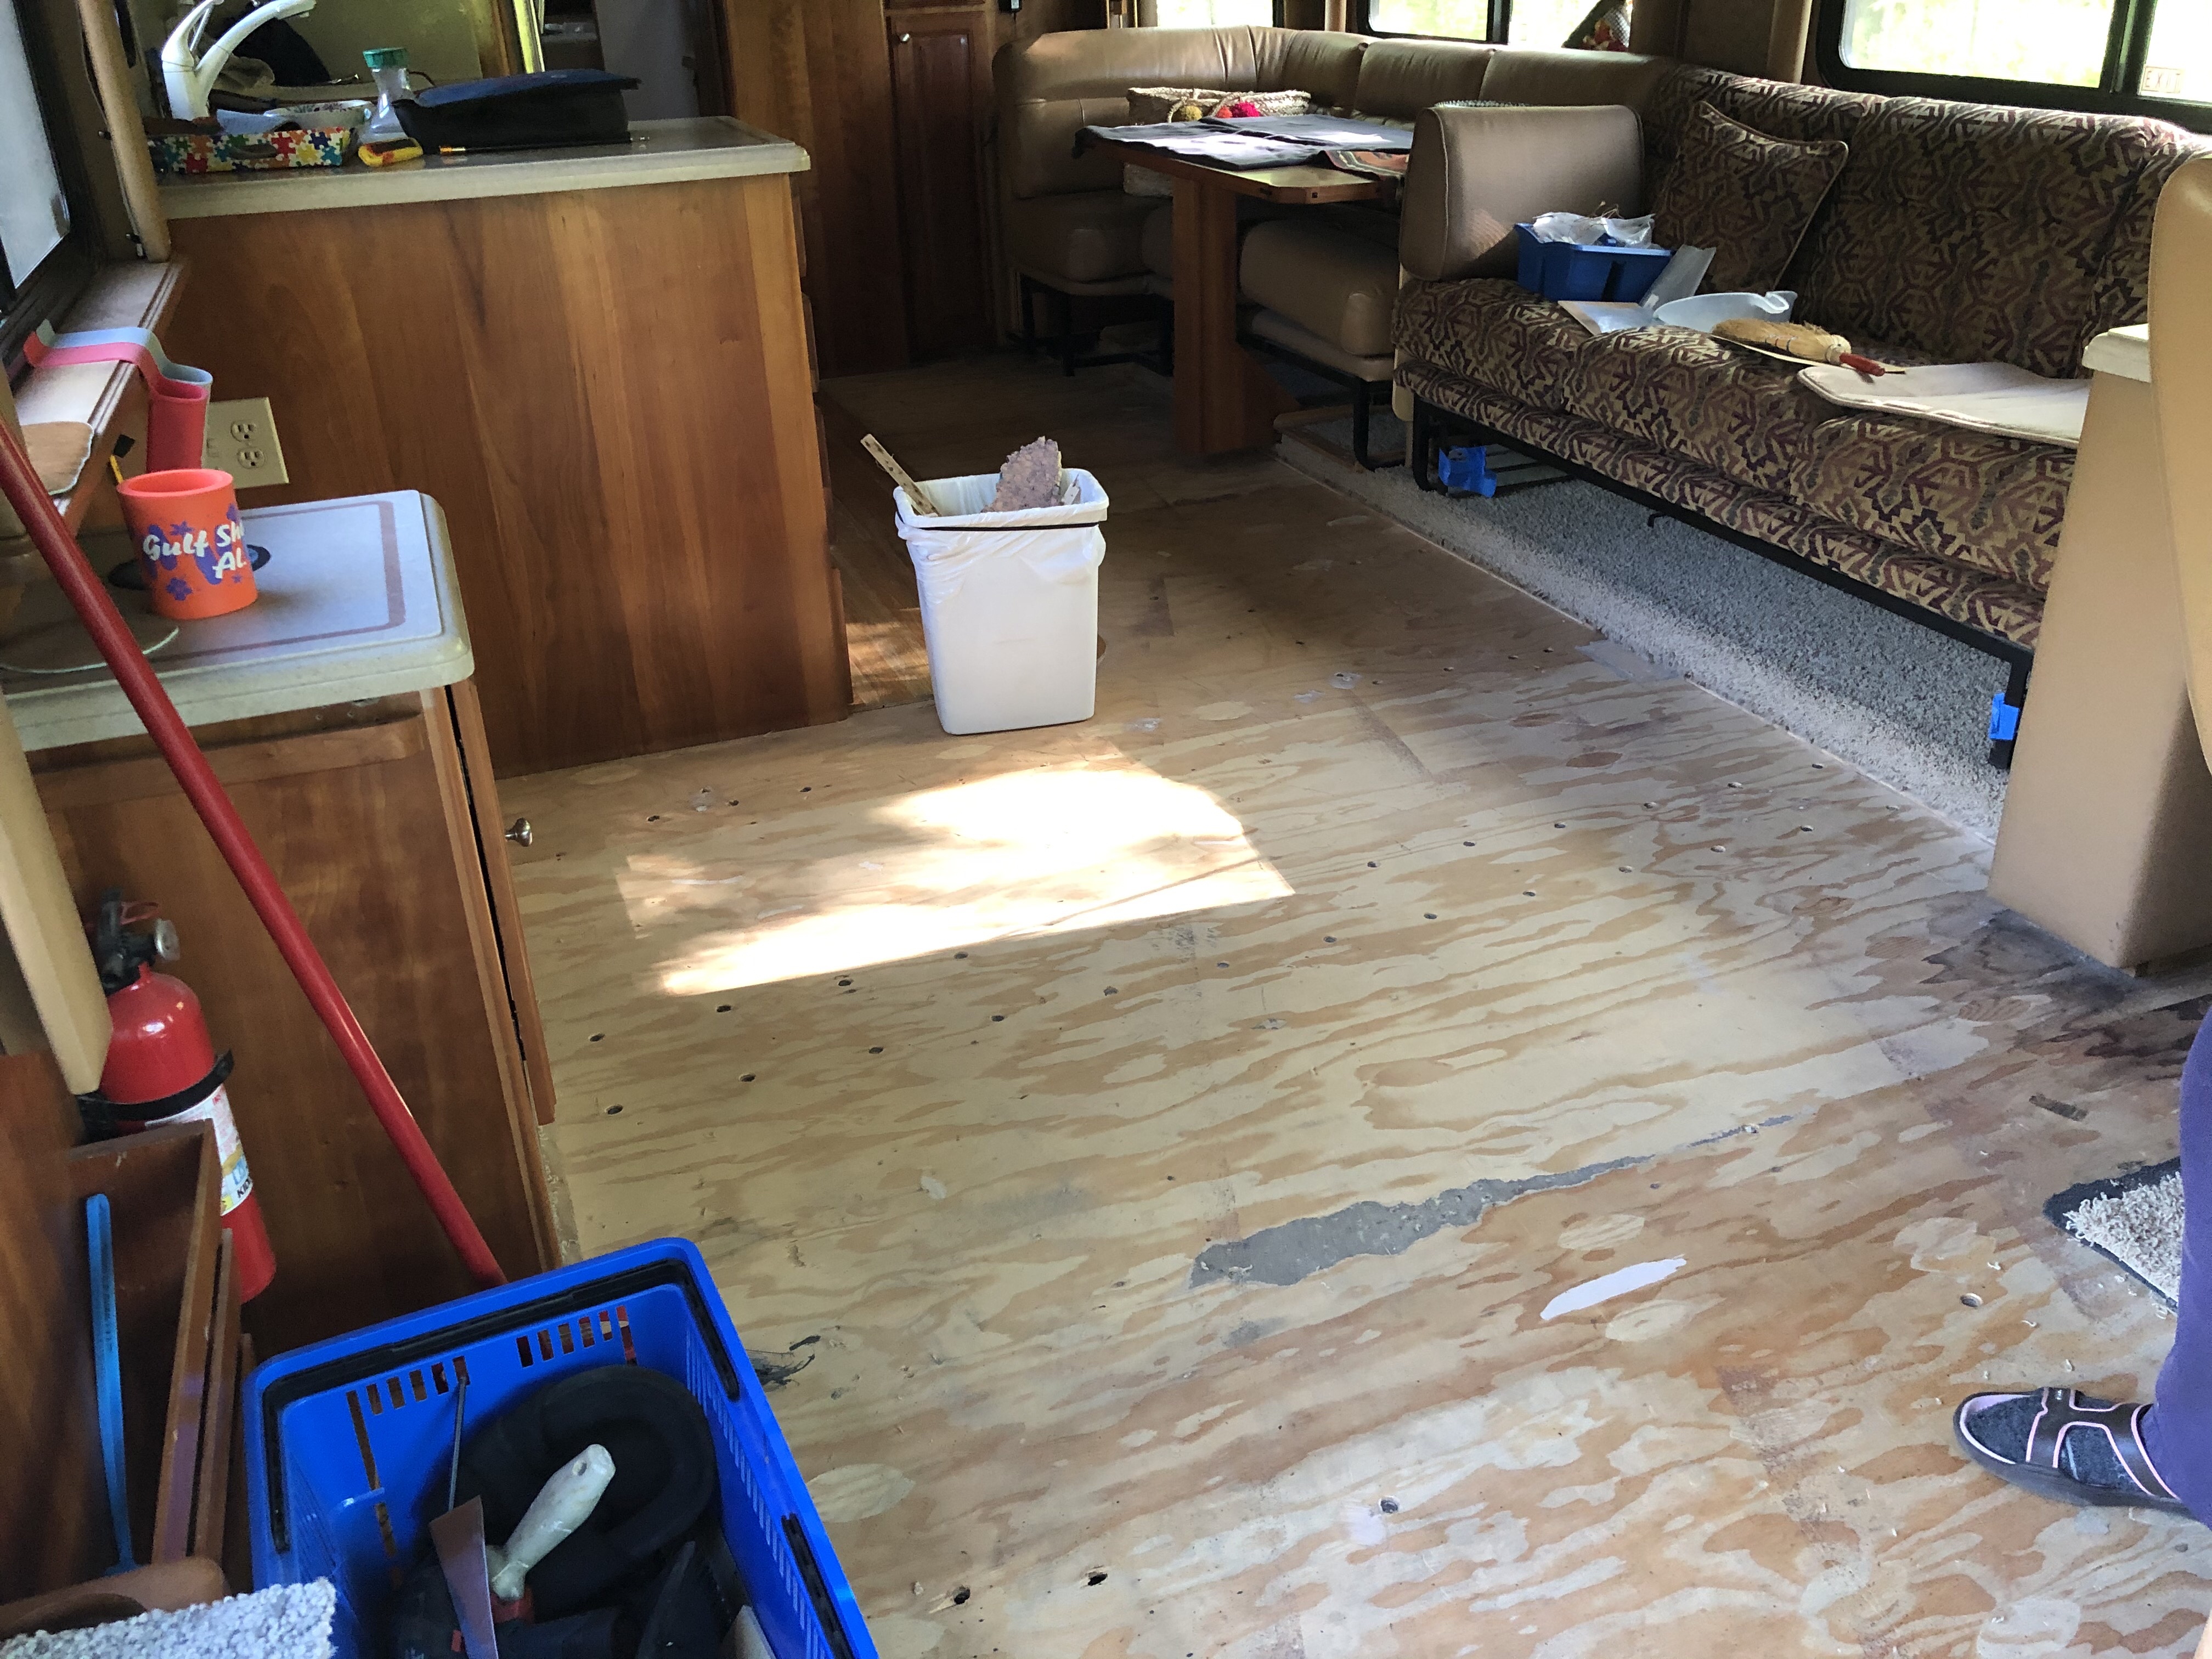
And sweep and vacuum and pull out a thousand staples.
And then we pre-finished a thin underlayment plywood layer and cut it to fit and stapled it in place, one staple every 4 inches.
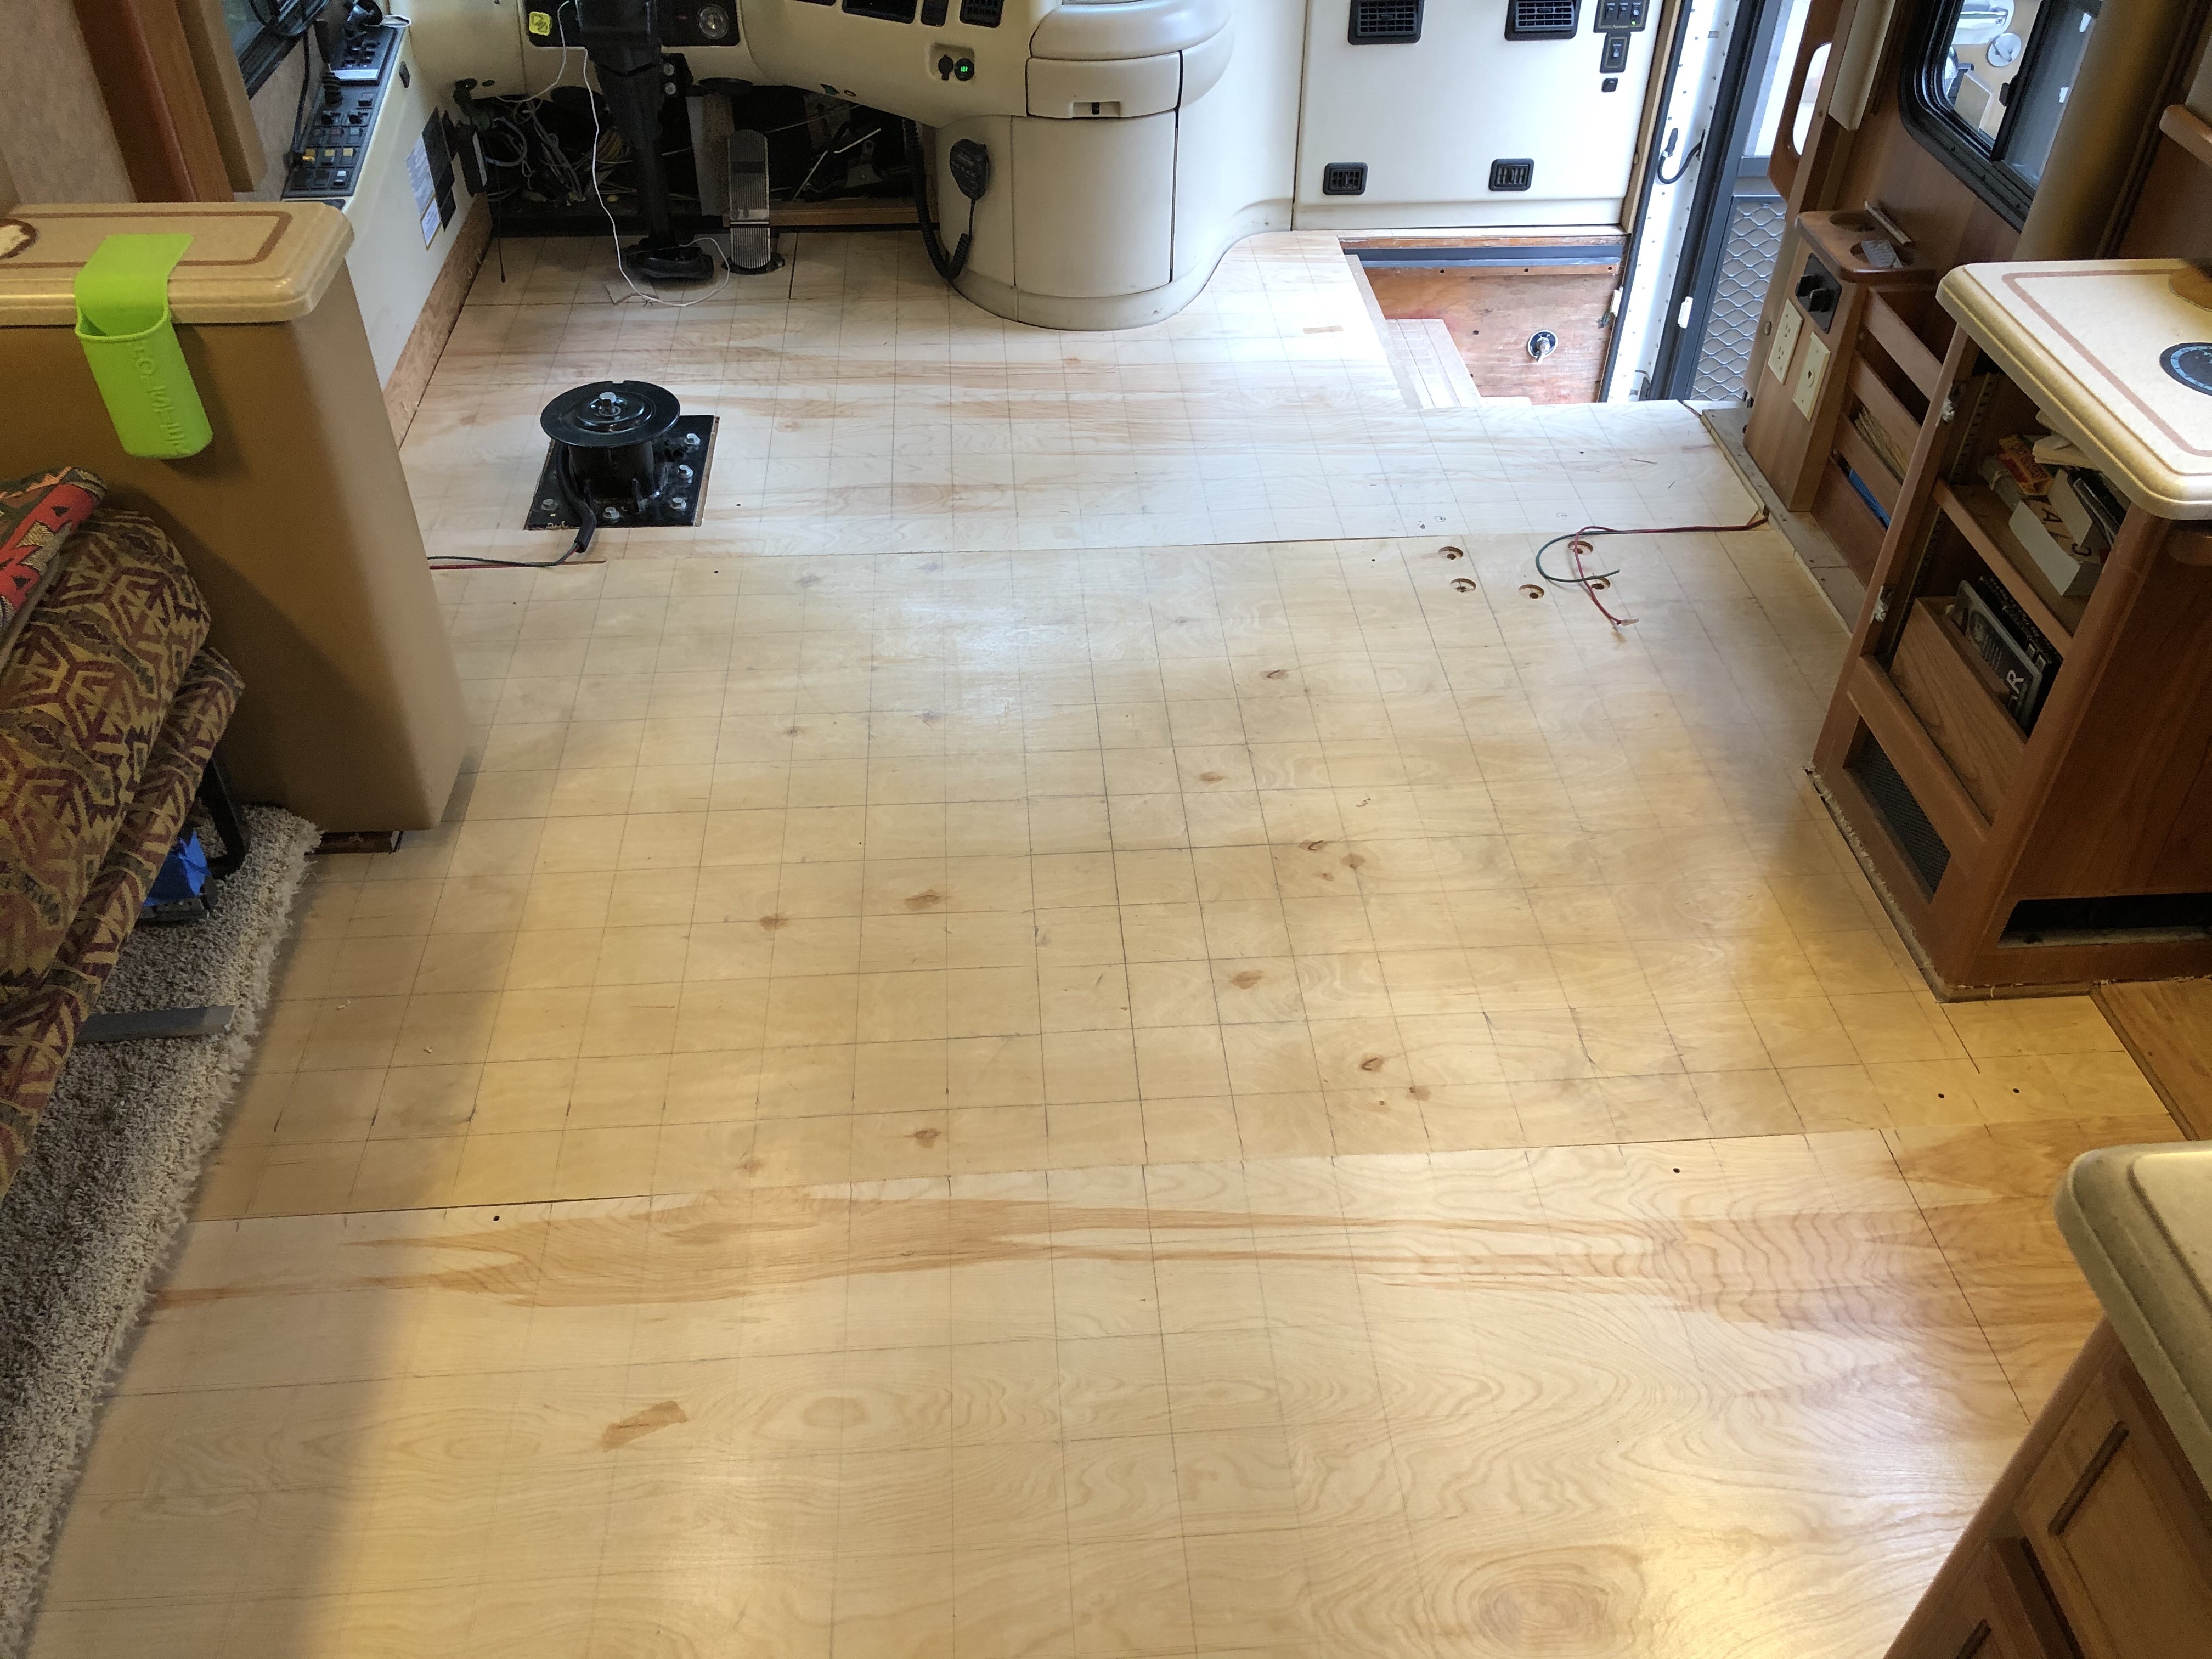
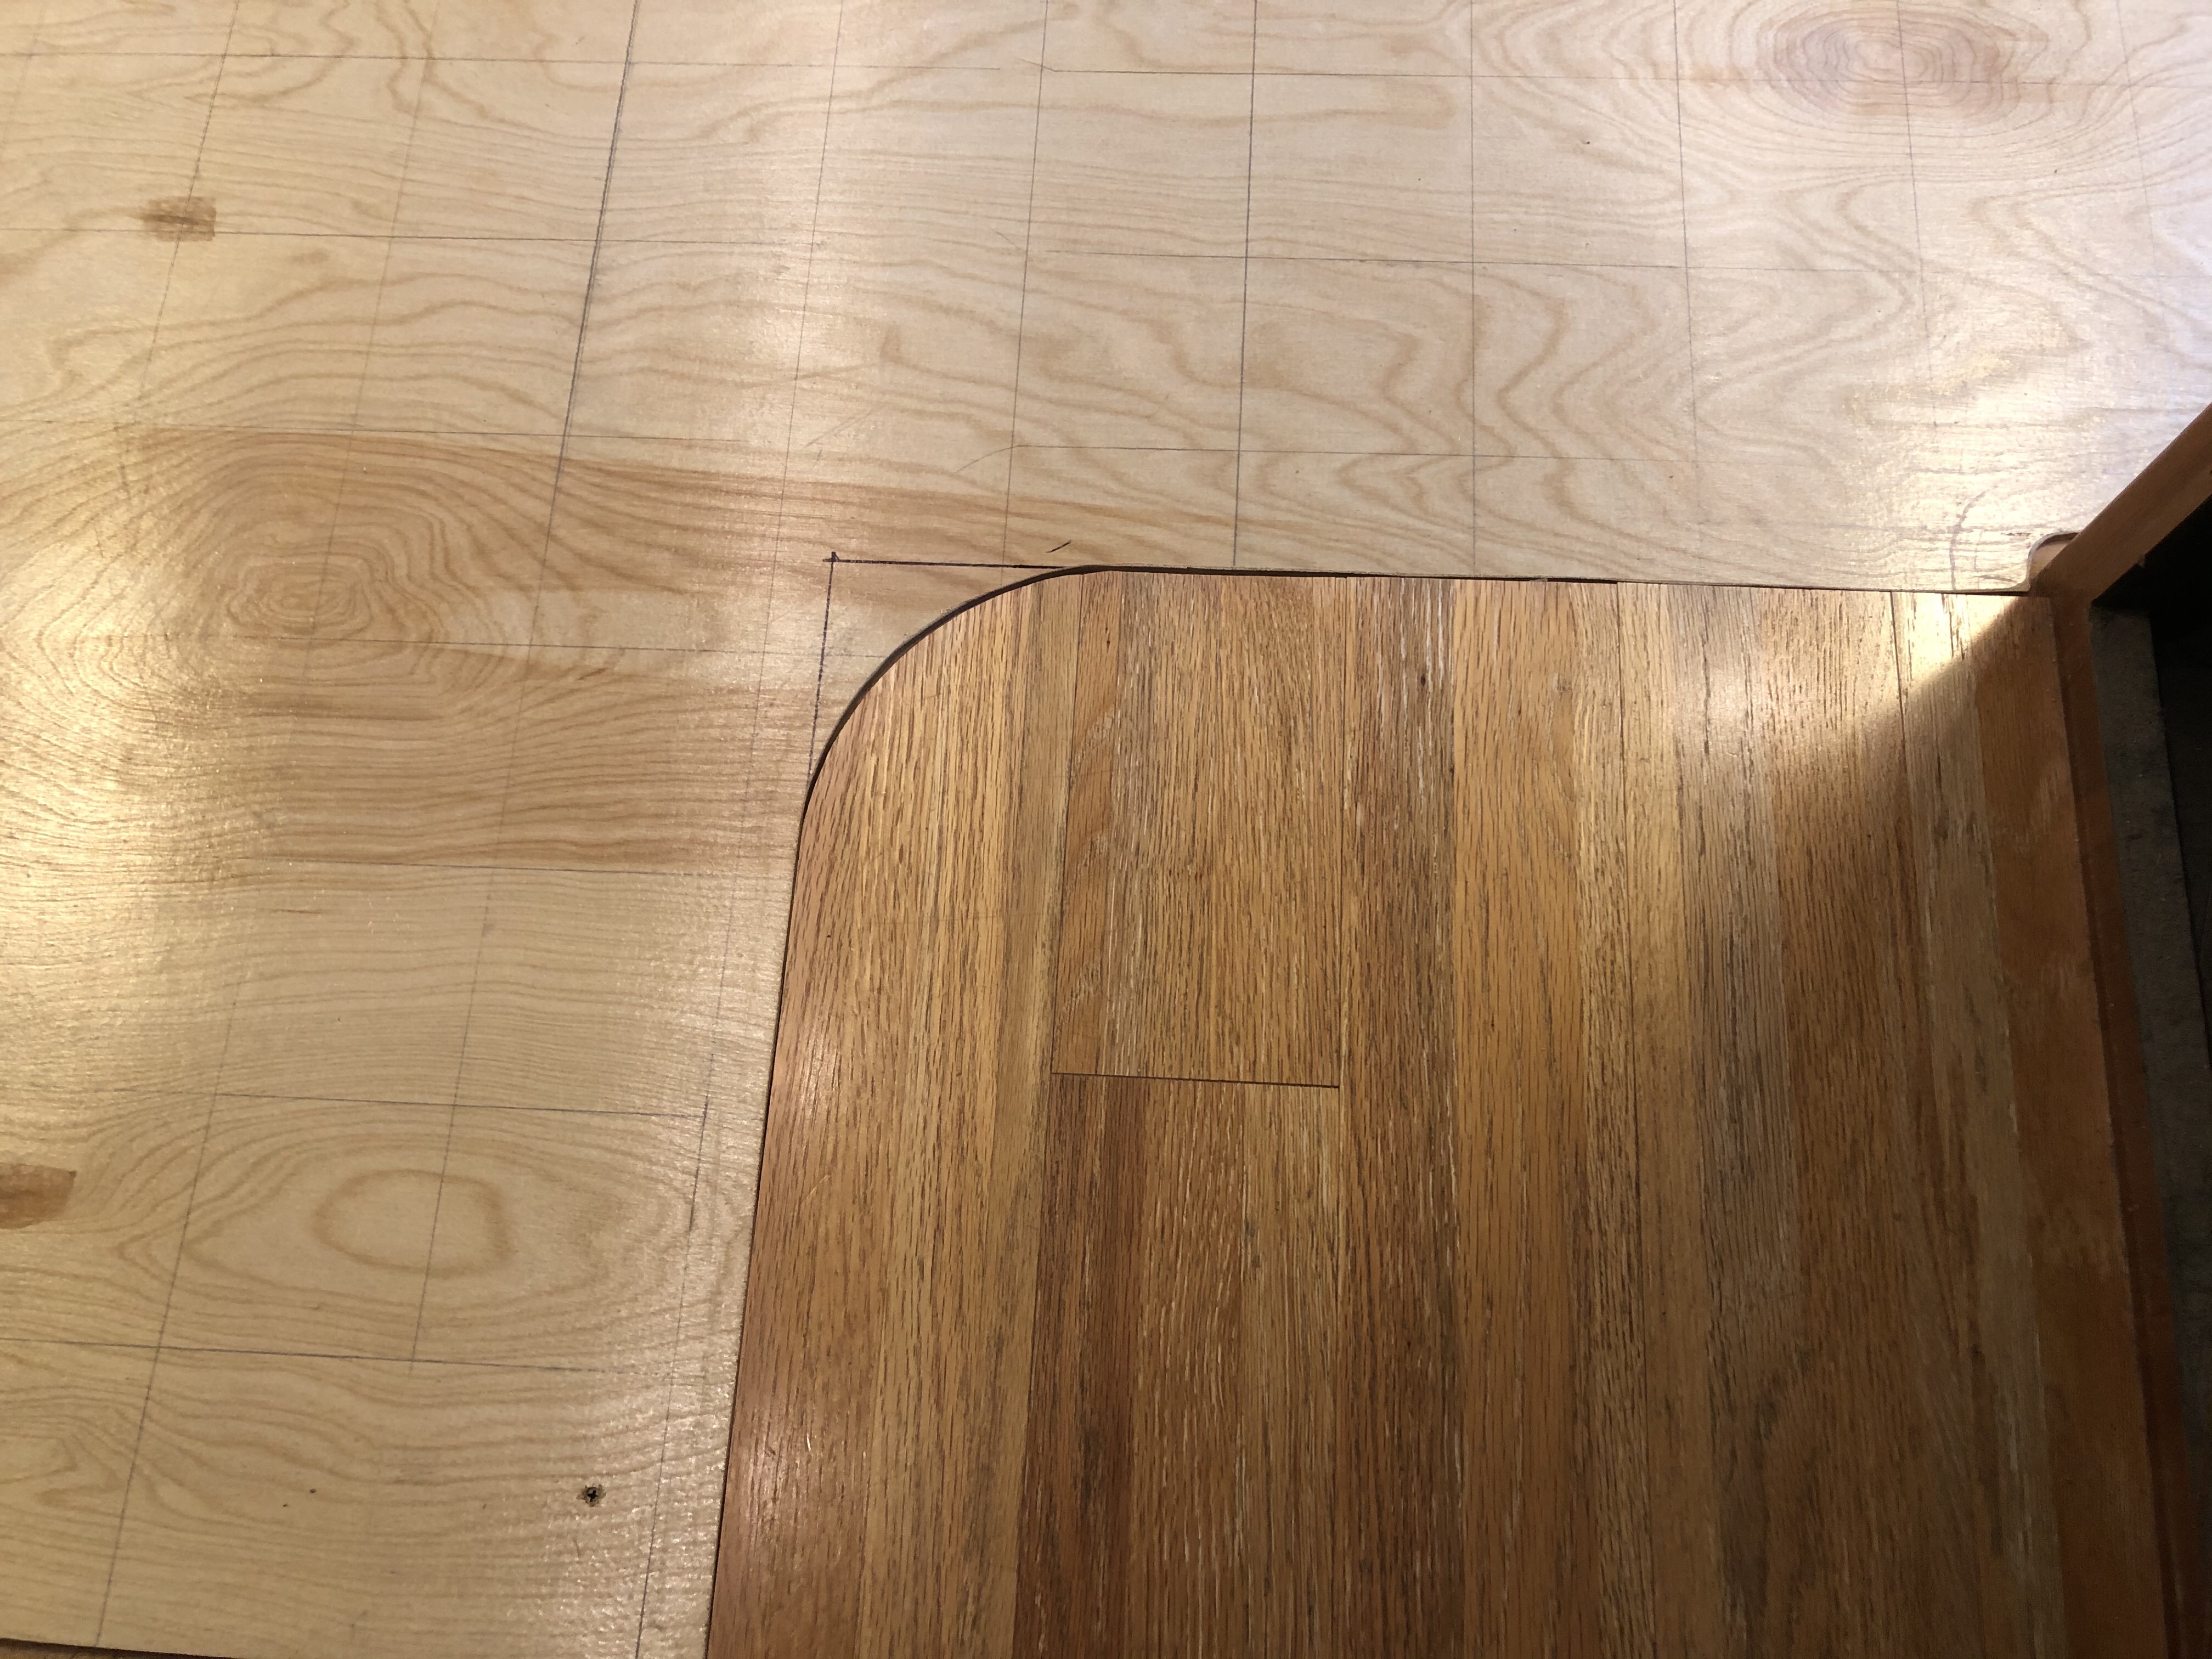
And then sanded the wooden floor in the kitchen area, stained it and finished it with four coats of a floor grade polyurethane varnish.
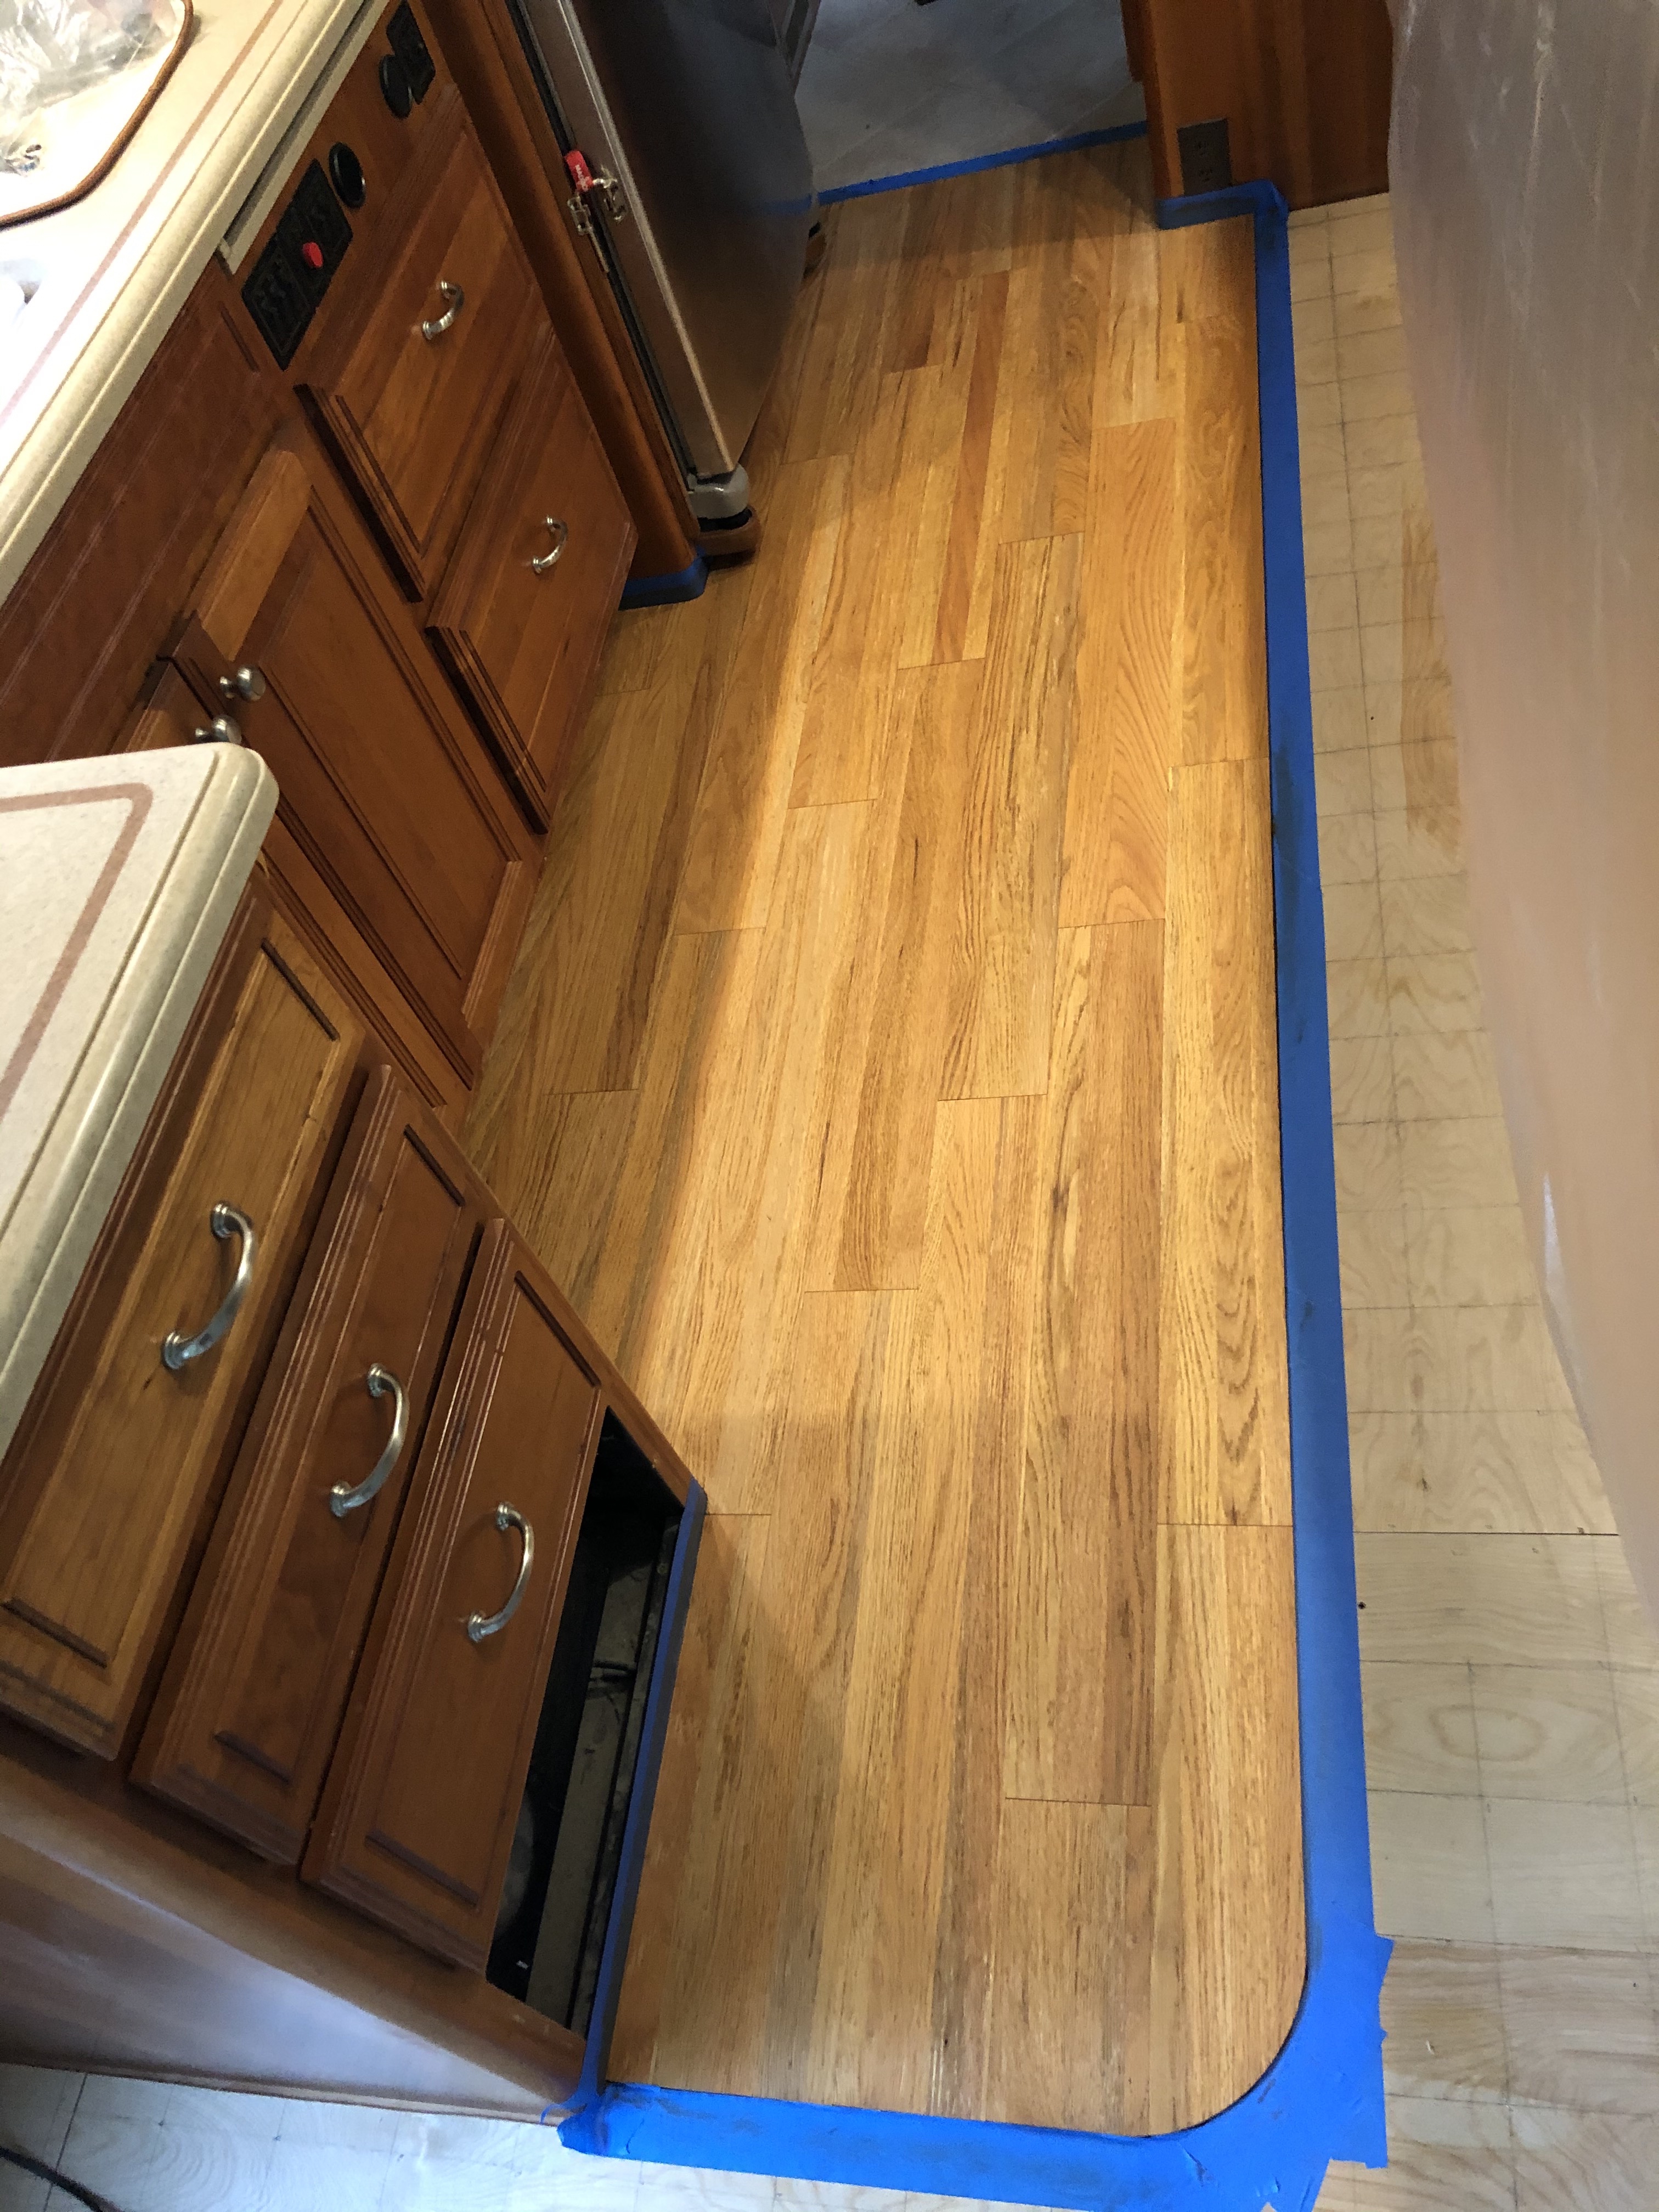
It looks wonderful, better than new.
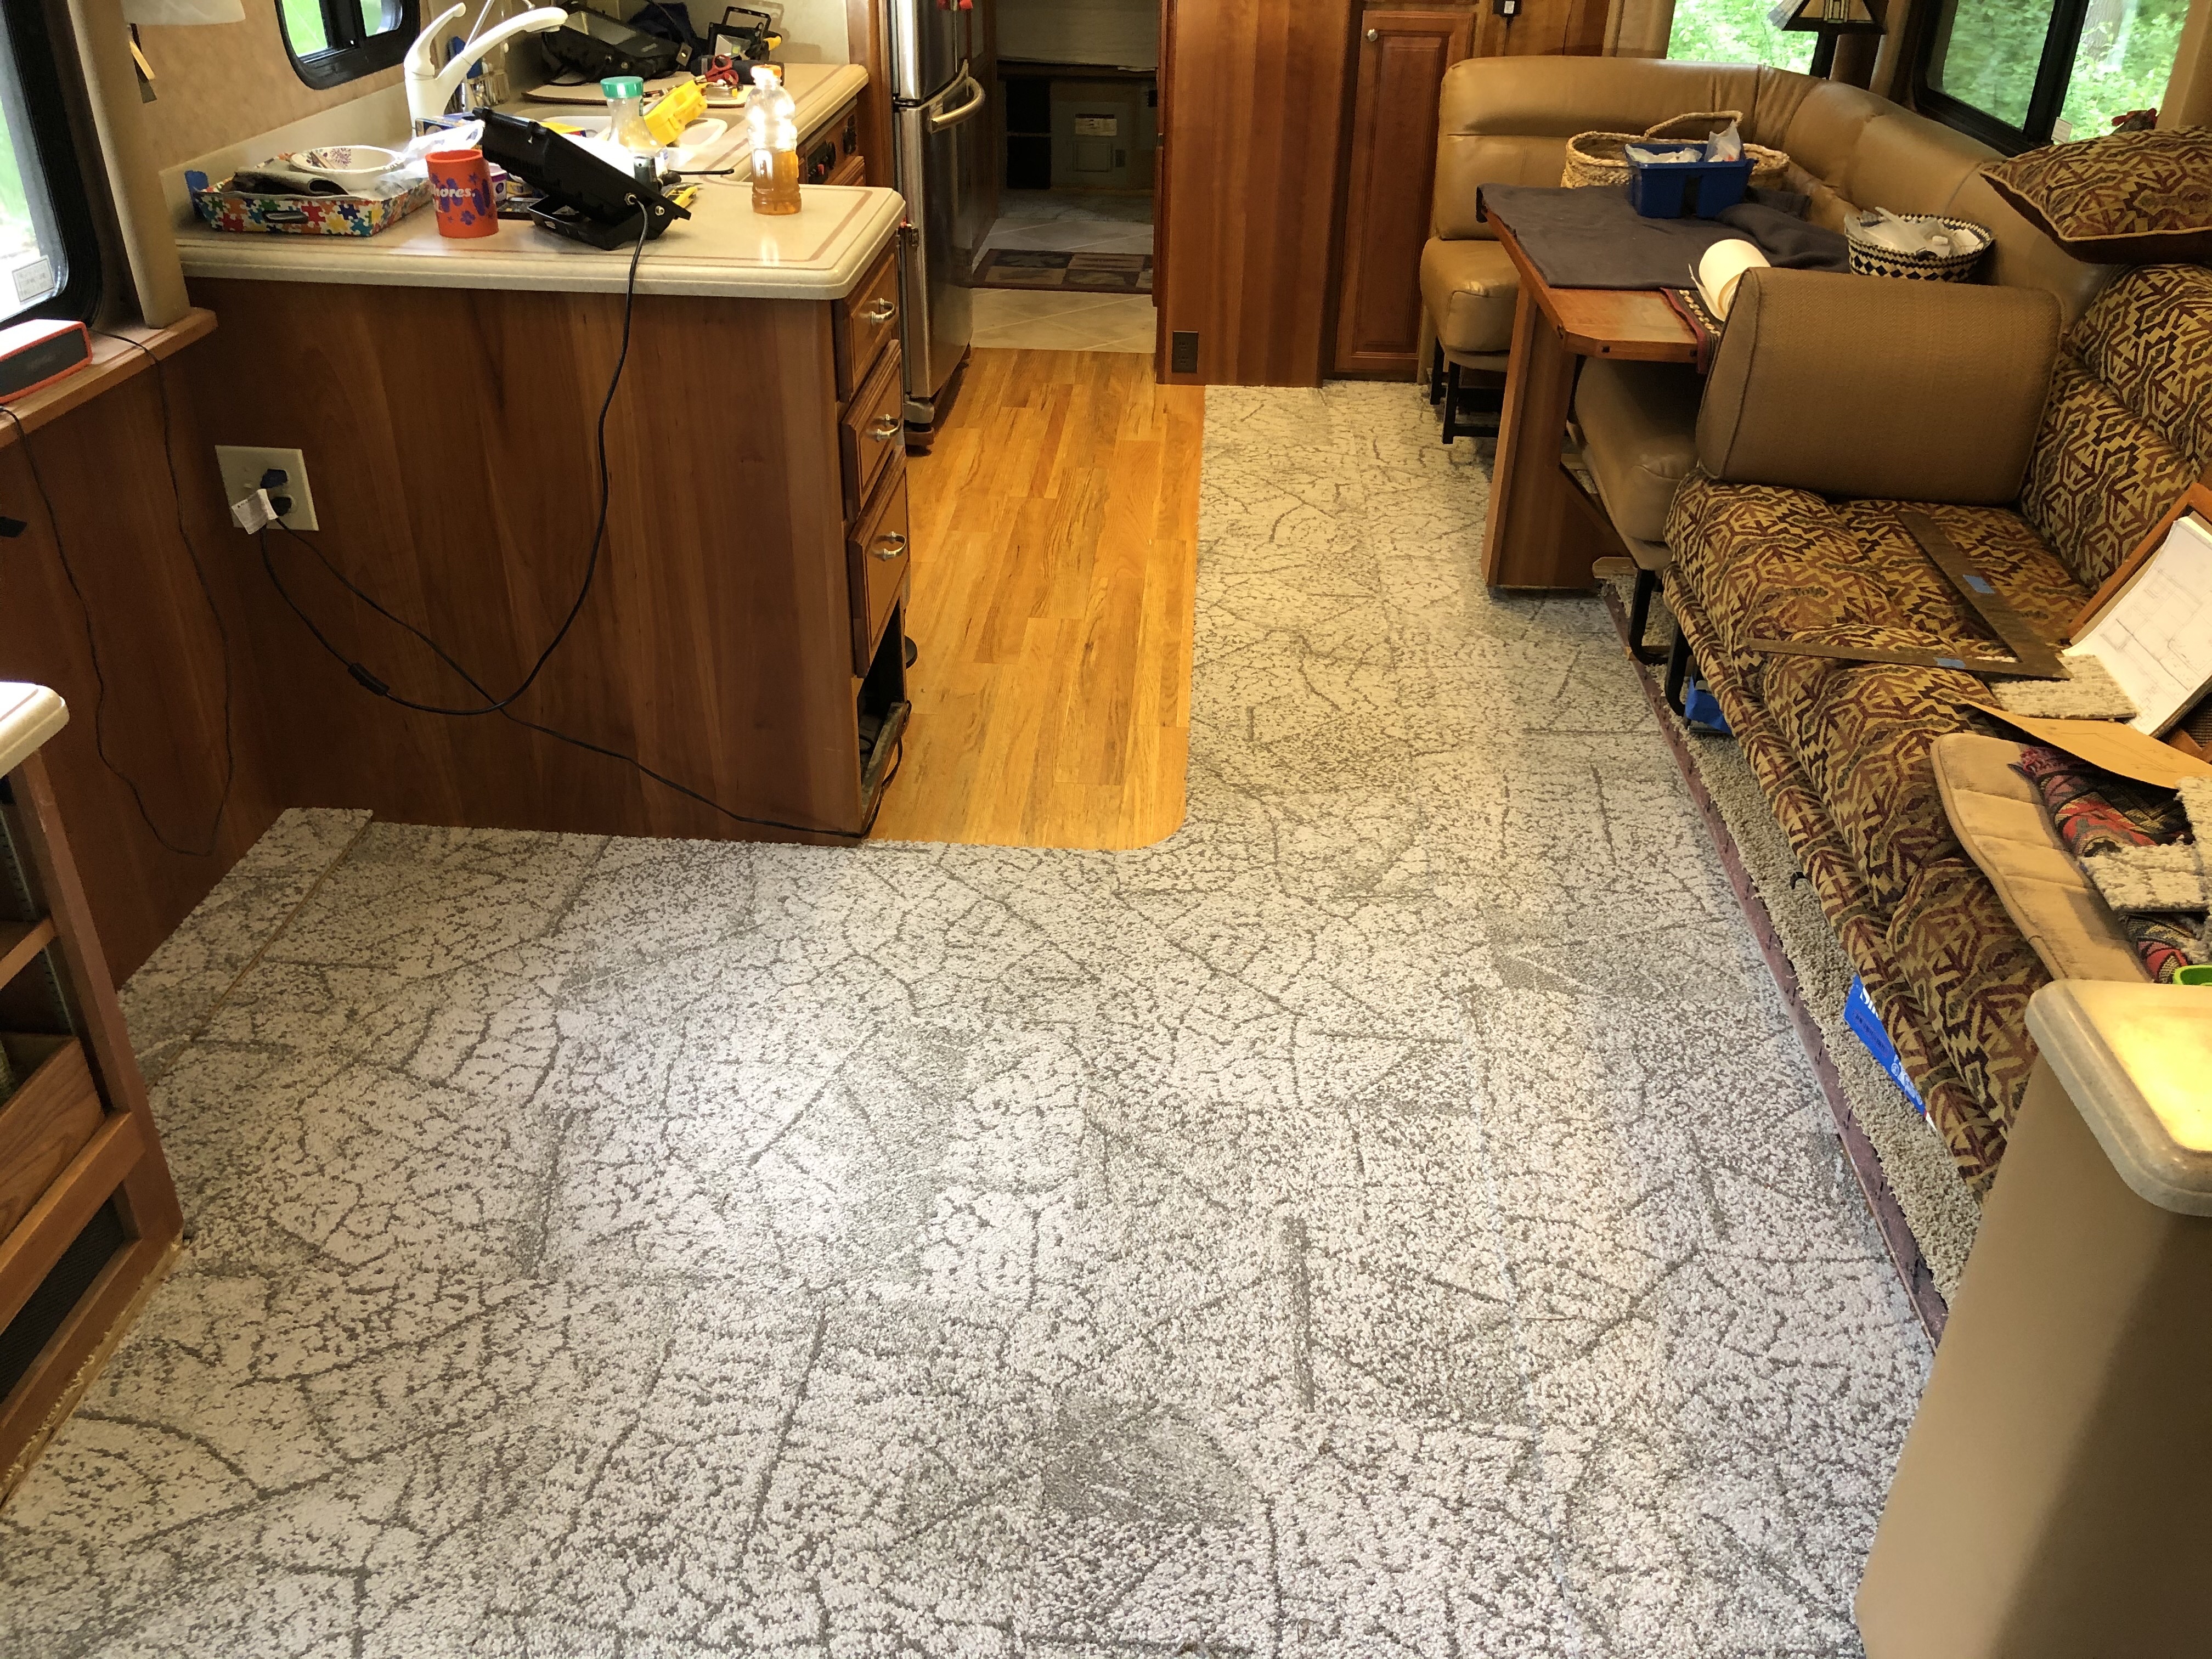
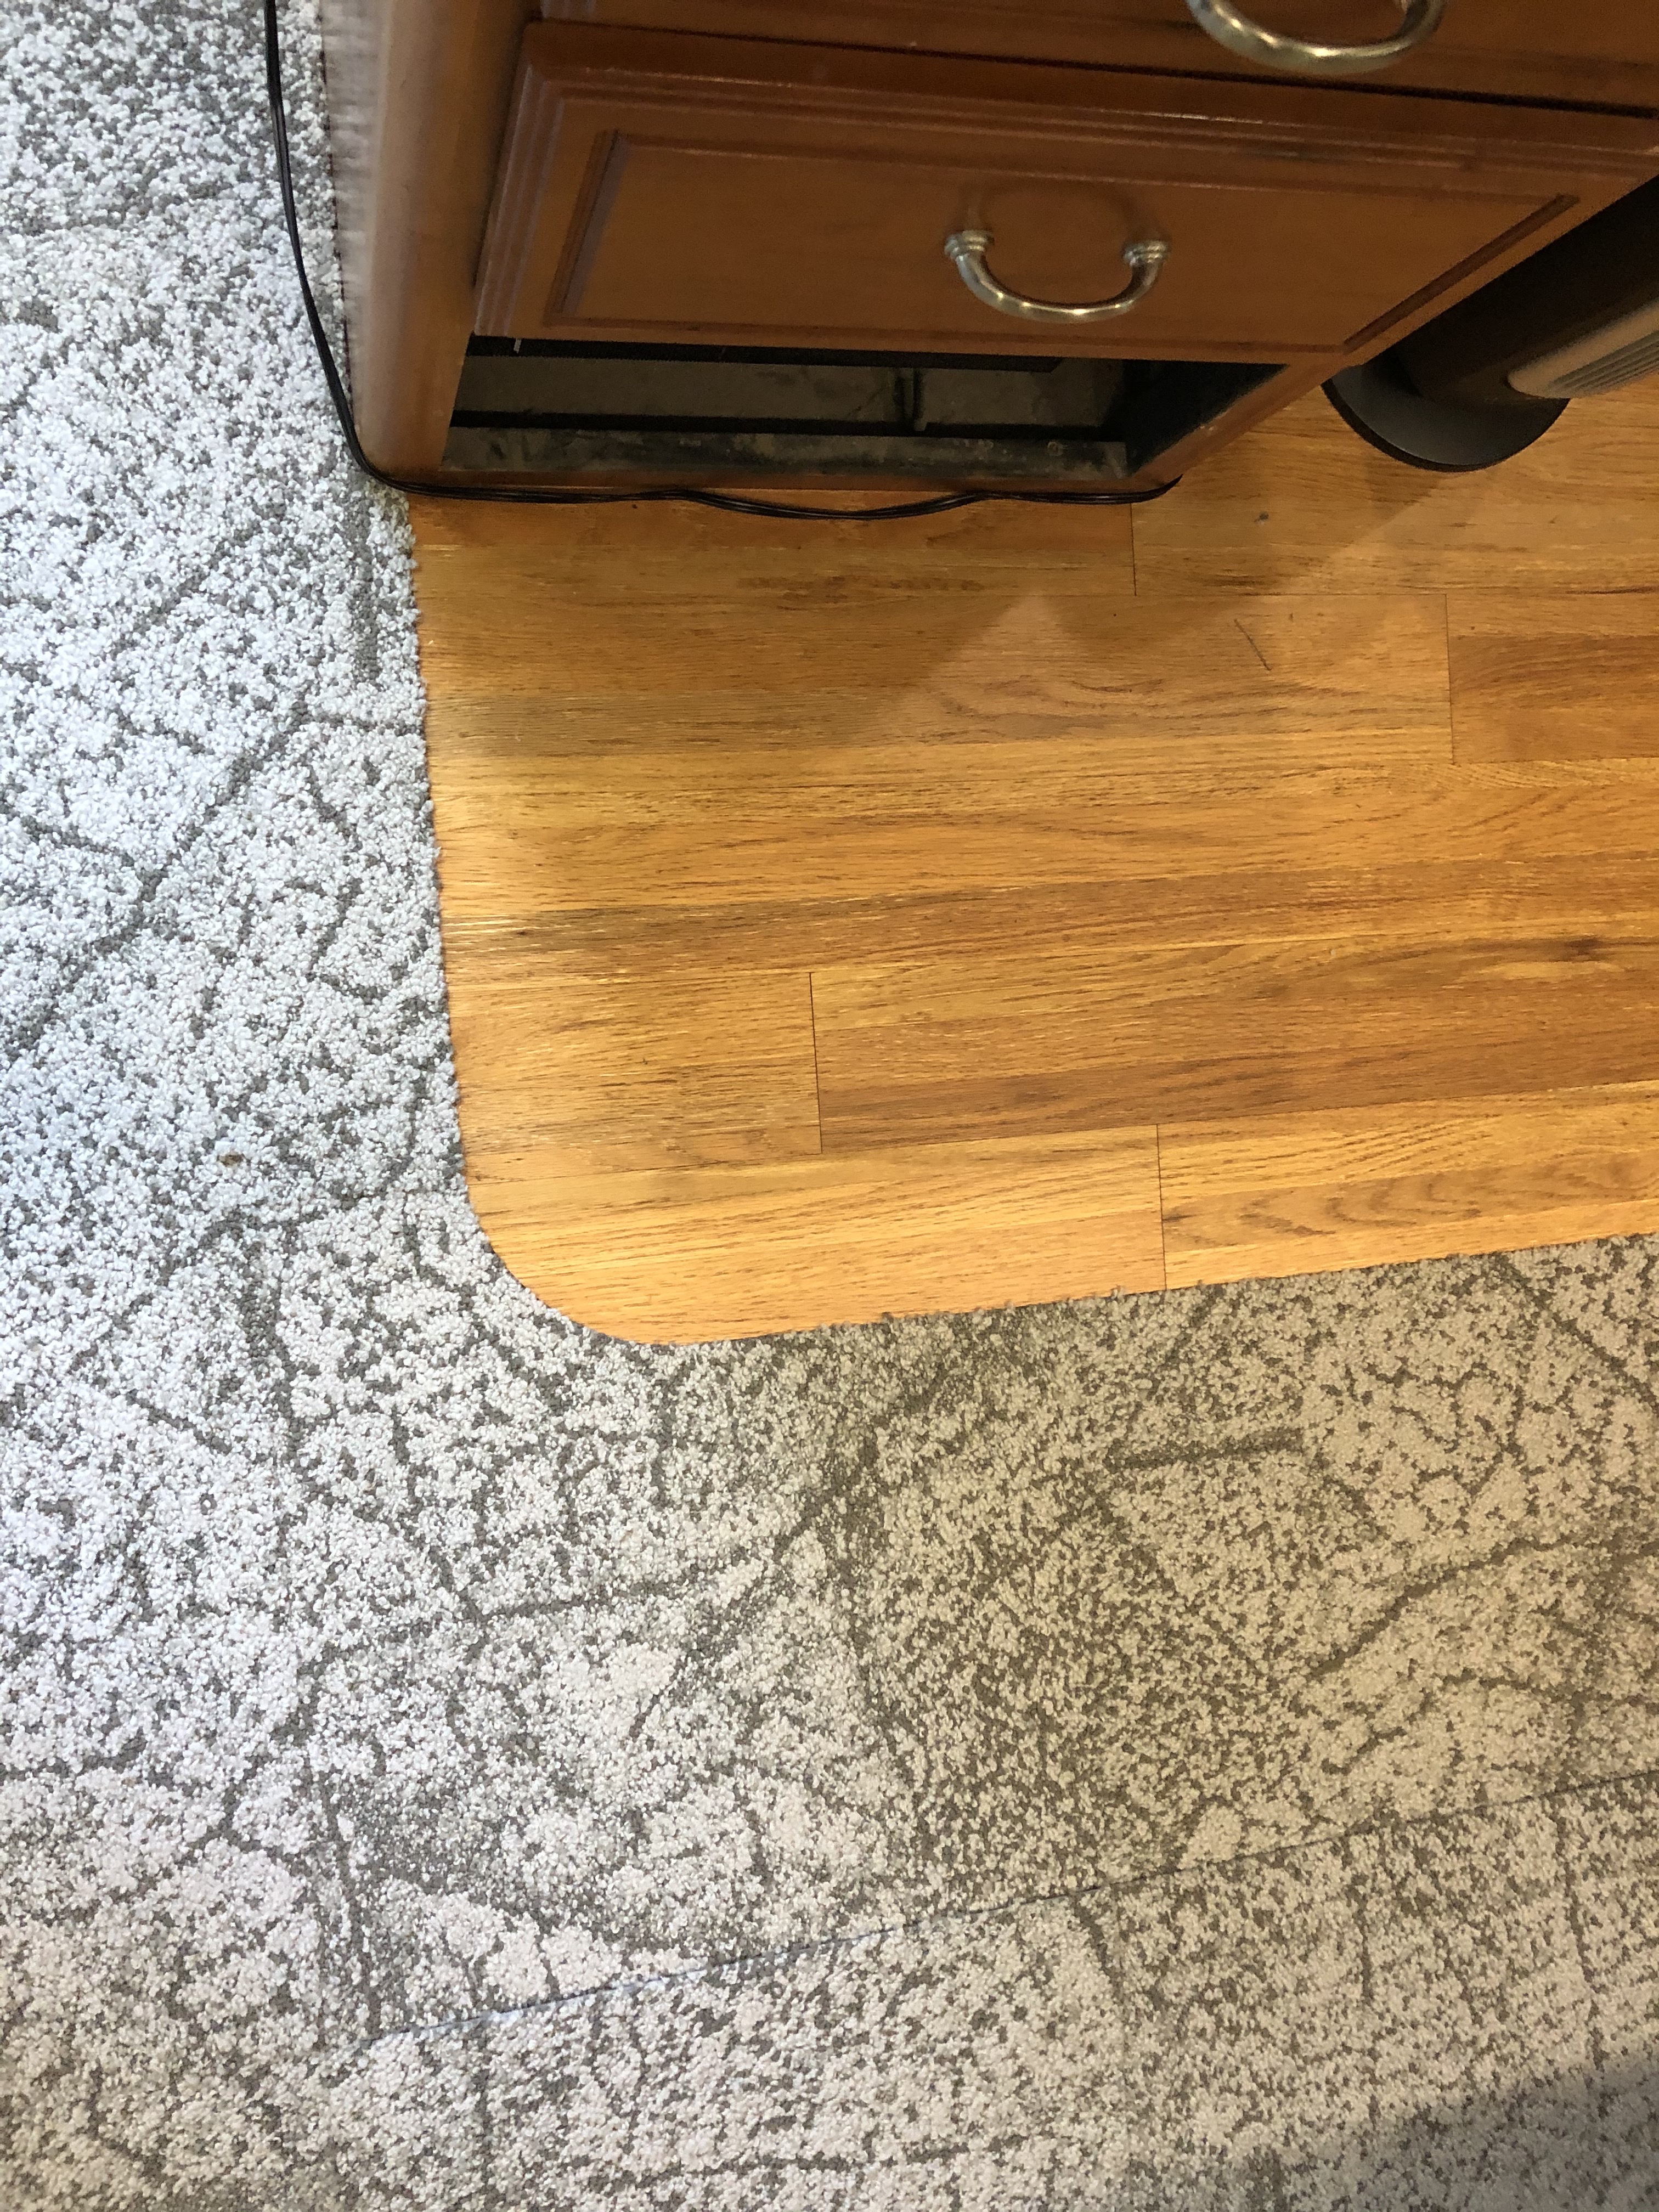
Then it was time for the puzzle of the tile layout. Each tile is 1/2 meter square, about 19.75″ on each side. They can be cut to any size you need. The puzzle is for the most efficient arrangement that meets all of the fit requirements.
We started in the bedroom, laid out all of the tiles and cut as needed to fit. All of the tiles got labeled and taken out and piled up.
We applied an adhesive to the underlayment with a paint roller, it sits for a half hour or so. It is sort of like a contact cement but the tile can be placed, pulled up and adjusted if needed. Once in place rolling the tiles and walking on them makes them semi-permanent. They can be removed if needed but they are stuck down pretty well.
Front tiles next starting at the rear.
And careful fitting in the front.
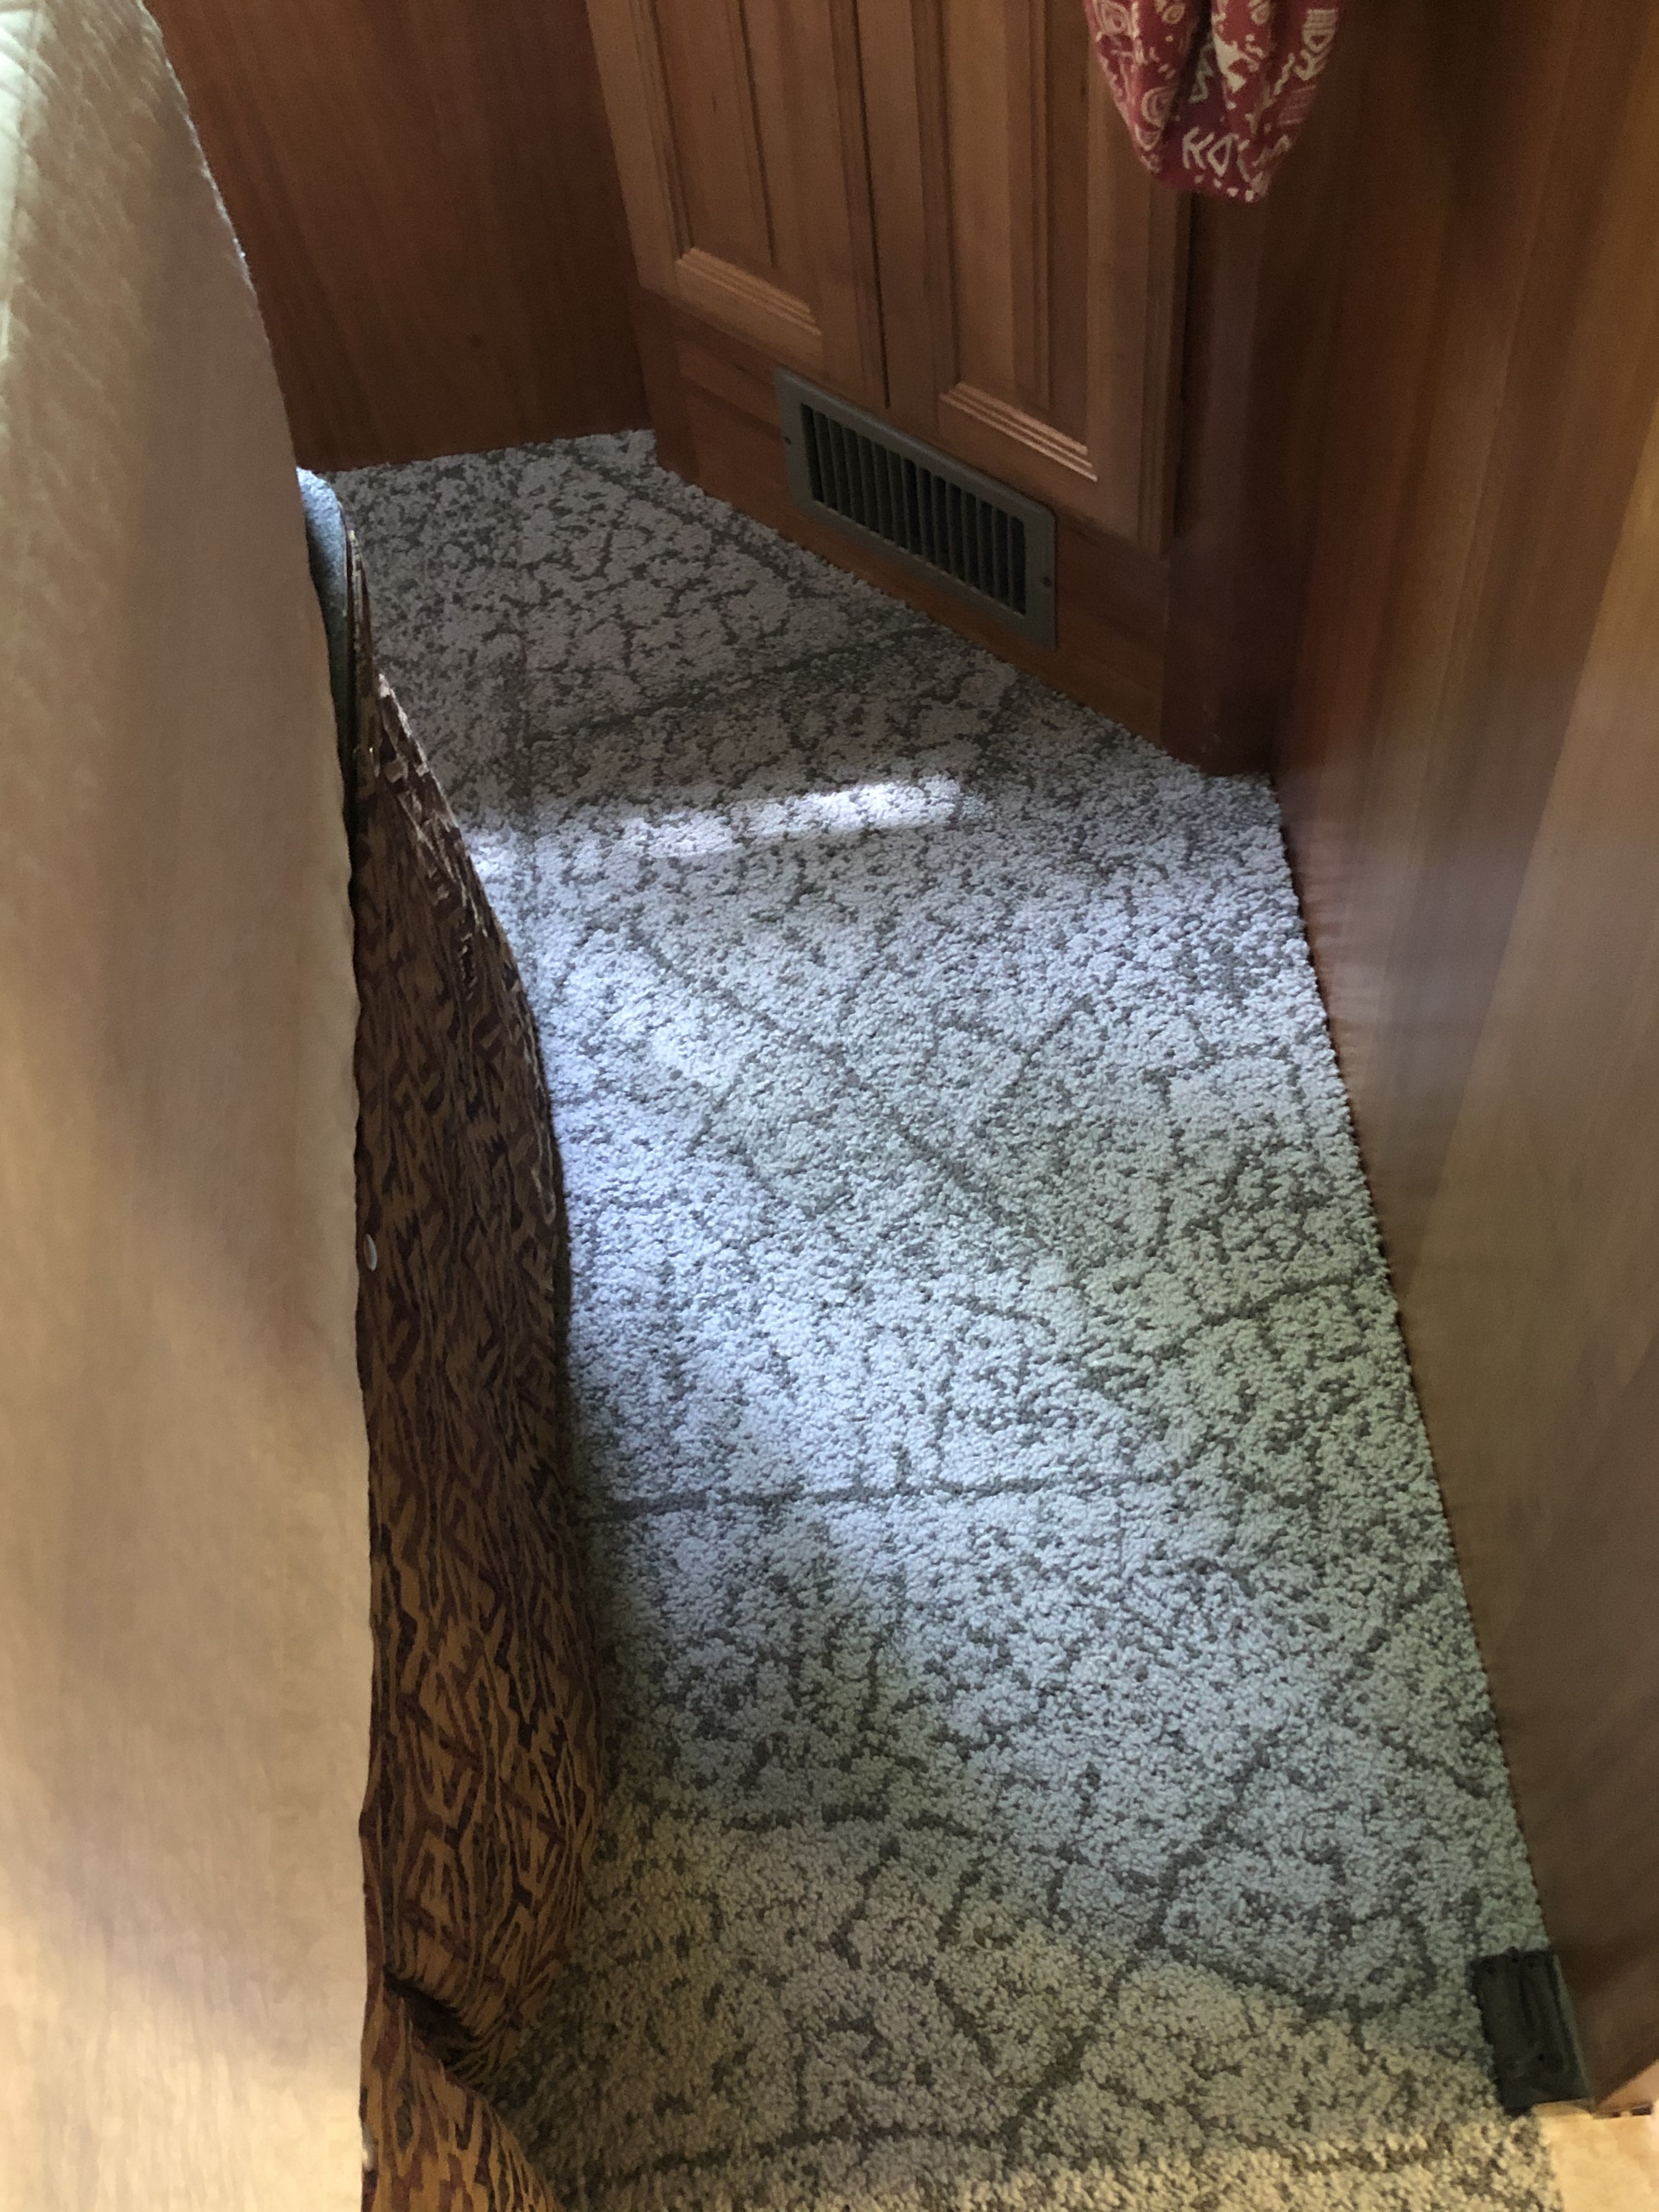
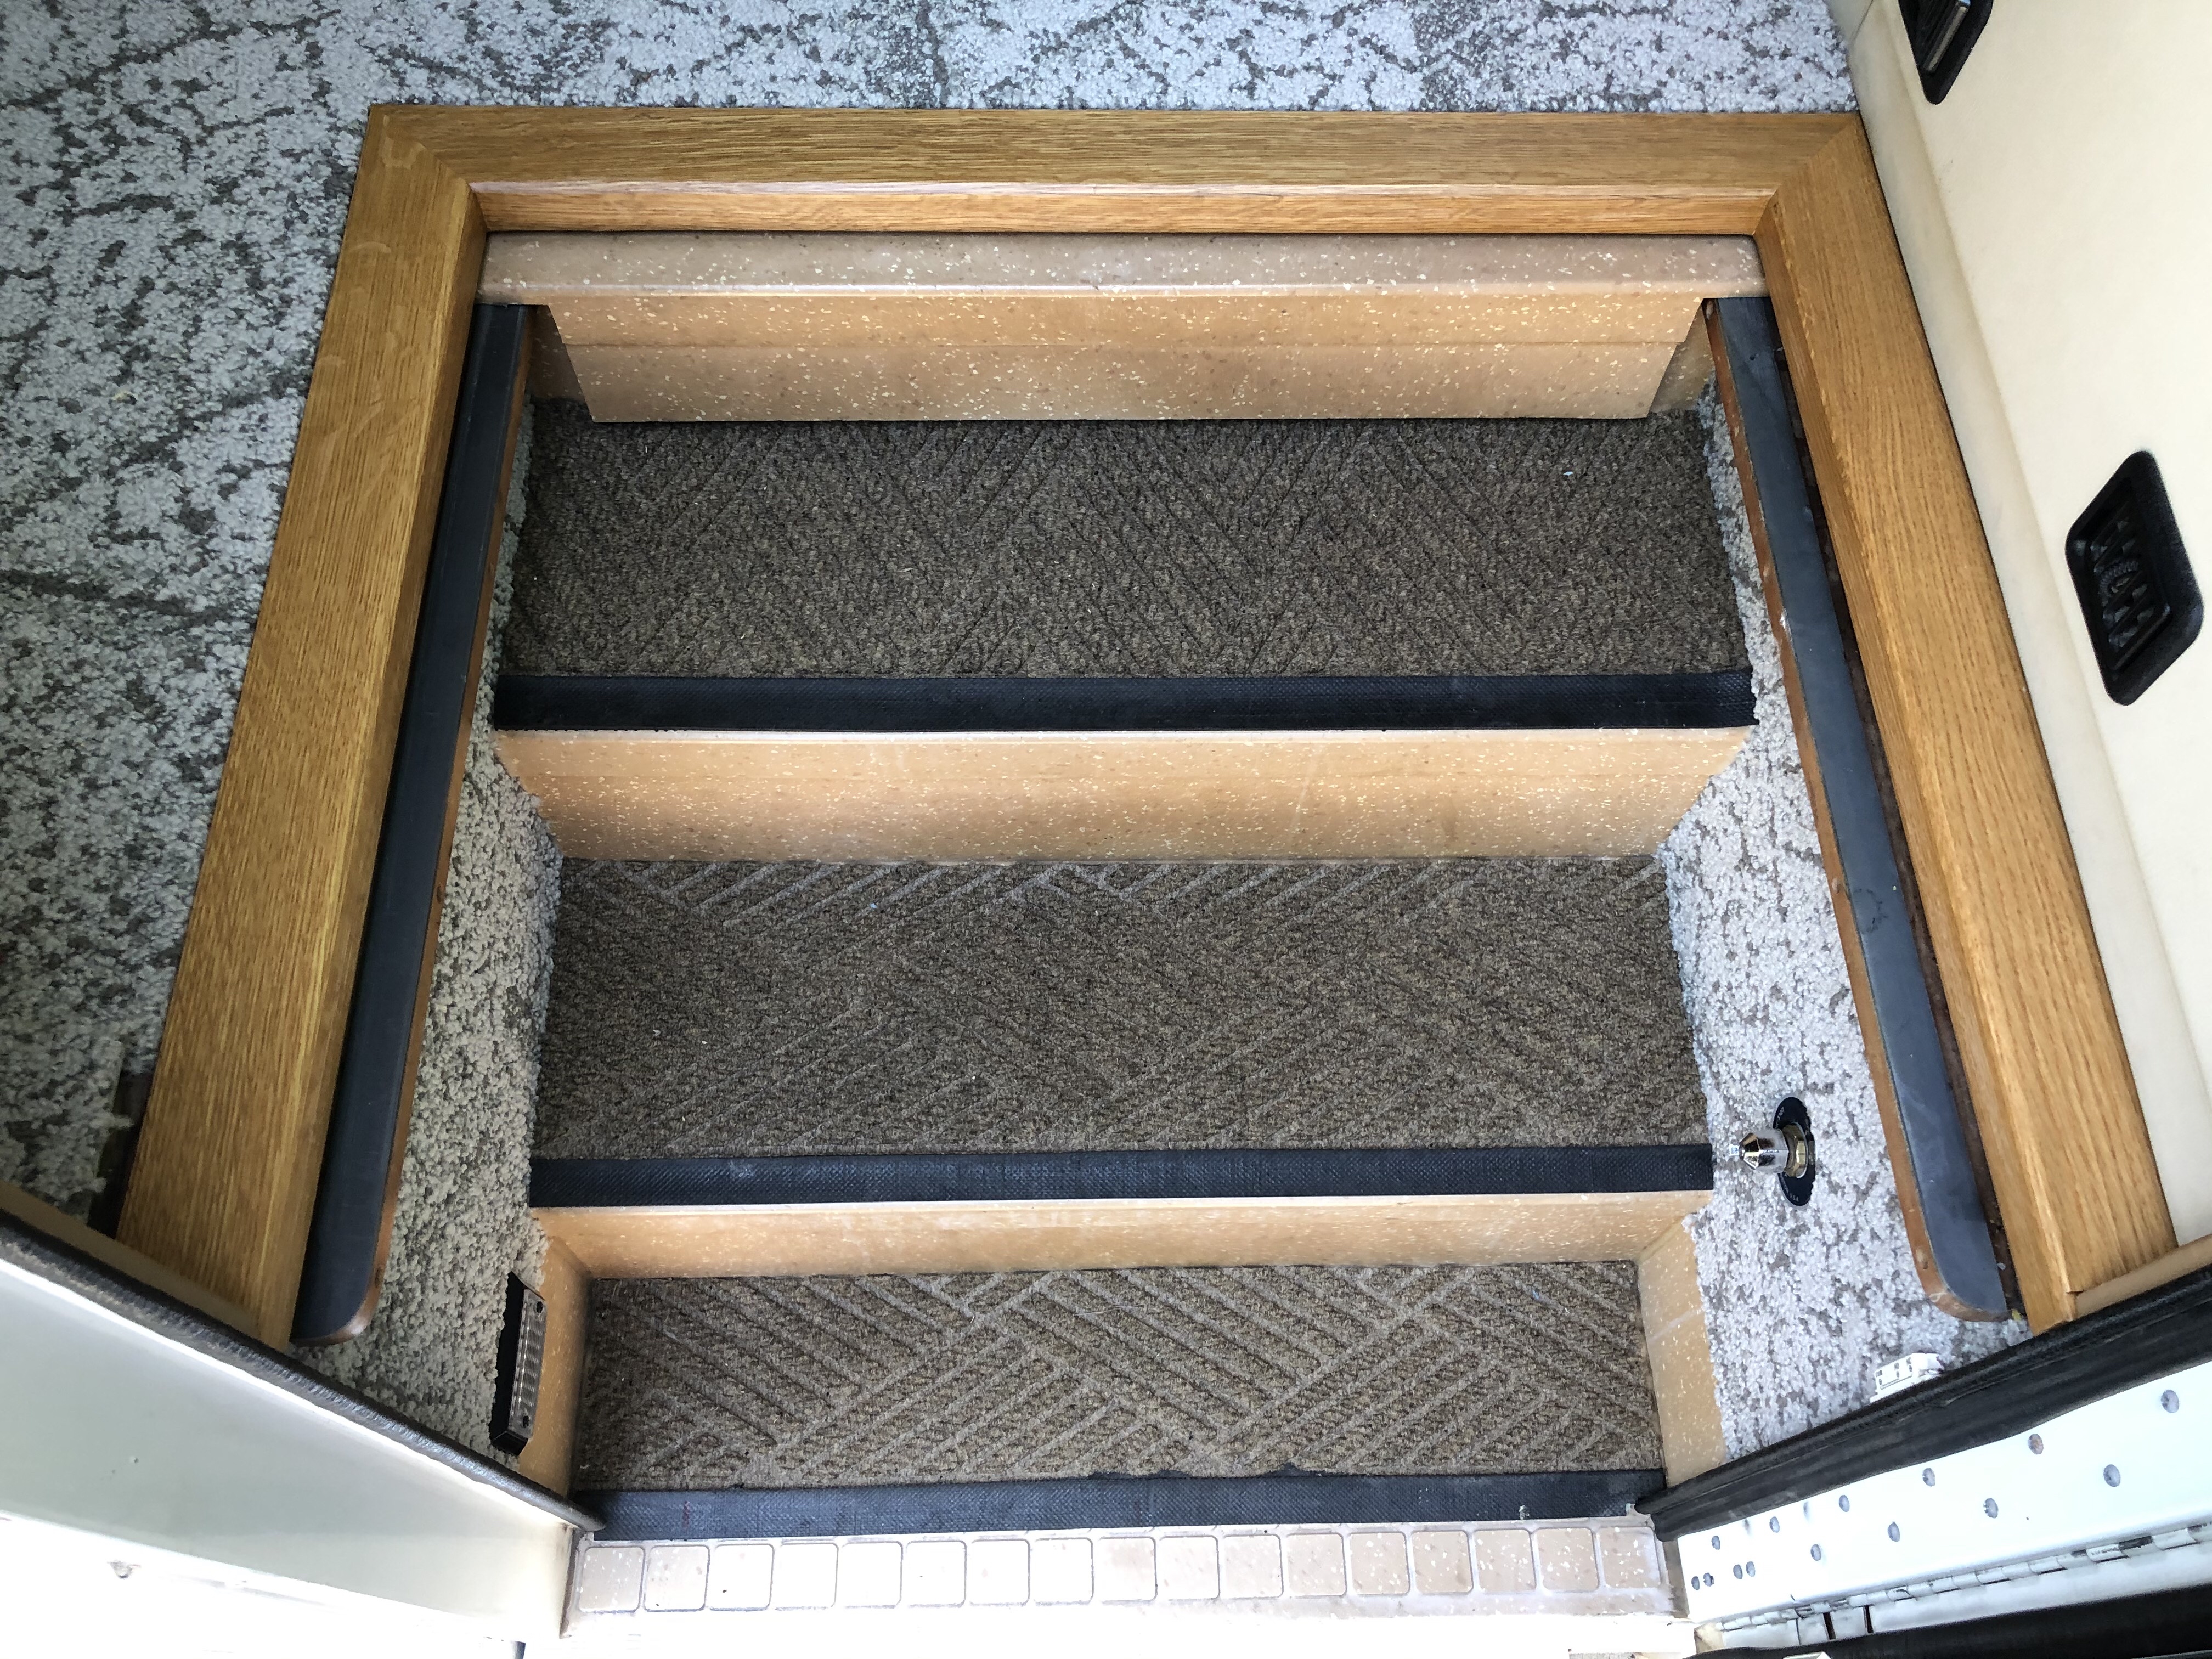
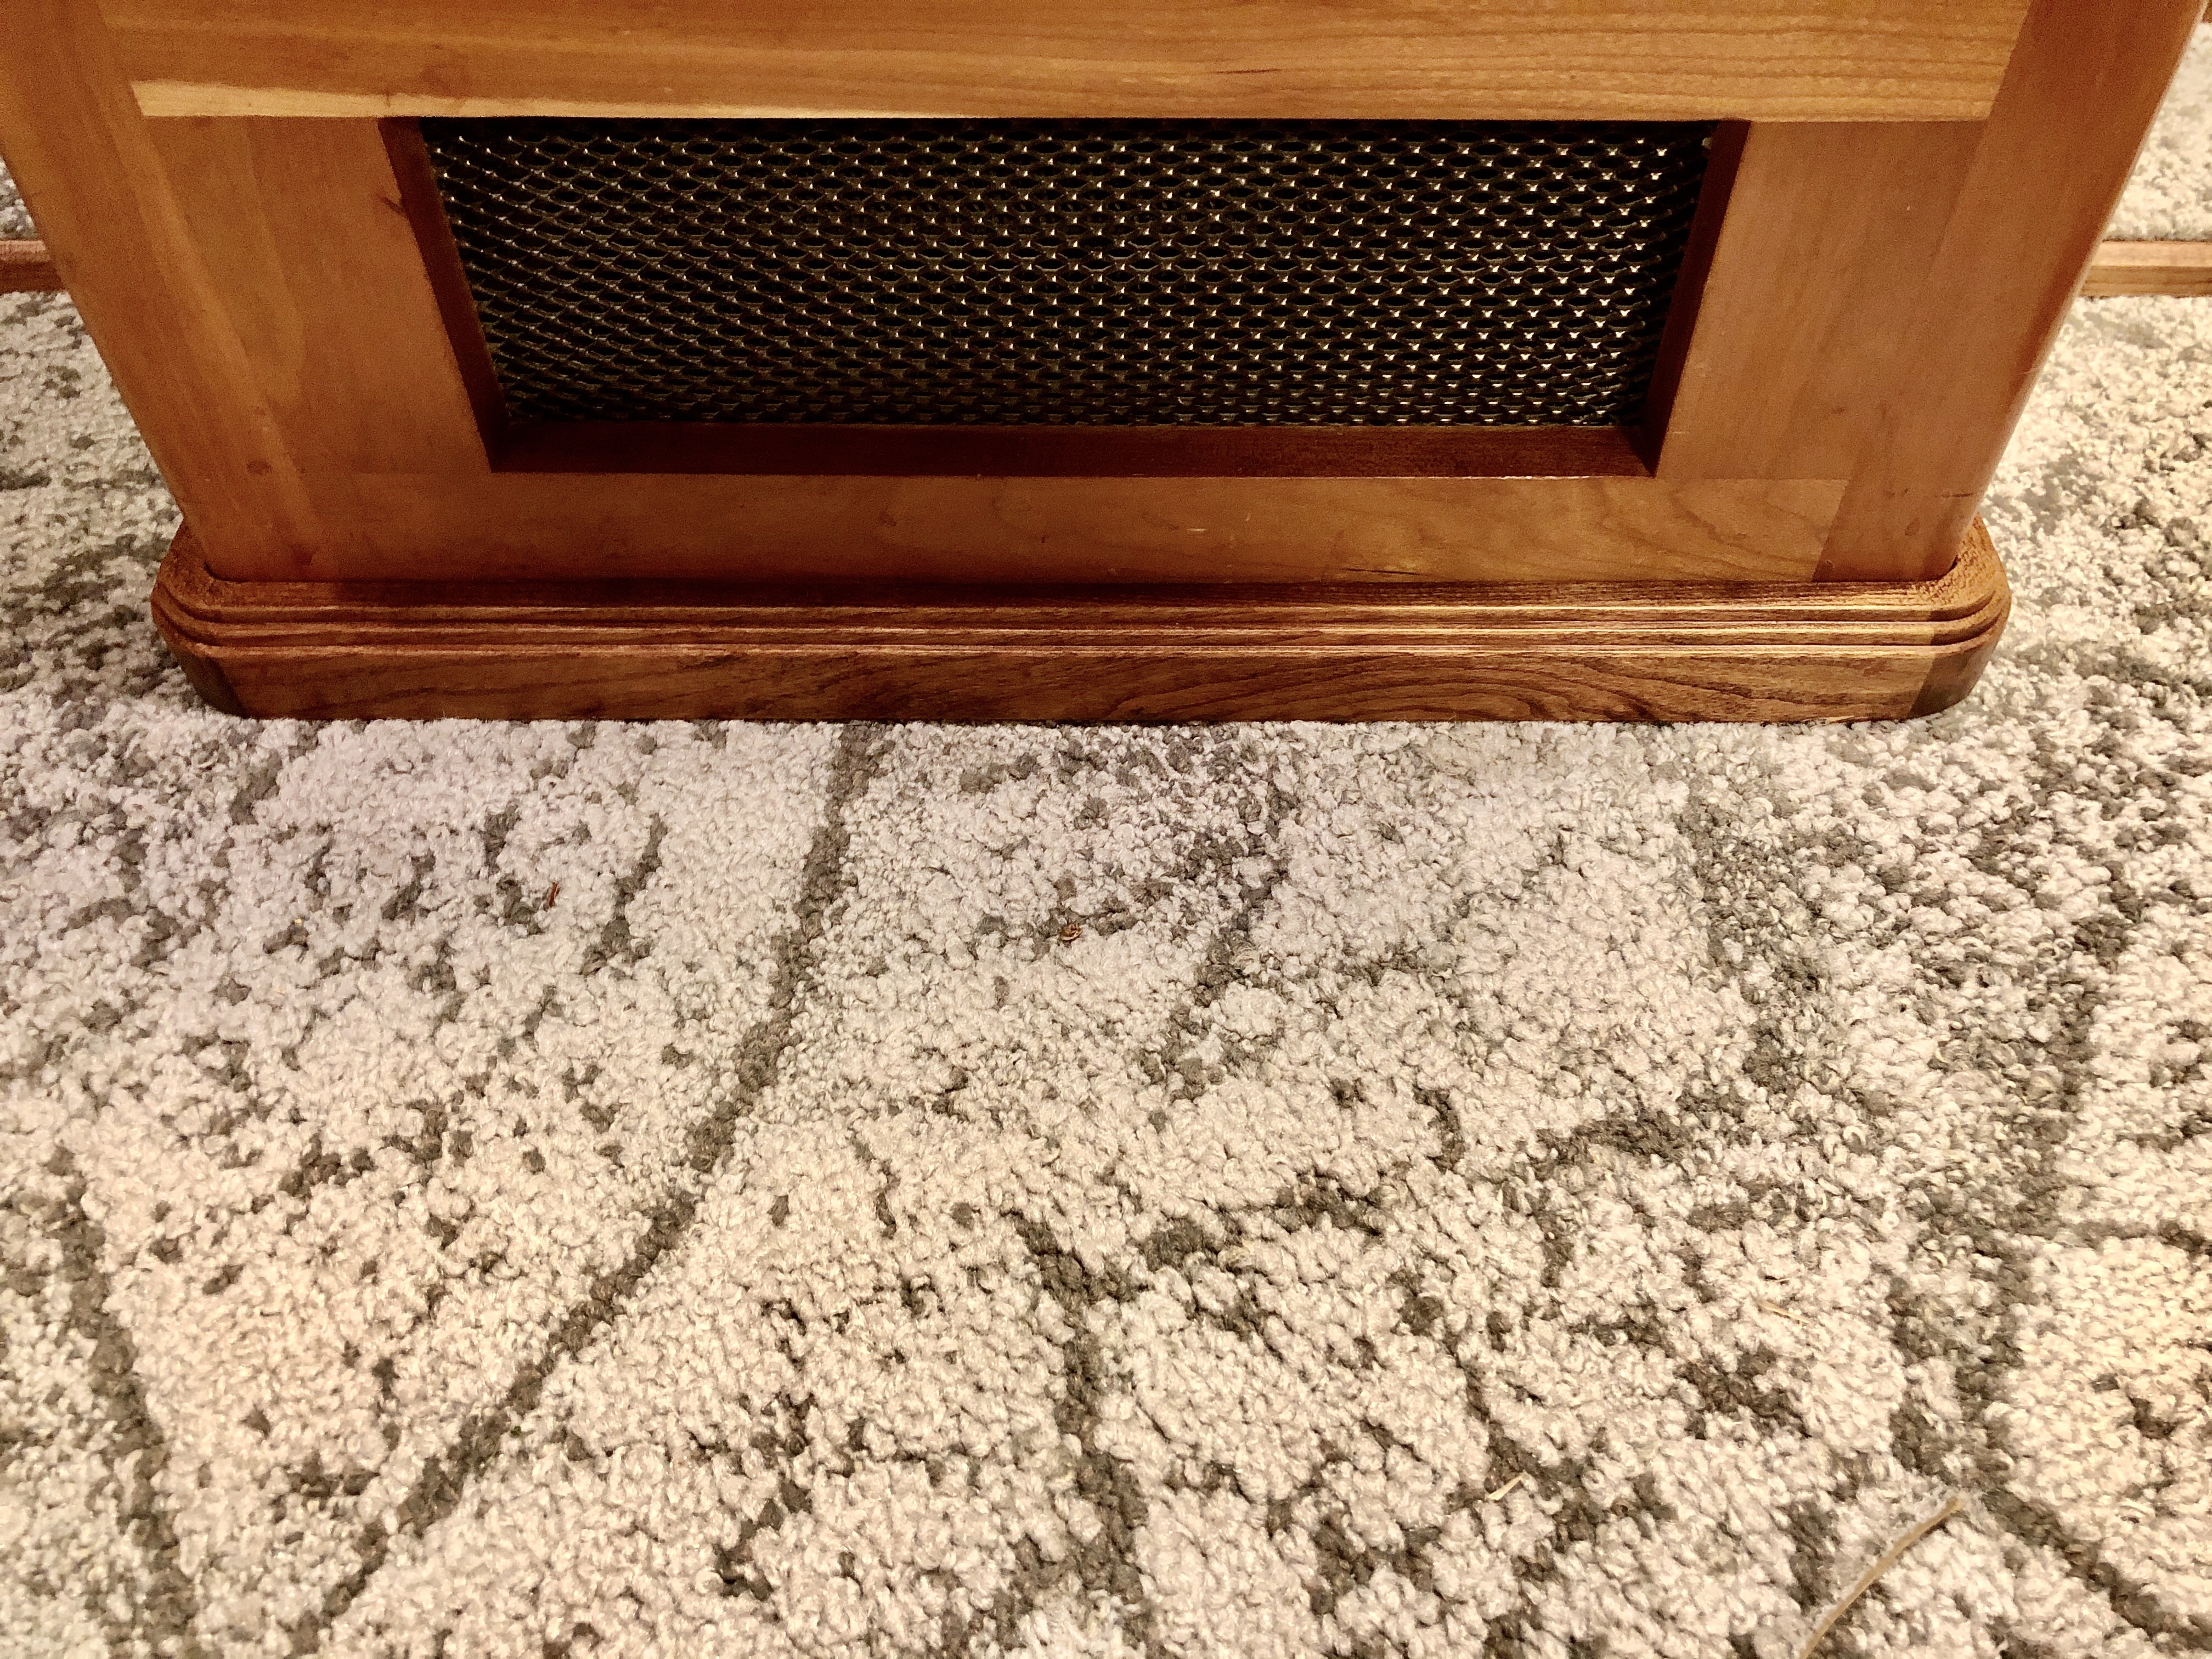
And a new custom made (by me) stairway trim. The carpet is gray, funny how it looks blueish in some photos.
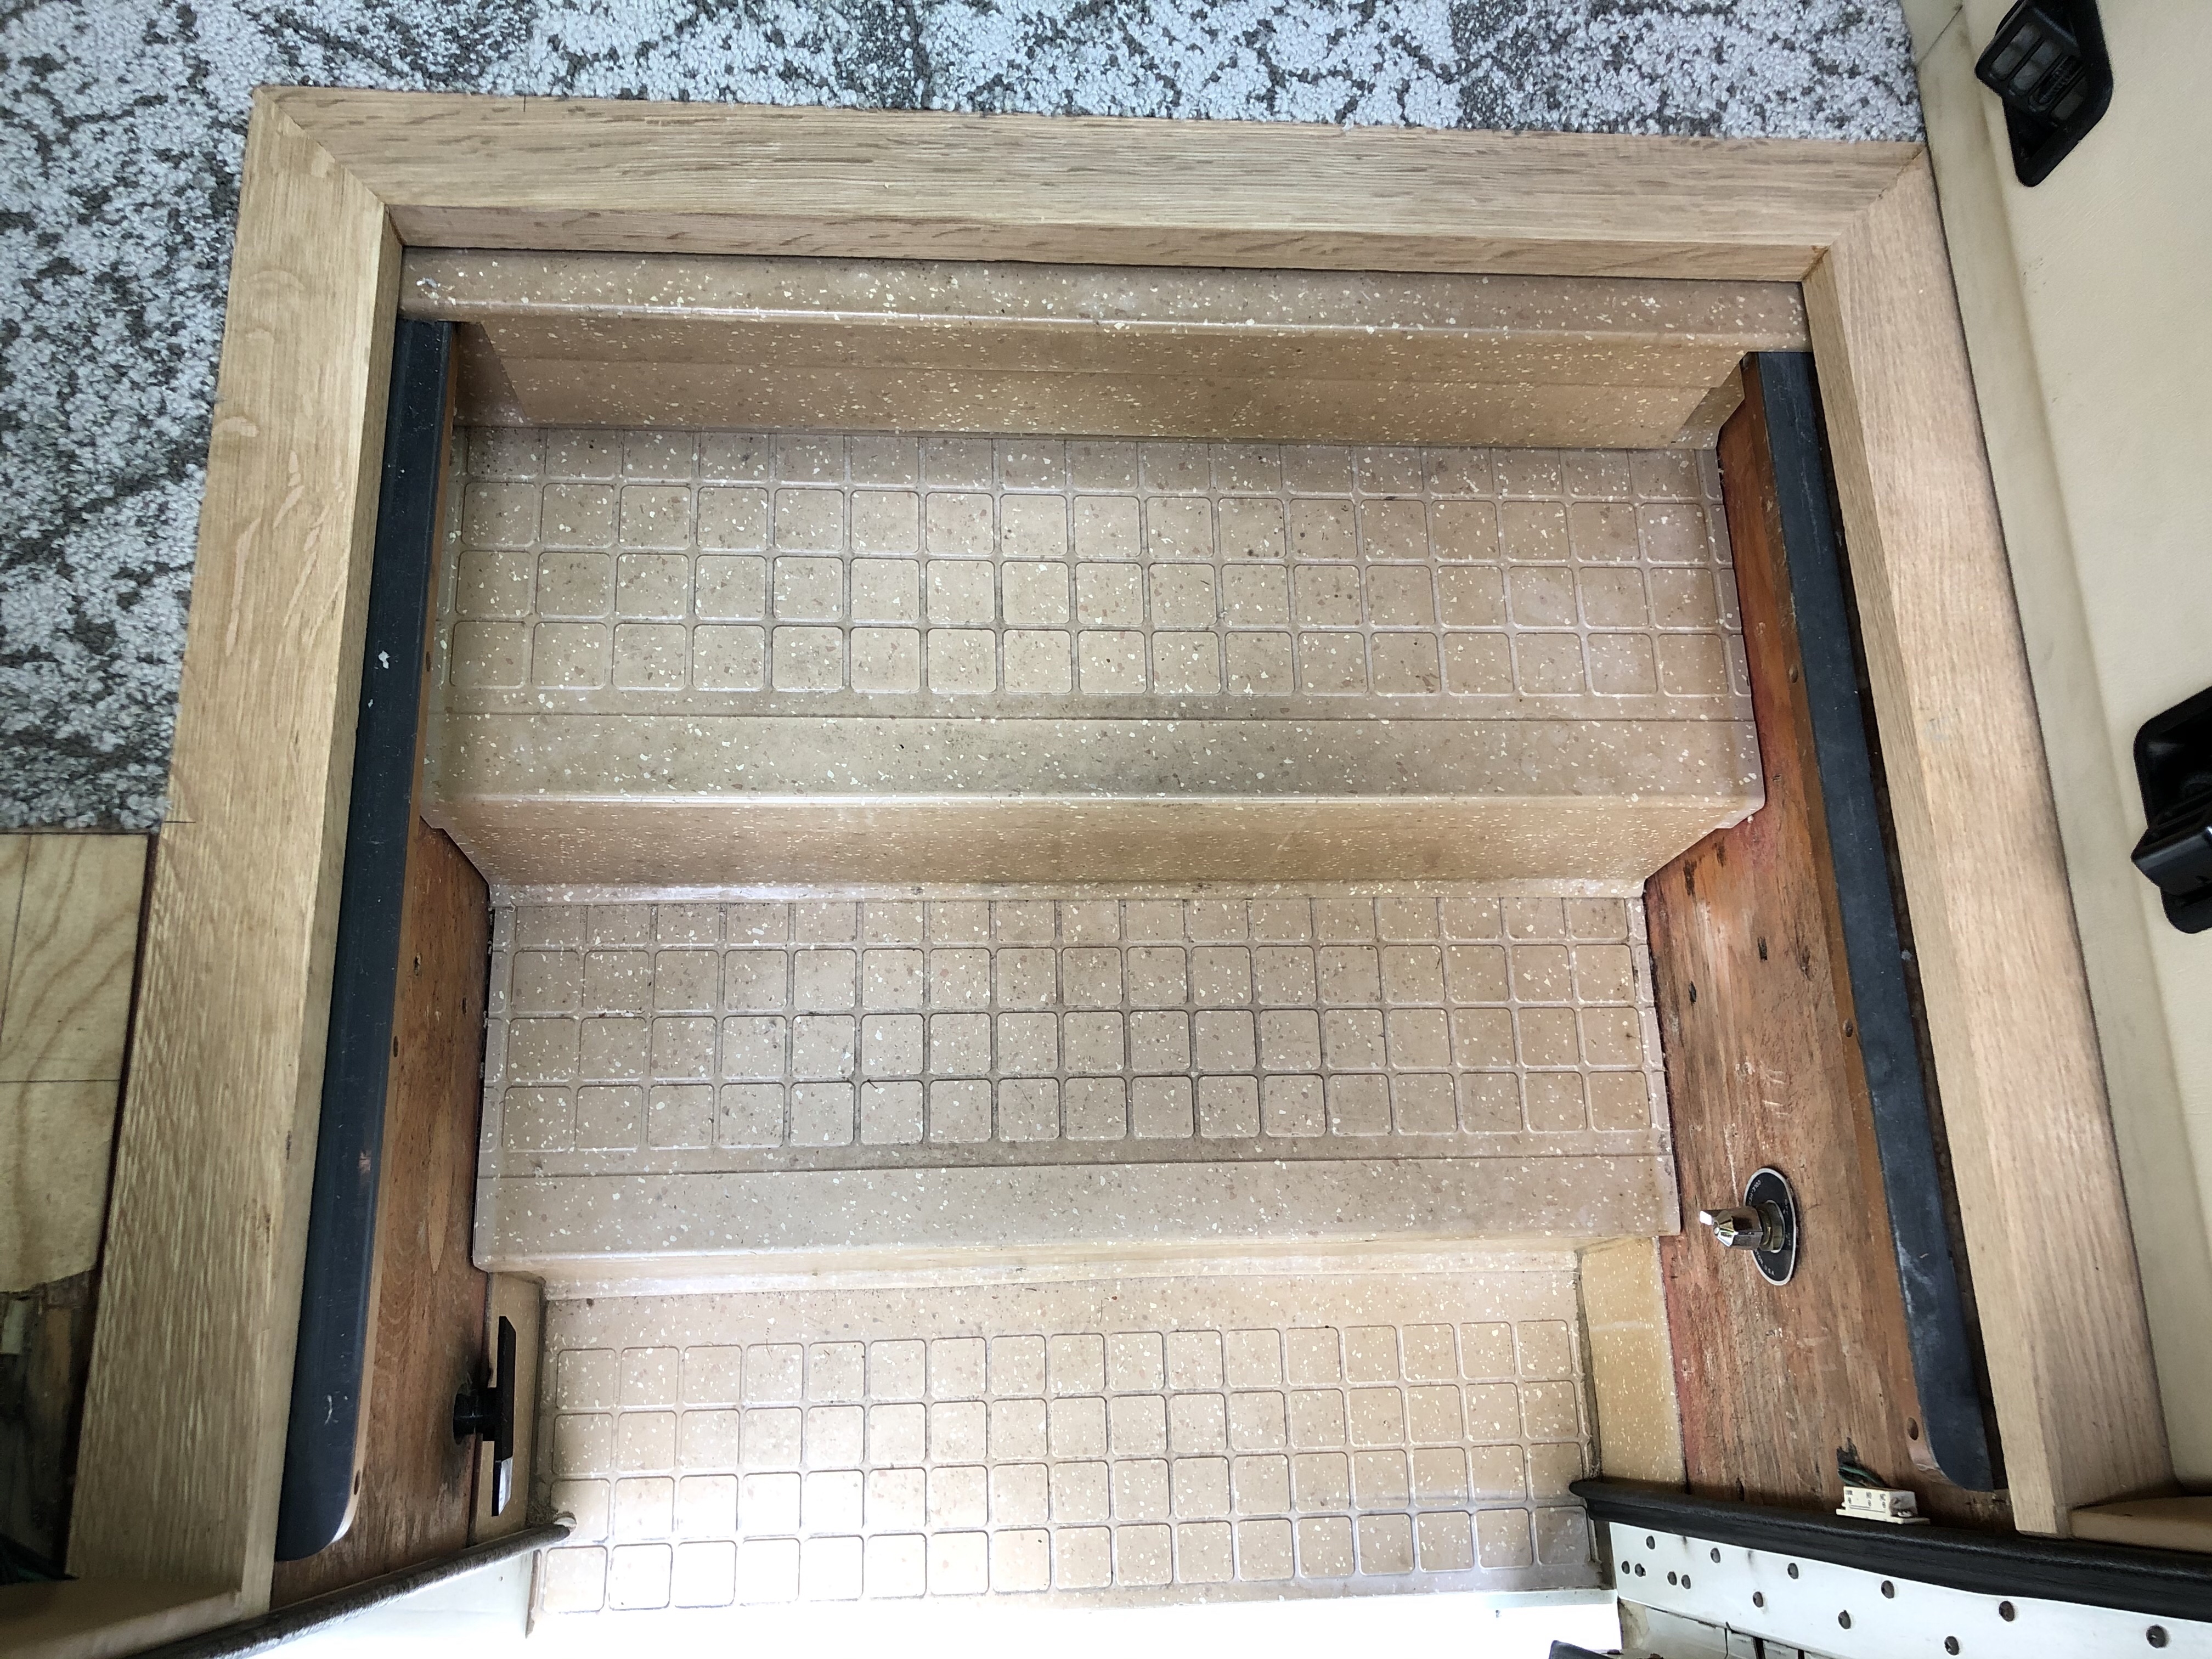
We have a front floor mat that fits around the dash in the front. We used the same material to finish the floor section that covers the steps and the steps themselves.
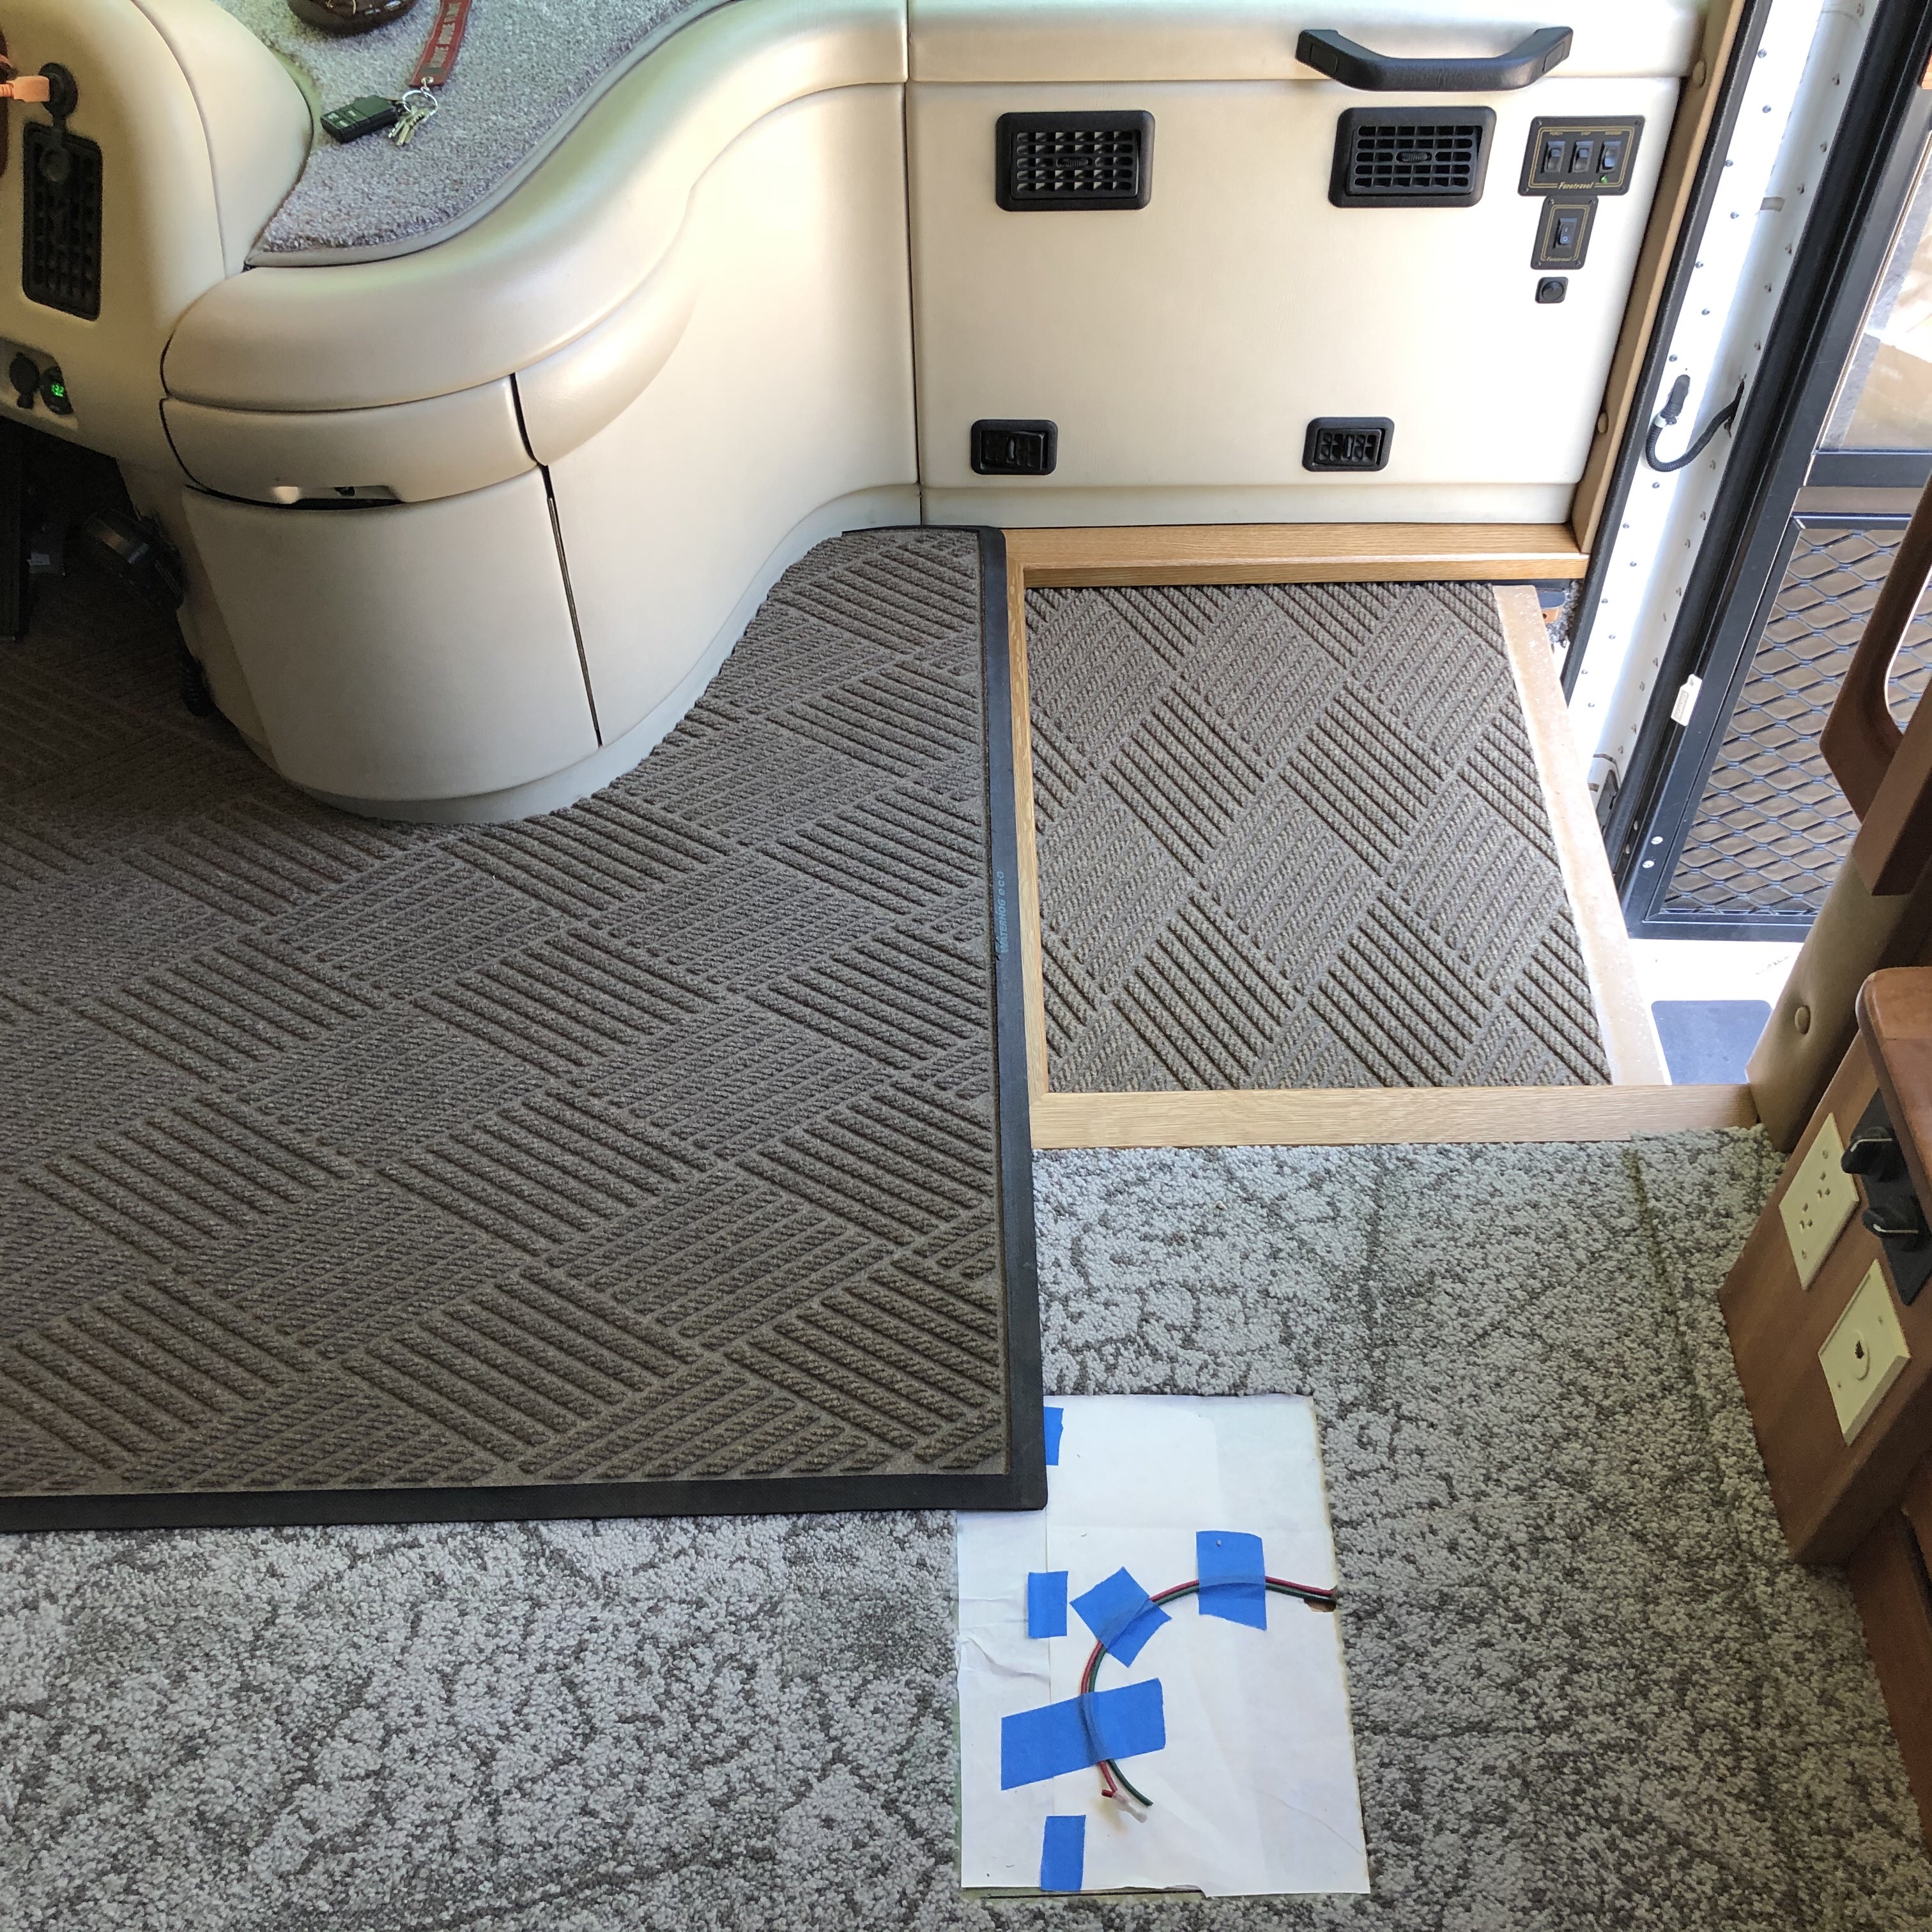
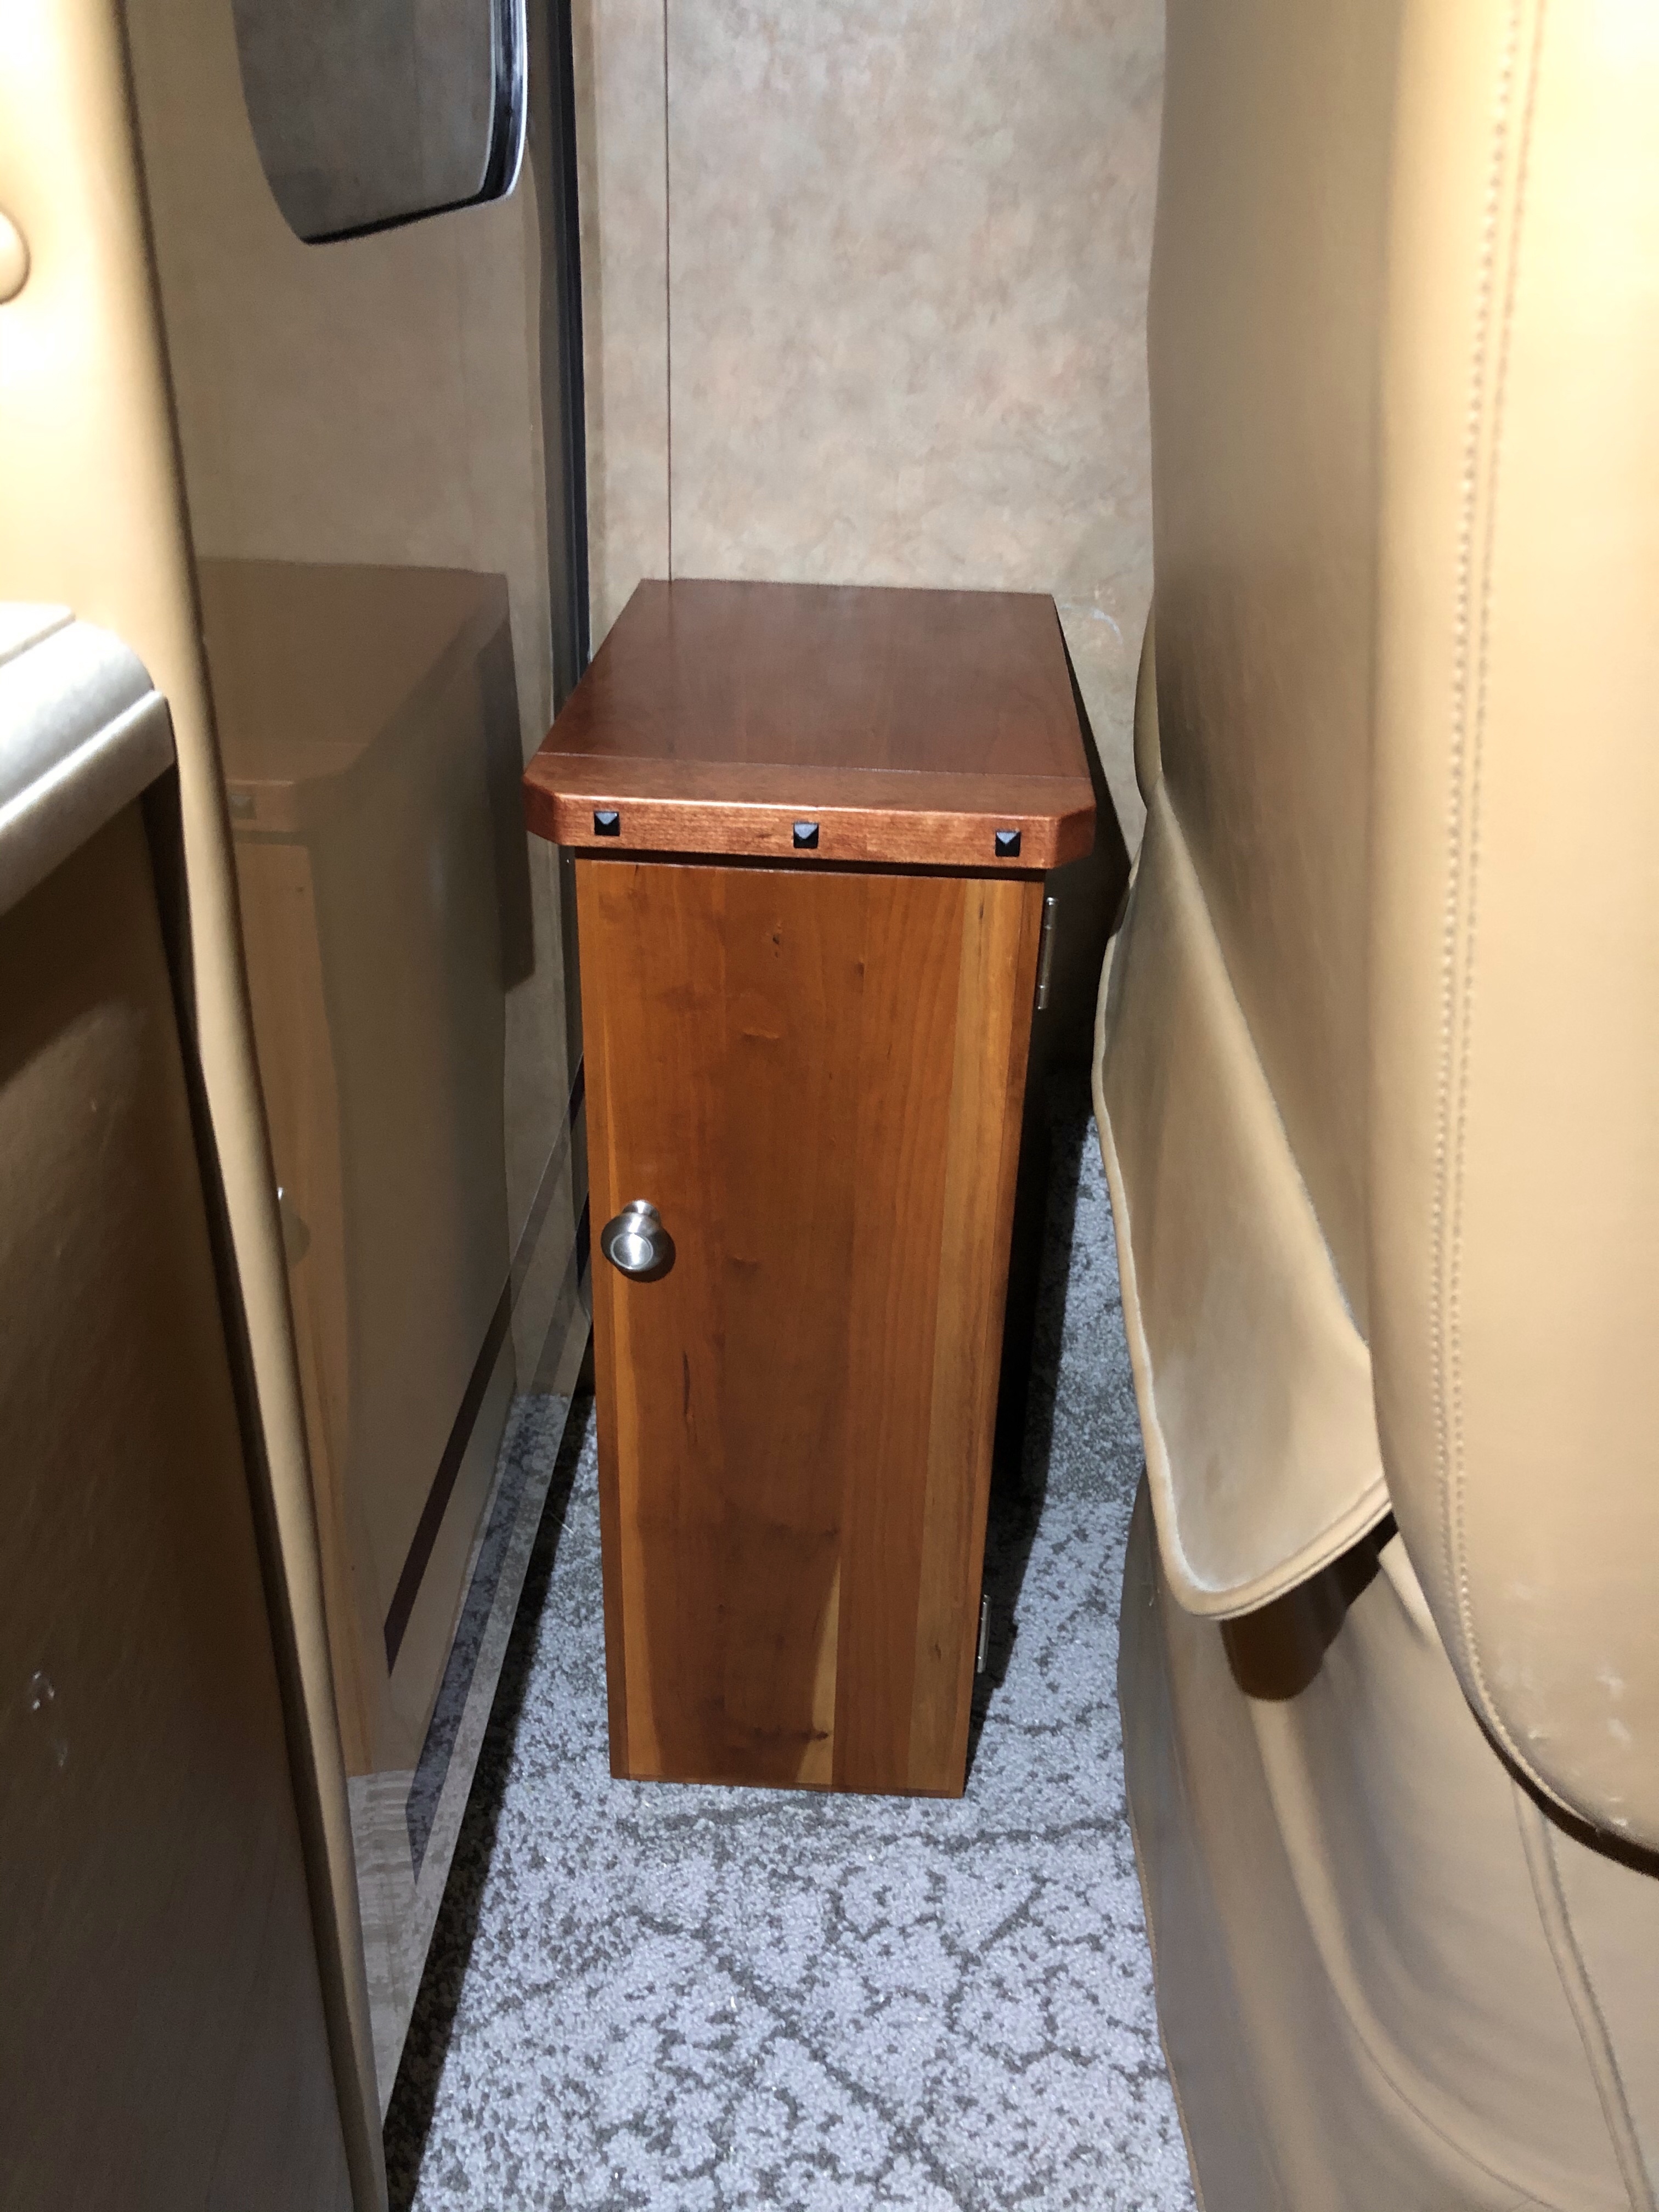
The small cabinet behind the passenger’s seat needed some custom trim to march the curved corners.
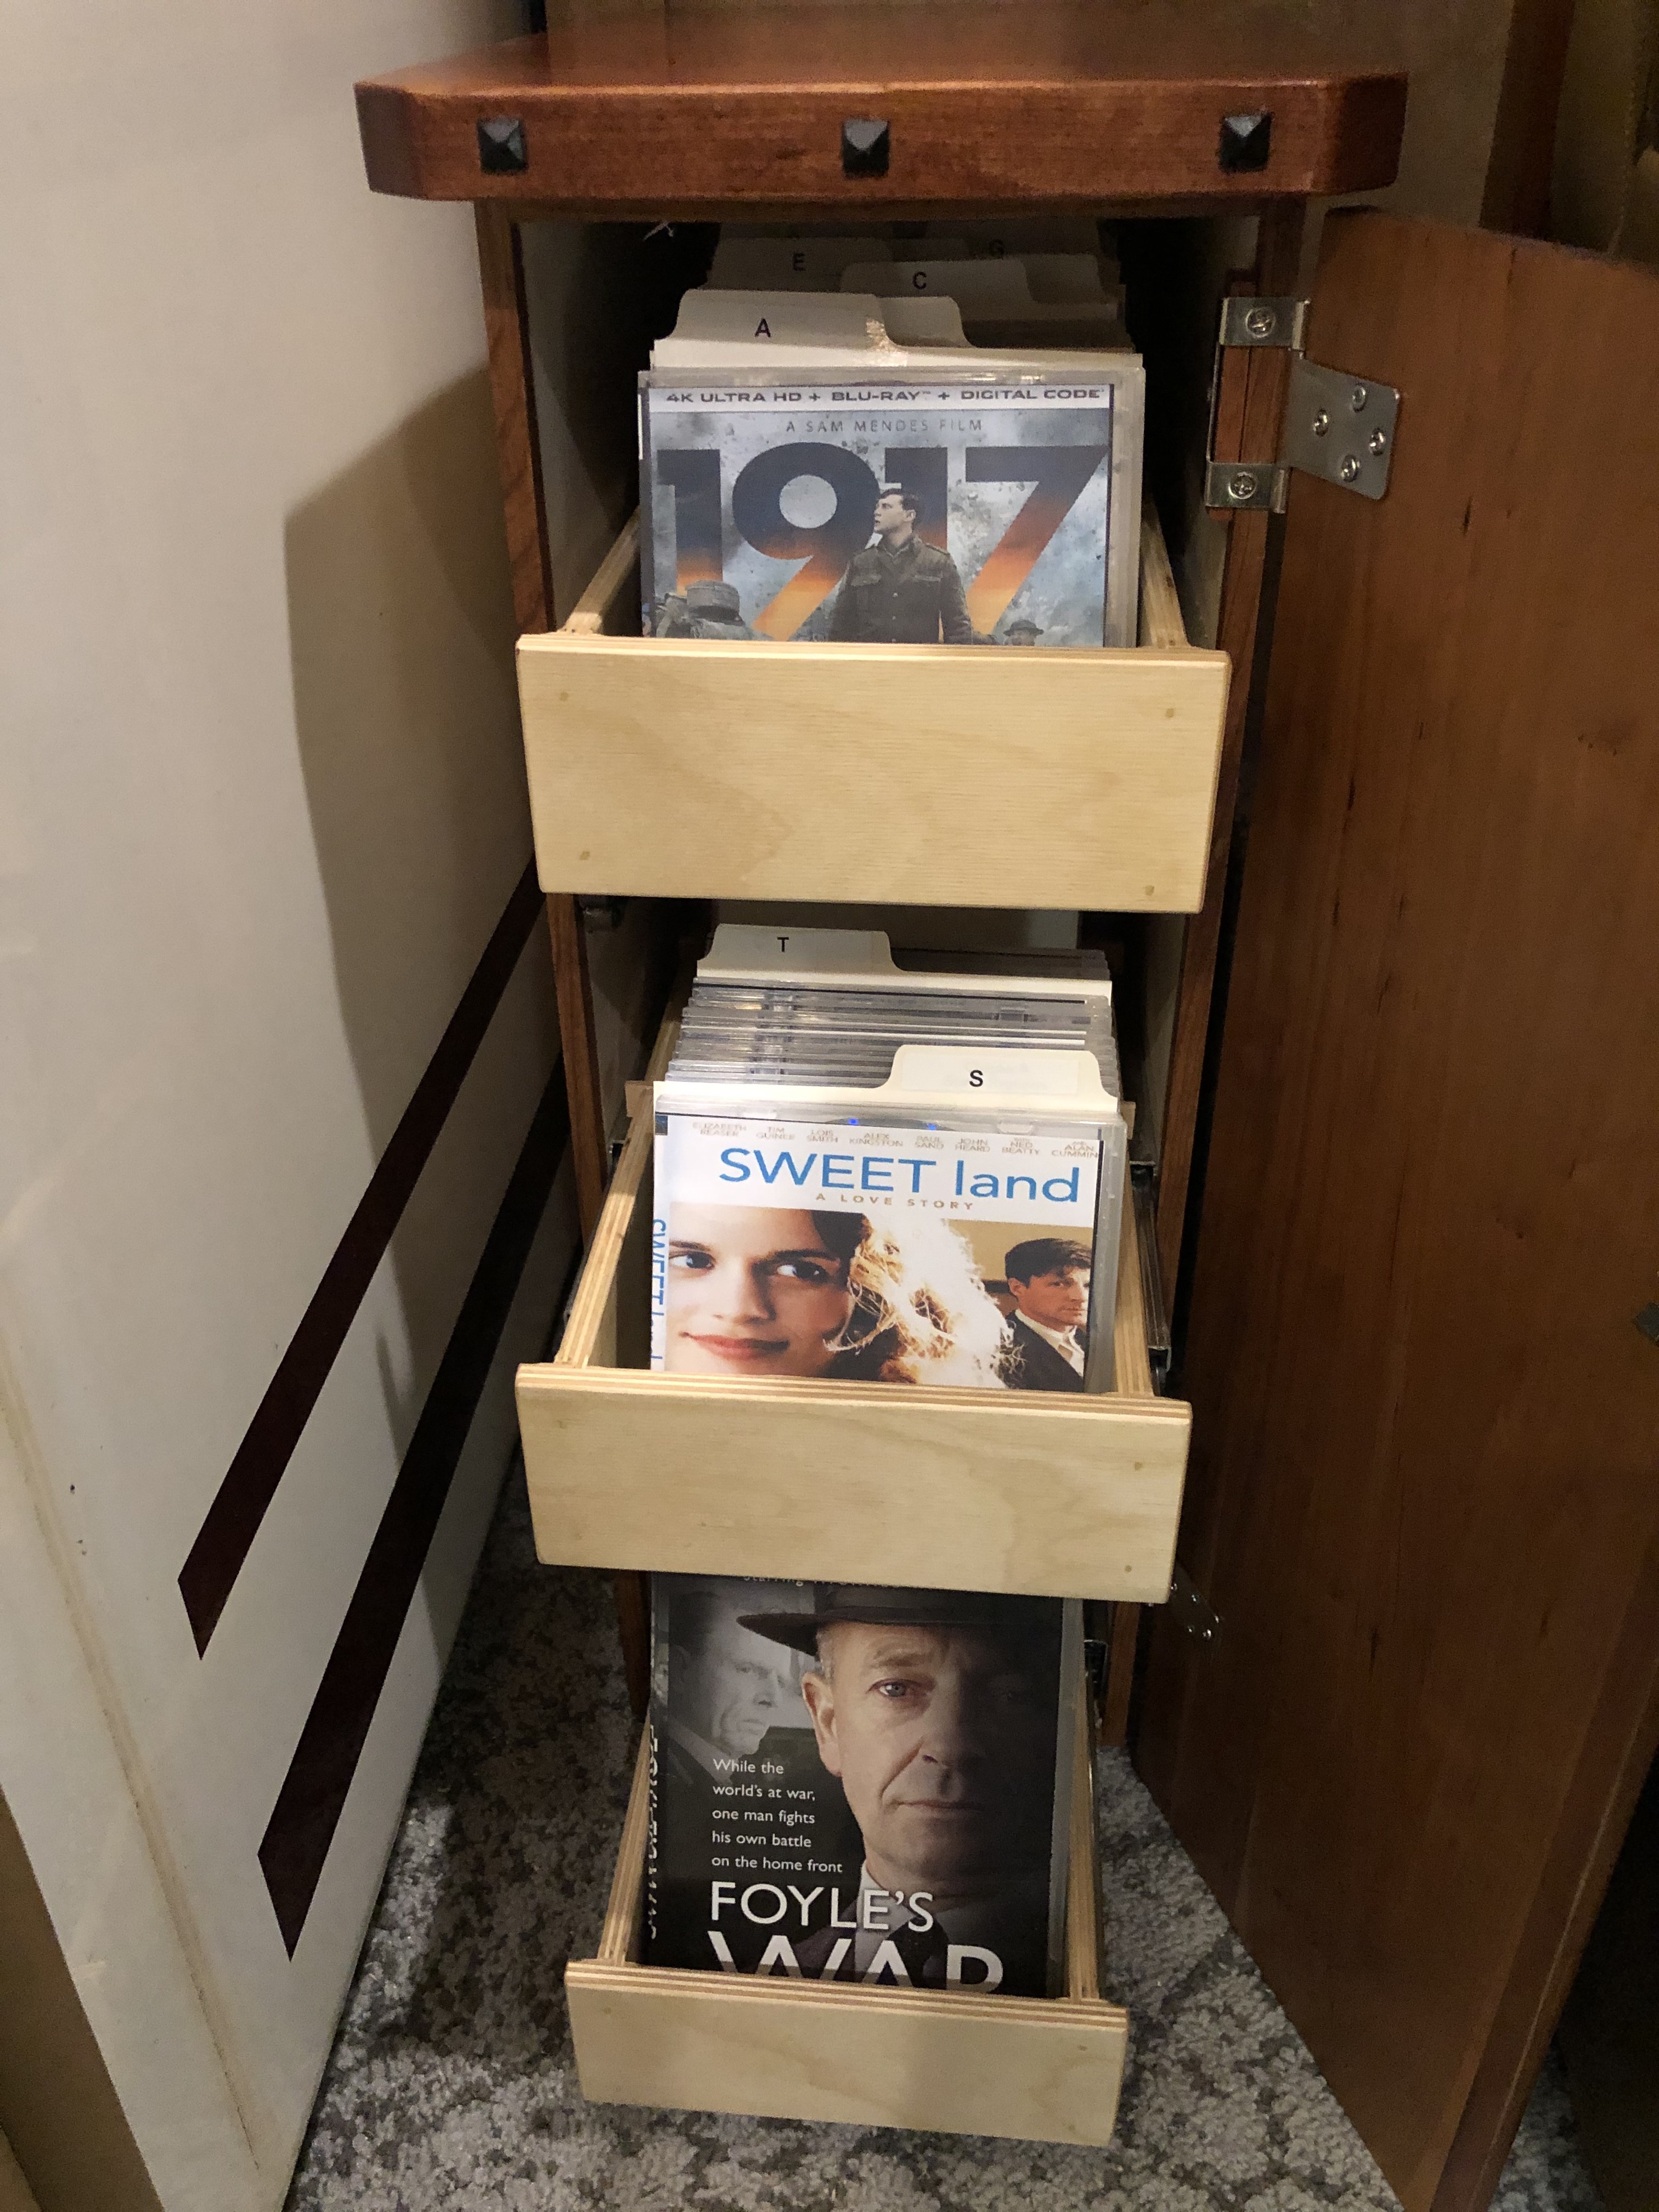
We also replaced the cabinet behind the driver’s seat with a much smaller cabinet that holds DVDs. The smaller cabinet allows the driver’s seat to rotate further around towards the rear. A nice bonus.
All finished up now and it looks great. It is fresh, bright, lively. Works for us.
The coach sat out in the driveway for three weeks. It was never plugged in. The solar panels provided recharging power almost every day. There were lots of lights on, fans were running, the refrigerator was turned on about half of the tine. After washing the coach it was ready to return to the barn and the batteries were at 100% charge! Three weeks, just solar.
Clean Up.
One other task that started shortly after we got home and will conclude in mid August is a clean up and purge process. We had our trash hauler bring out an apartment sized dumpster.
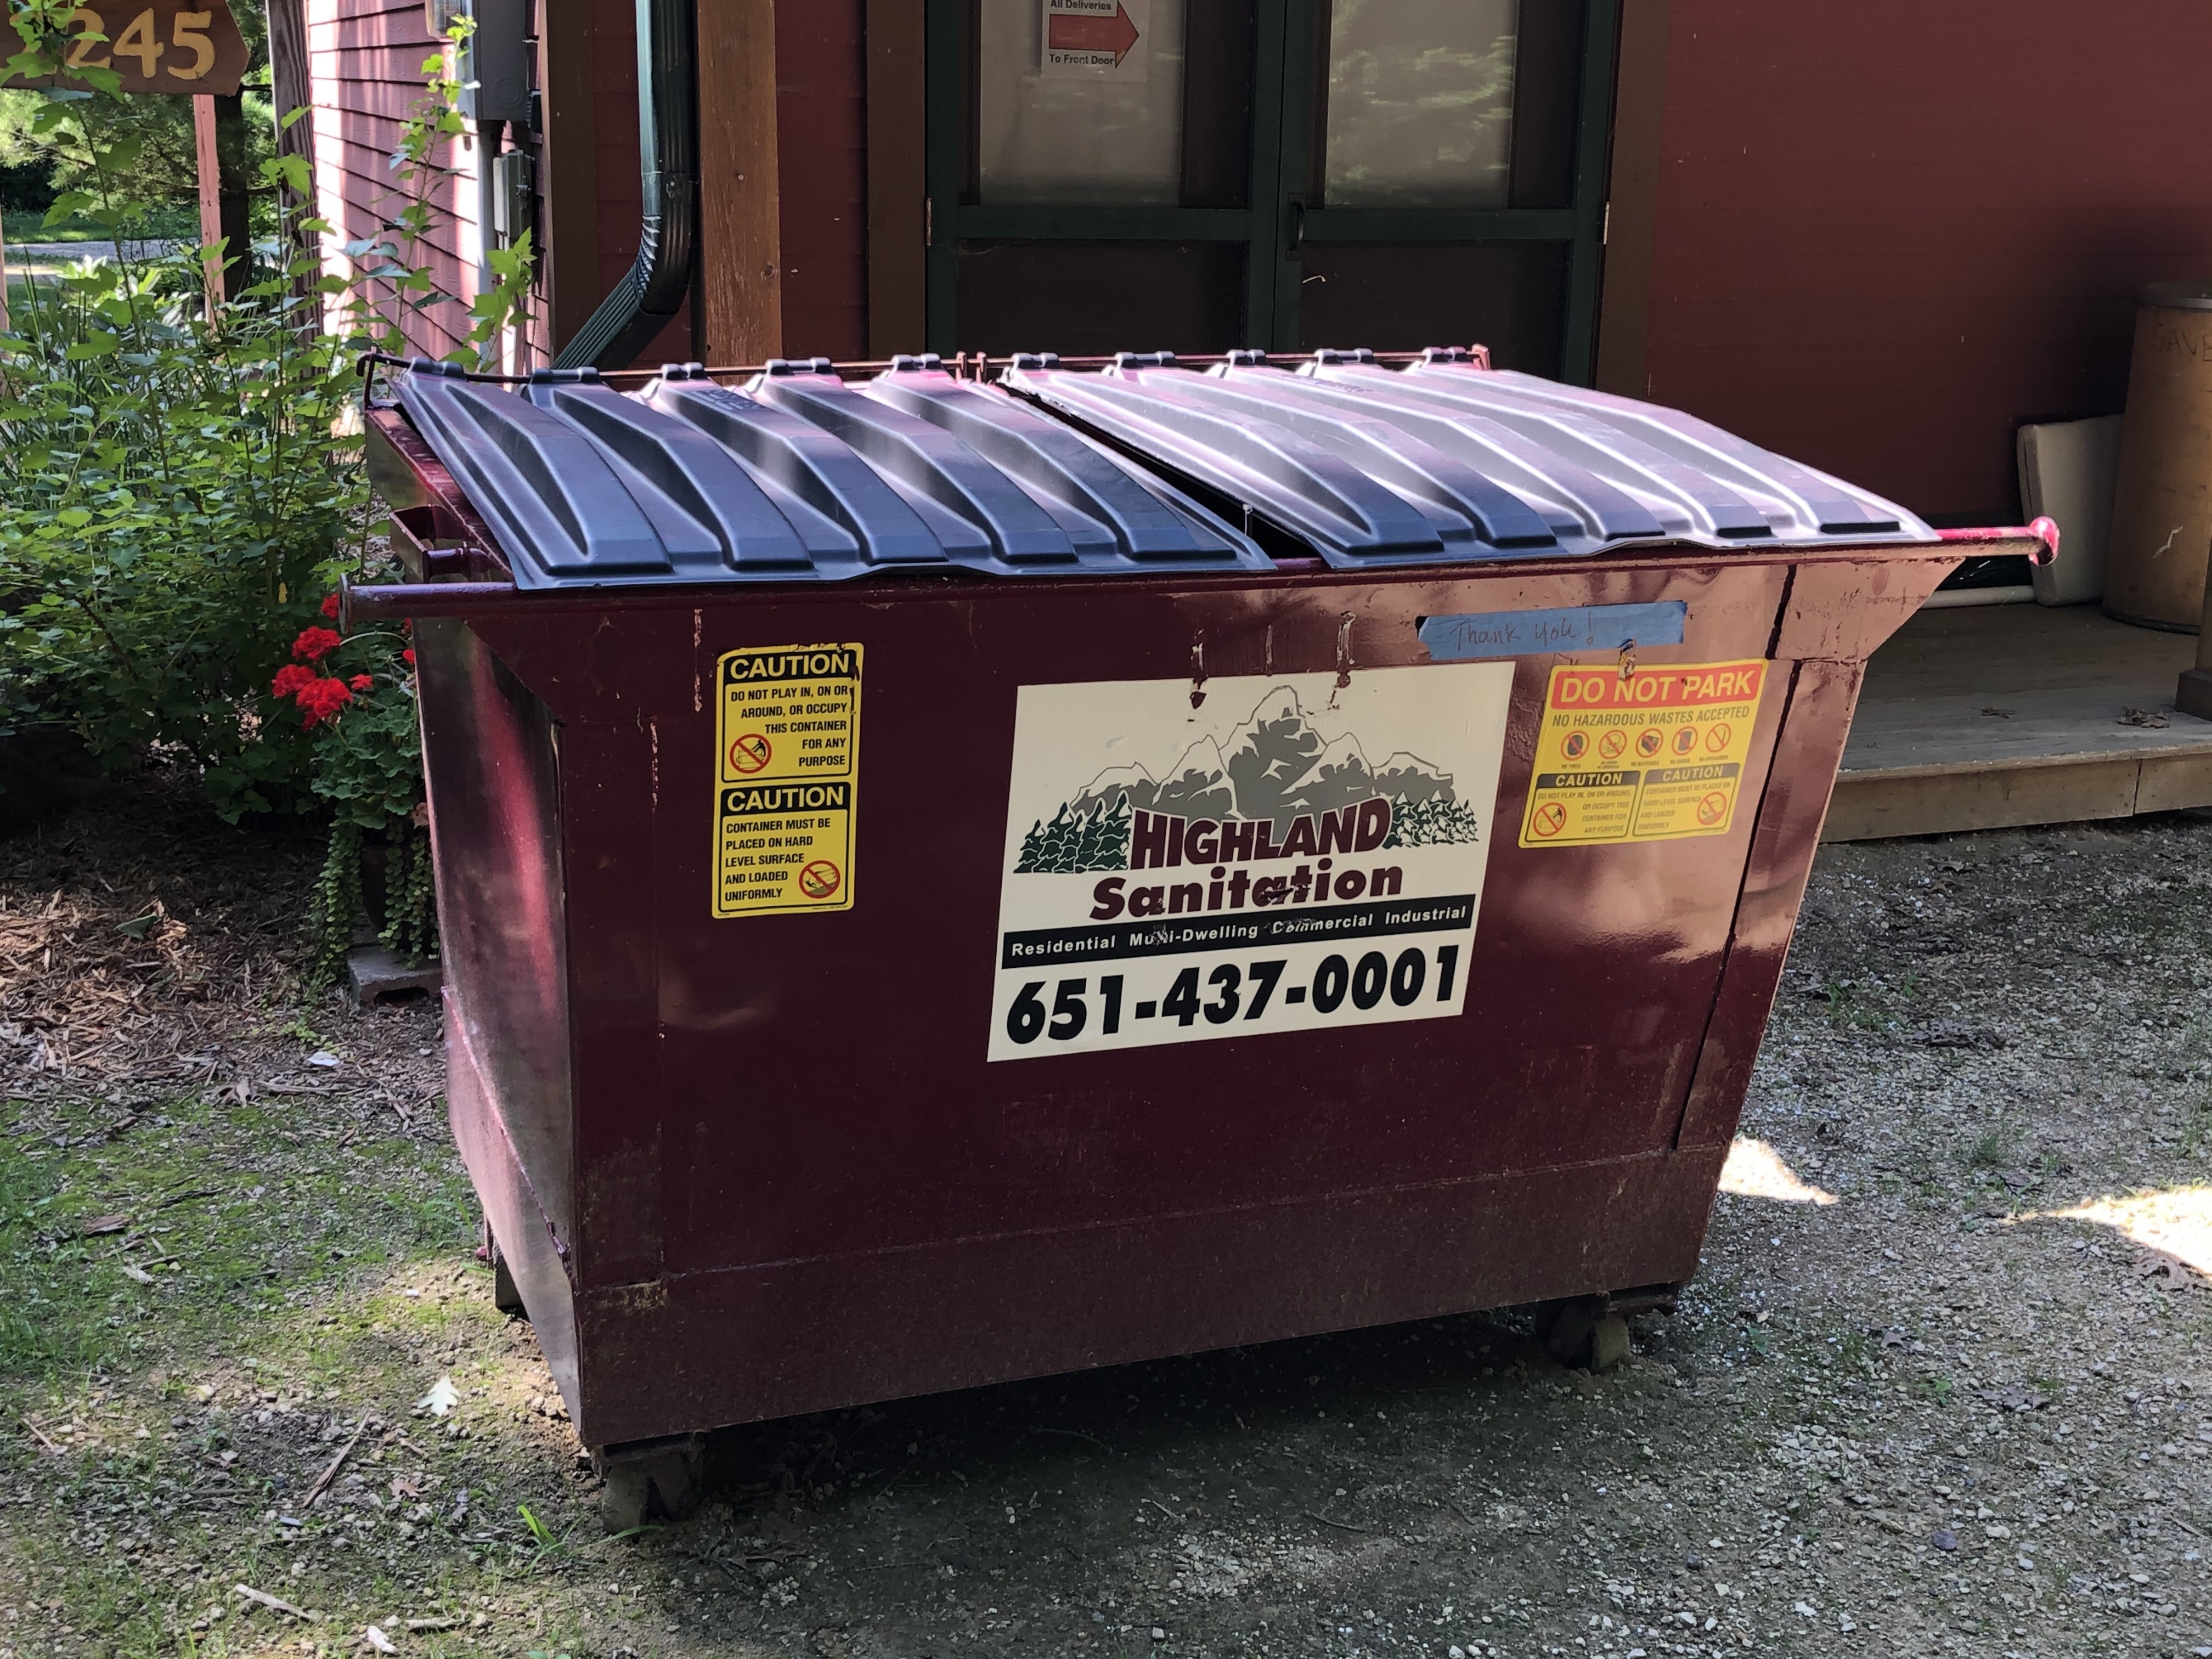
It started out slowly but once you get past the first few boxes of stuff it gets easier. You have to get over the hoarder complex and just start pitching. Really, it feels good. We have filled this thing five times now and will have it full before the last load departs next week.
A Navajo Rug
We found and bought a small genuine hand woven wool Navajo rug from the Shiprock Trading Post in Farmington, NM. It was made by Virginia Yazzi and is done in a traditional Two Gray Hills style. It was made available through the Museum of New Mexico foundation. They usually have an auction at this time every year. All on line this year.
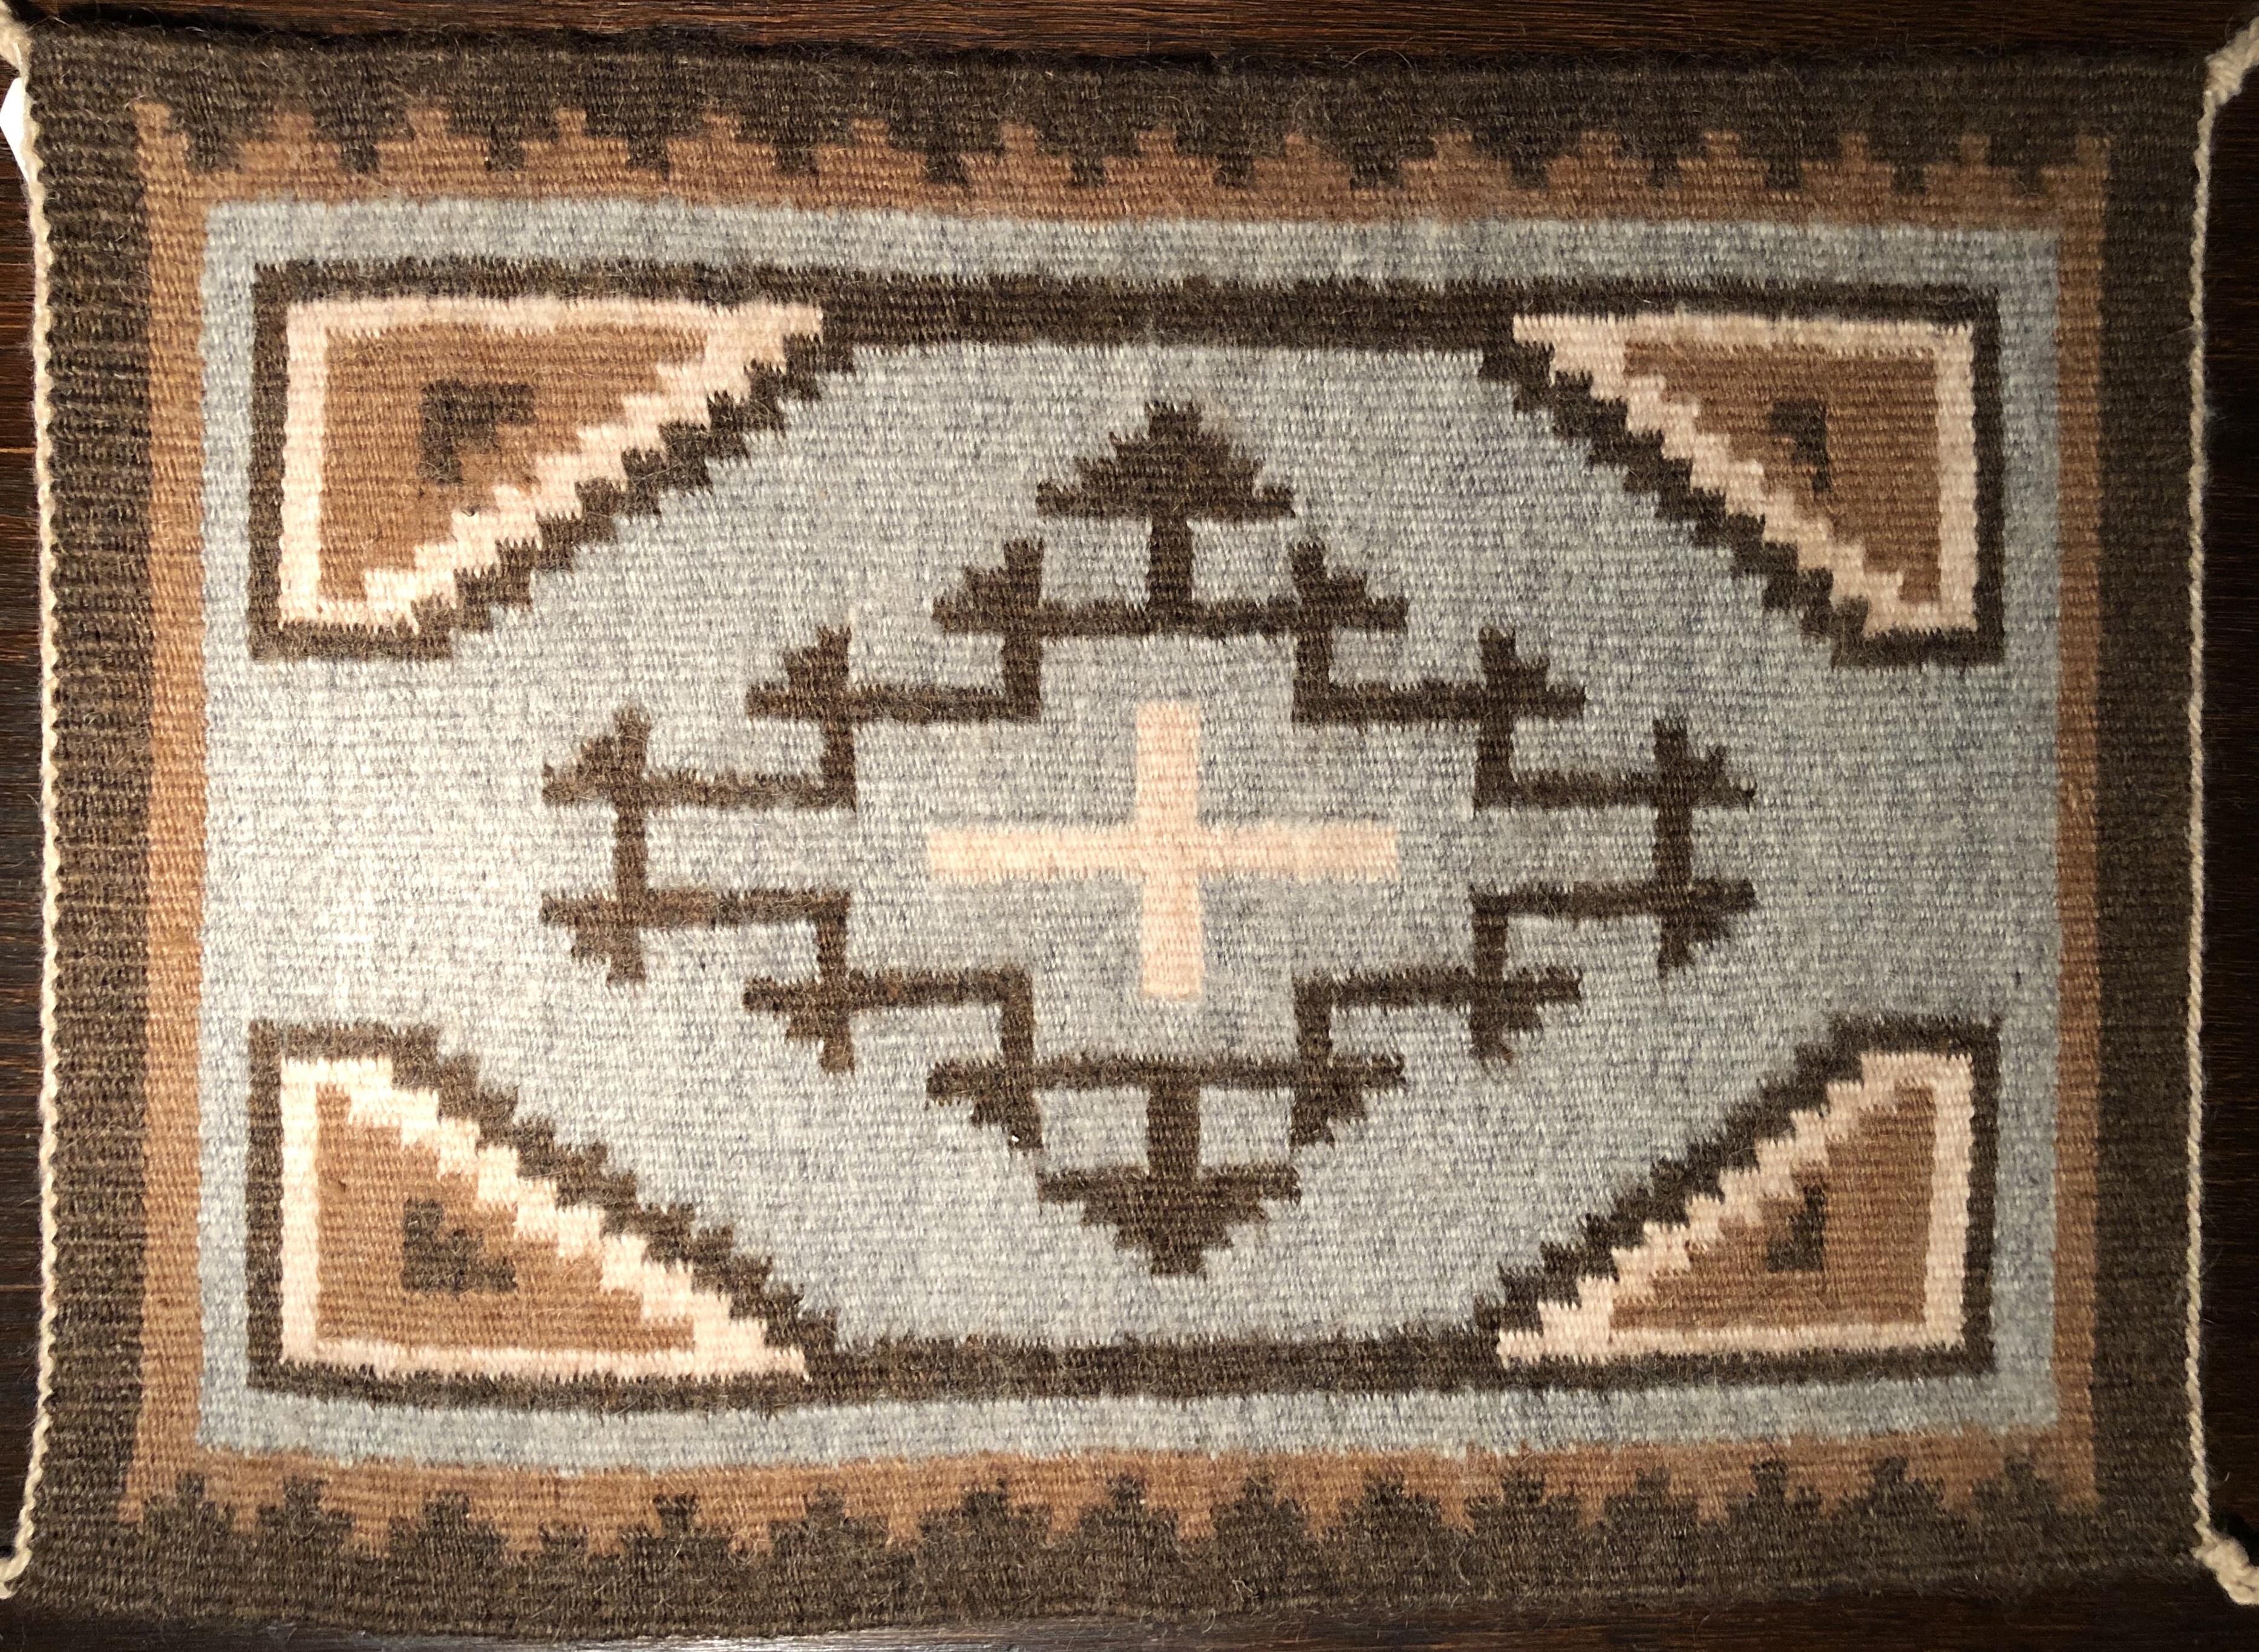
It will be a wall hanging in the coach.
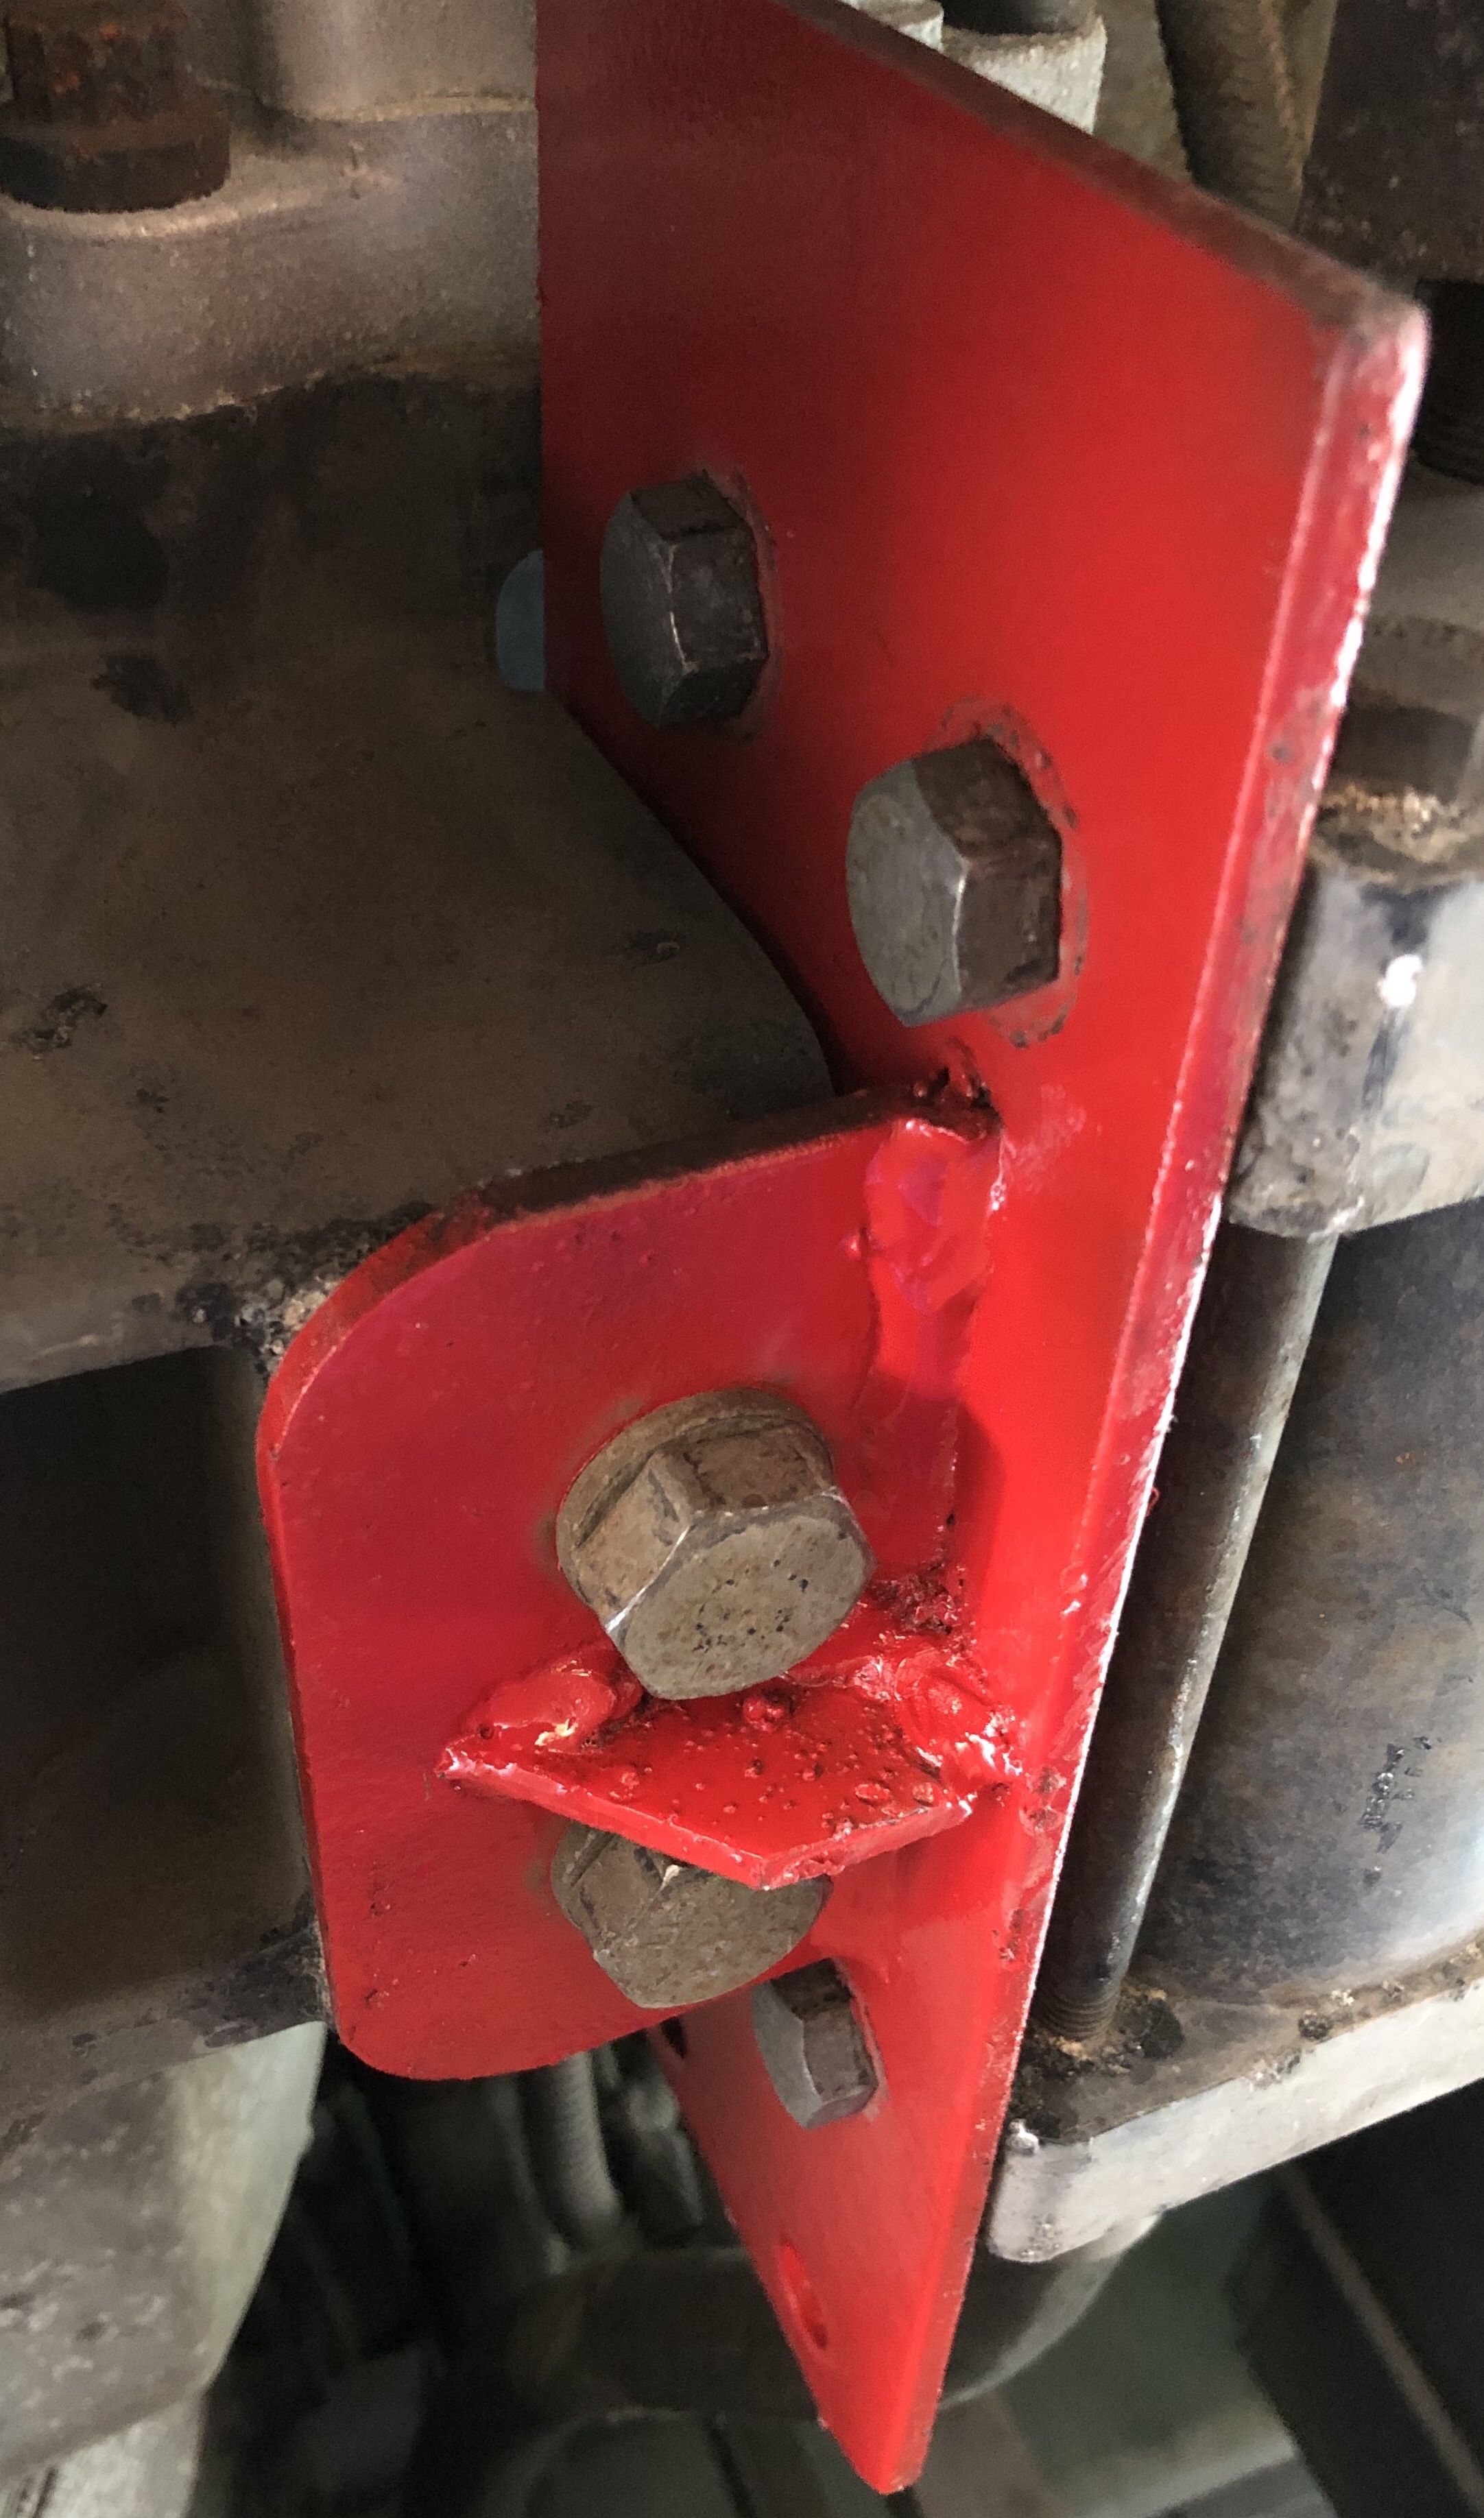
Retarder Accumulator Bracket
There have been some reports of a weld failure on the bracket that supports the coach’s retarder accumulator. I guess I knew there was an accumulator for the retarder but had no idea where it was. It actually was fairly easy to access and remove. The weld looked fine but I added welding to the other side of the flange and added a gusset. It took longer for the paint to dry than it did to remove, reinforce and replace the bracket.
Branding Iron
I have been looking for a branding iron for wood projects for some time. I never found one that I liked until I found this one.

Not the best picture but you get the idea. Mountains and pine trees maybe reflected in a lake. I like it!
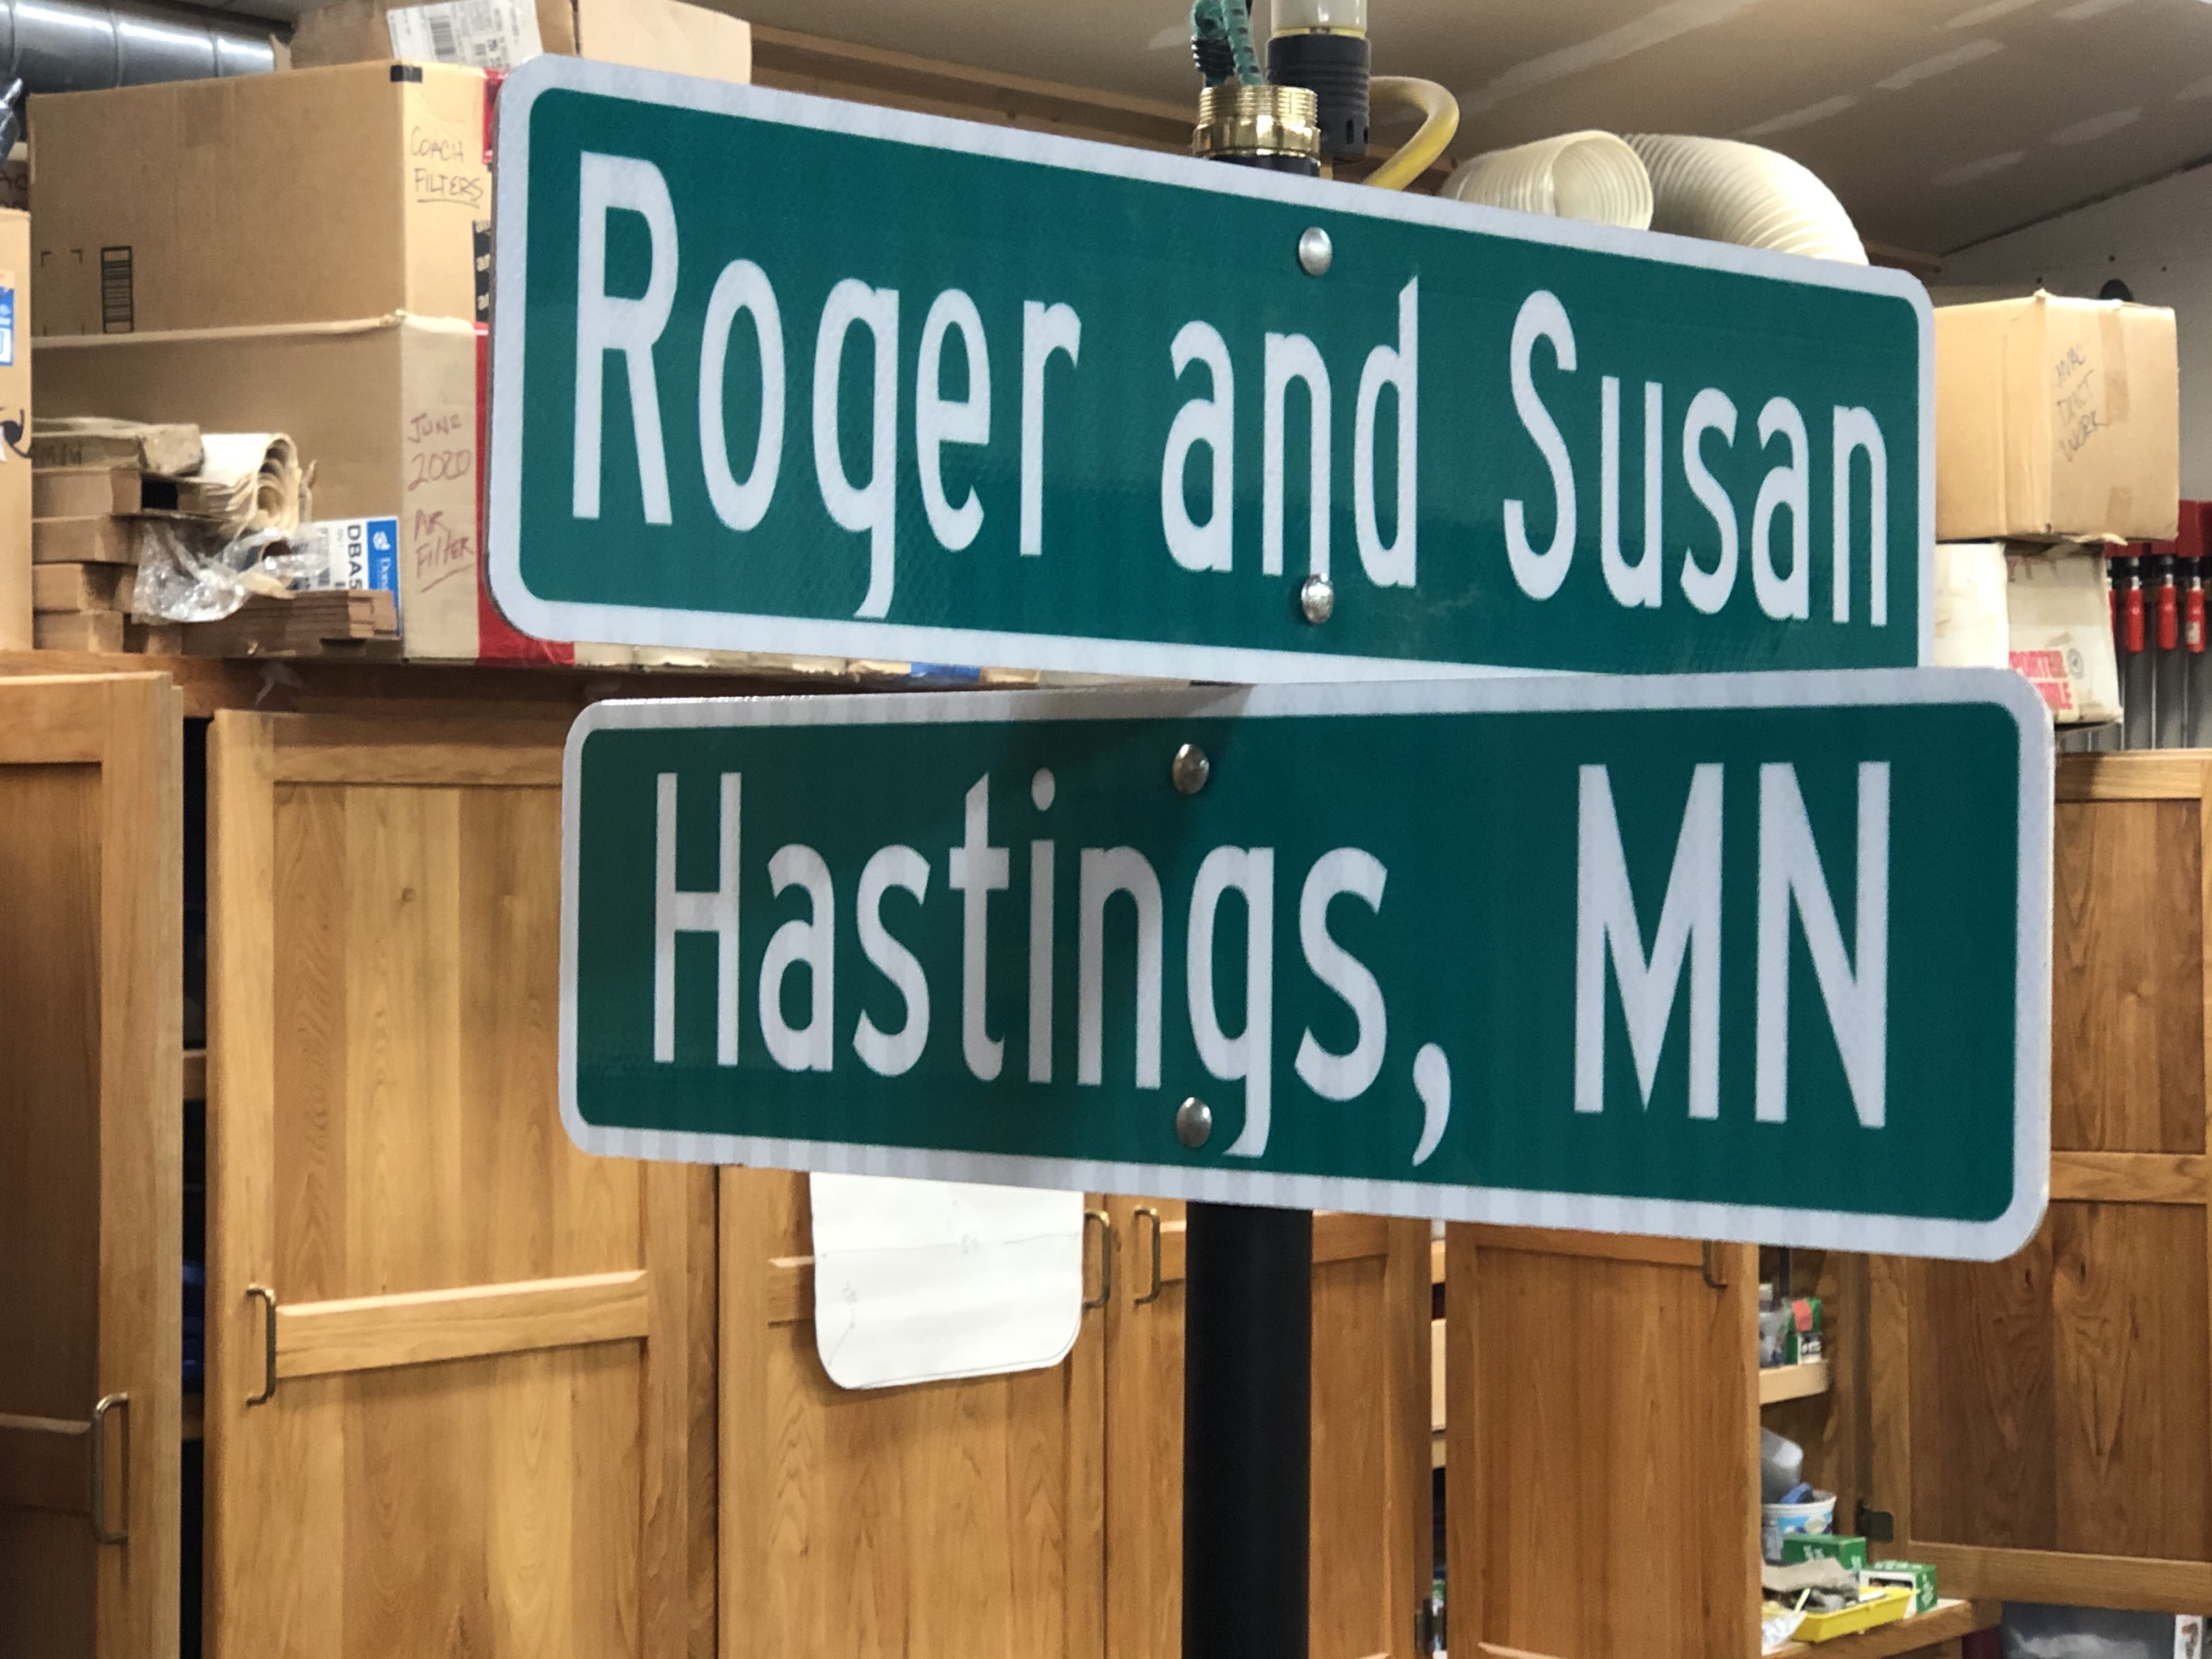
Street Sign
We repurposed parts of a floor lamp to make a post for out street signs. We also found a solar powered light for the top of the post.
That’s our summer so far! Lots more on the list that still can be done.
More Later, Much Love
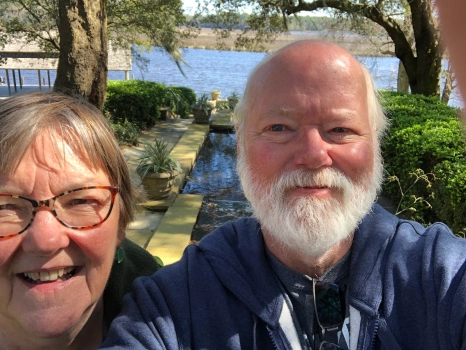
Roger and Susan
