

Here comes a bit of techno-babble. It is more to document what we did than anything else.
Last fall while we were in Nacogdoches, TX, I took some time to look closely at the 24-year-old exhaust system on the coach. There was one junction between a 5” exhaust pipe and the main muffler where a hanger had completely rusted away and quite a bit of the joining parts were rusted. And I found several small holes as well, almost all were in welded seams.
And the year before, the 5” diameter chrome exhaust pipe tip just fell off after the steel pipe it was connected to rusted through and the hanger failed.
We got an on-the-road fix for the exhaust tip, but not before the hot exhaust melted some wire cover and damaged a tail light.
While in Nacogdoches, I removed the rusted hanger and put a 5” band clamp pipe connector over the rusted pipes and a new hanger.
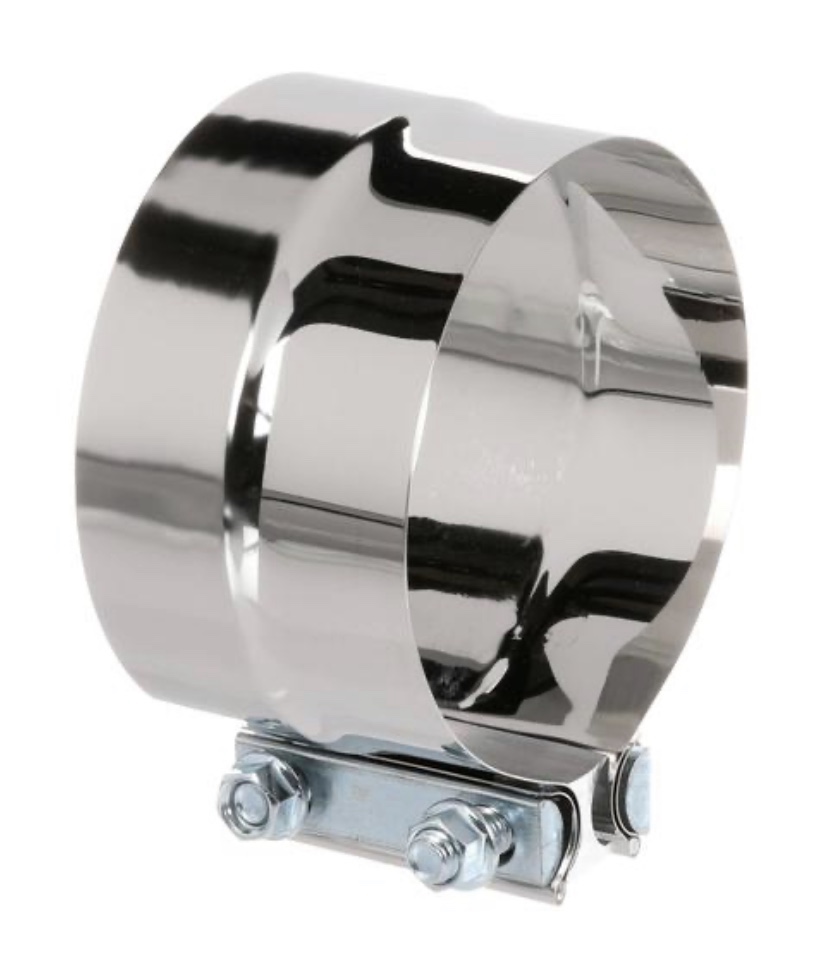
These worked well. I used a generous amount of red high-temperature silicone sealant and the clamp to hold the rusted parts together and give me a place to attach the replacement clamp.
I sealed up the small holes as best I could with sealant and off we went.
So a new muffler was another line item on the summer’s projects list.
The common way to replace the original Foretravel muffler (which is the size of a small trash can) is to route some 5” flex pipe to a resonator and then out through the rear end with a new exhaust tip.
The resonators are mostly about 16 inches long and make the noise level of the exhaust system significantly louder than the original system. I know several people who have gone that way and I didn’t like the extra noise especially when you are starting up and departing a campground.
So I started looking at other options. One might have been to put two short resonators end to end. I found no one who had done that or any reports of noise reduction.
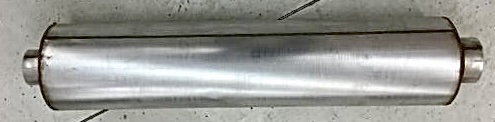
I then found truck mufflers made by Donaldson. They had 5” inlet and outlet pipes. The body of the muffler was about 45 inches long. These came in different materials from steel to stainless steel and different levels of sound attenuation.
I spent quite a bit of time under the rear corner of the coach measuring and visualizing how the exhaust system would work.
I decided it would work so I ordered the stainless steel muffler with the greatest sound attenuation and all of the parts I thought I would need to get this project done.
Once everything was delivered and the weather looked clear for a few days I slipped this project in while still working on the tree clean-up project.
The exhaust from the engine turns the turbocharger which increases the pressure of the air going into the engine. After the turbocharger, the 5-inch exhaust pipe turns 90 degrees and points down, and then another 90 degrees and points towards the side of the coach.
My idea was to add another elbow to turn the exhaust pipe so that it pointed forward and then add a 180-degree U-shaped pipe to turn it back towards the rear.
All the measuring and planning help, but when it comes to actually fitting parts together there is always a lot of trimming and fitting to make it happen the way you want.
I cut off part of the elbow pointing to the side of the coach so that the next elbow pointing forward would be lower. I used a 5-inch pipe to join two pipes of the same size butted up to one another. This was sealed up using a generous amount of red high-temp sealant. When this is all tightened up and the sealant cures it is a rock-solid connection.
The U-shaped pipe would connect to the front of the muffler. At the rear of the muffler, there needs to be a 5” offset S-shaped pipe that connects to the chrome exhaust tip which goes through a hole in the coach body.
I assembled the U-shaped pipe to the muffler and the S-shaped offset pipe to the other end of the muffler and then propped it up in its approximate position to see how it was going to fit. I needed clearance where the muffler went by the air conditioner cooling fan, it needed to line up with the hole in the back of the coach, and the U-shaped pipe needed to line up with the elbow pointing forward.
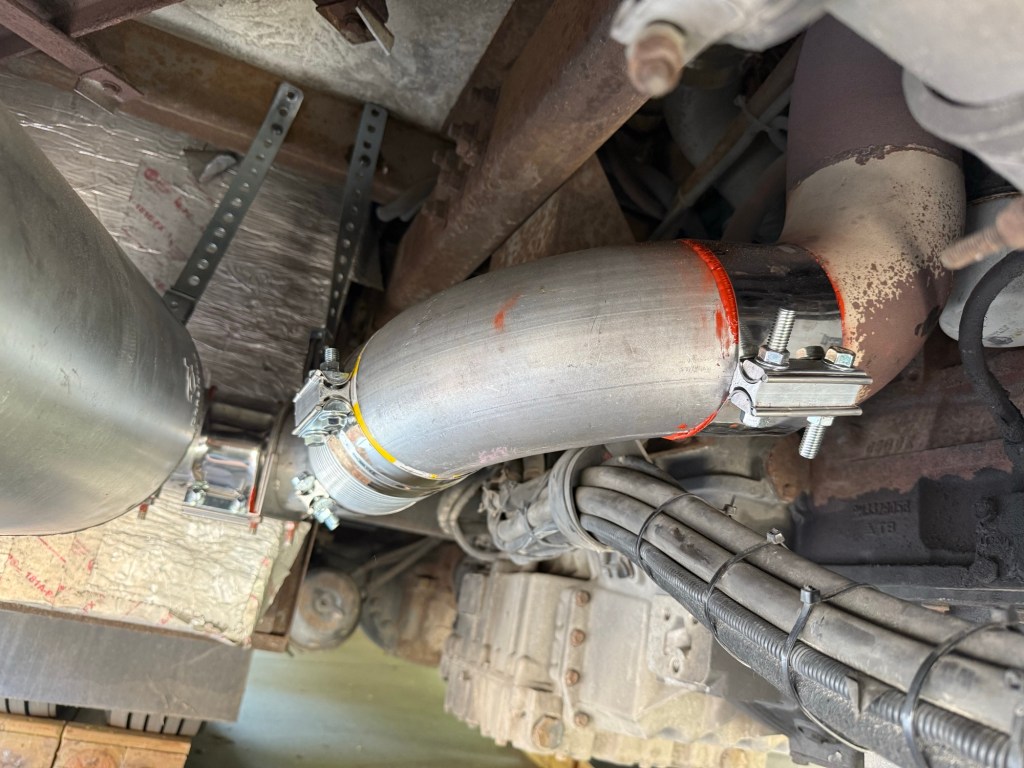
A few adjustments later I had it lined up pretty well and determined I needed to add a section about 8 inches long to make everything fit. That is where a section of stainless steel flex pipe and a couple of additional clamps come in handy.

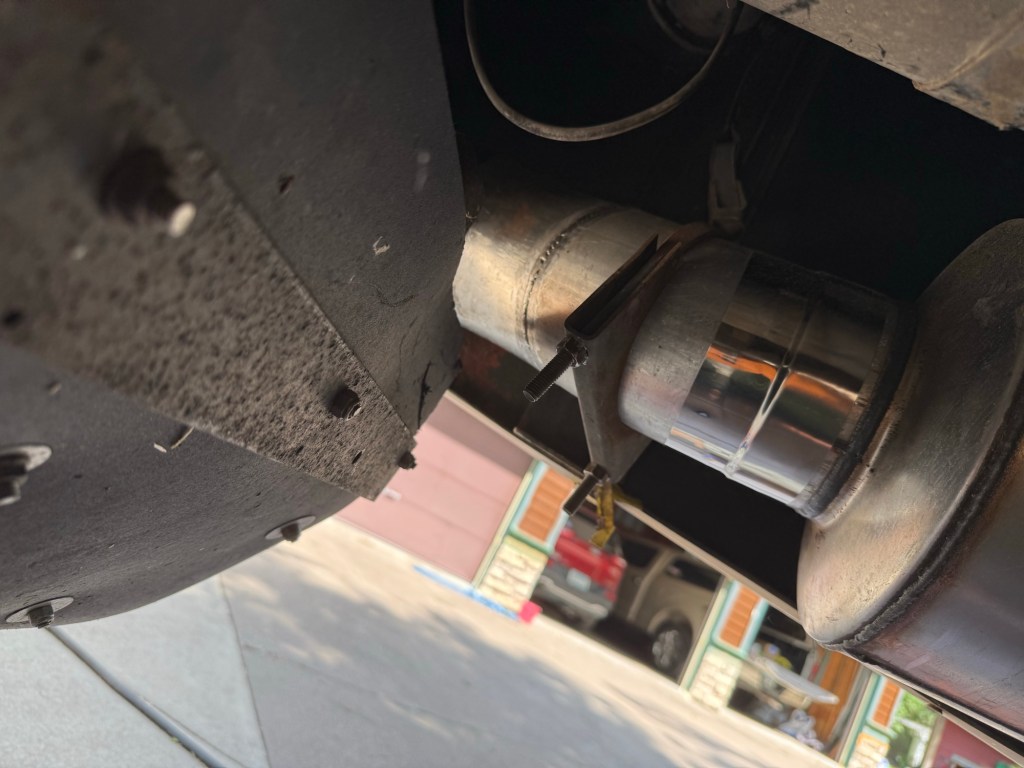
You can see in the picture above the flex section connected to the U-shaped pipe which is connected to the muffler. The U-shaped piece was made from two ninety-degree sections cut to fit and welded together. I put another connecting clamp and plenty of sealant over the welded joint to make sure it sealed up.
There are a pair of pipe clamps there too which hold one end of the hanger straps to support the front end of the muffler and assembled pipes. The straps are anchored to the coach frame above.
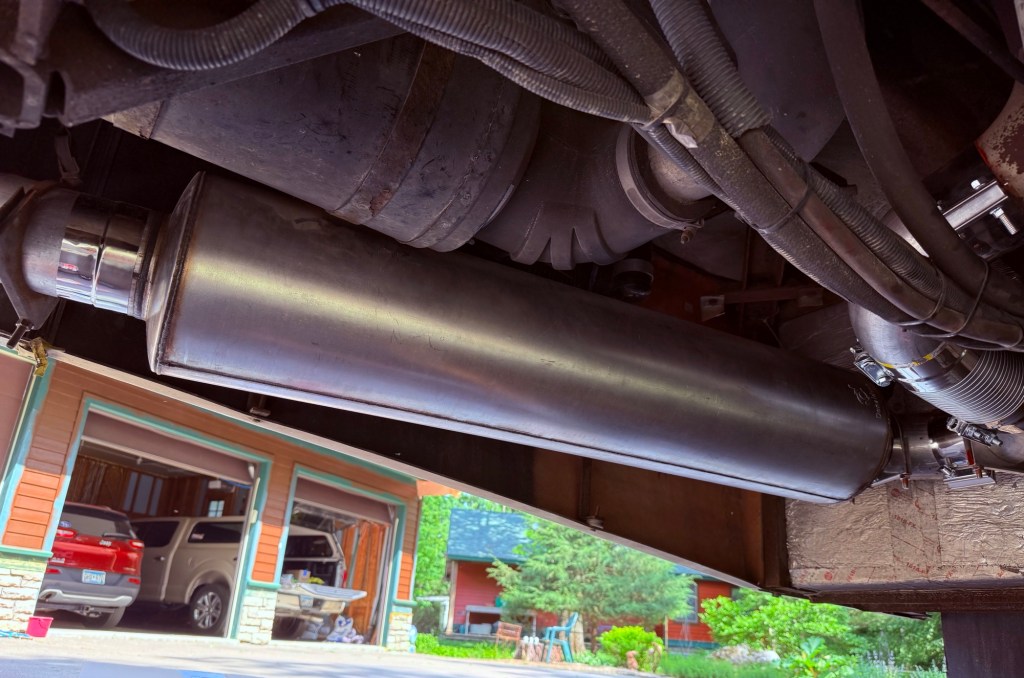
Now you can see the ten-inch diameter muffler heading towards the rear of the coach. The five-inch offset pipe is connected to the rear of the muffler with another pipe band clamp. There are two more hanger brackets attached just to the rear of the band clamp.
This is all pretty close fits. You don’t want anything shaking or loose, nothing too close to anything else that might not do well if it got too hot, and the exhaust tip has to come out through the hole at the rear of the coach with clearance all around.
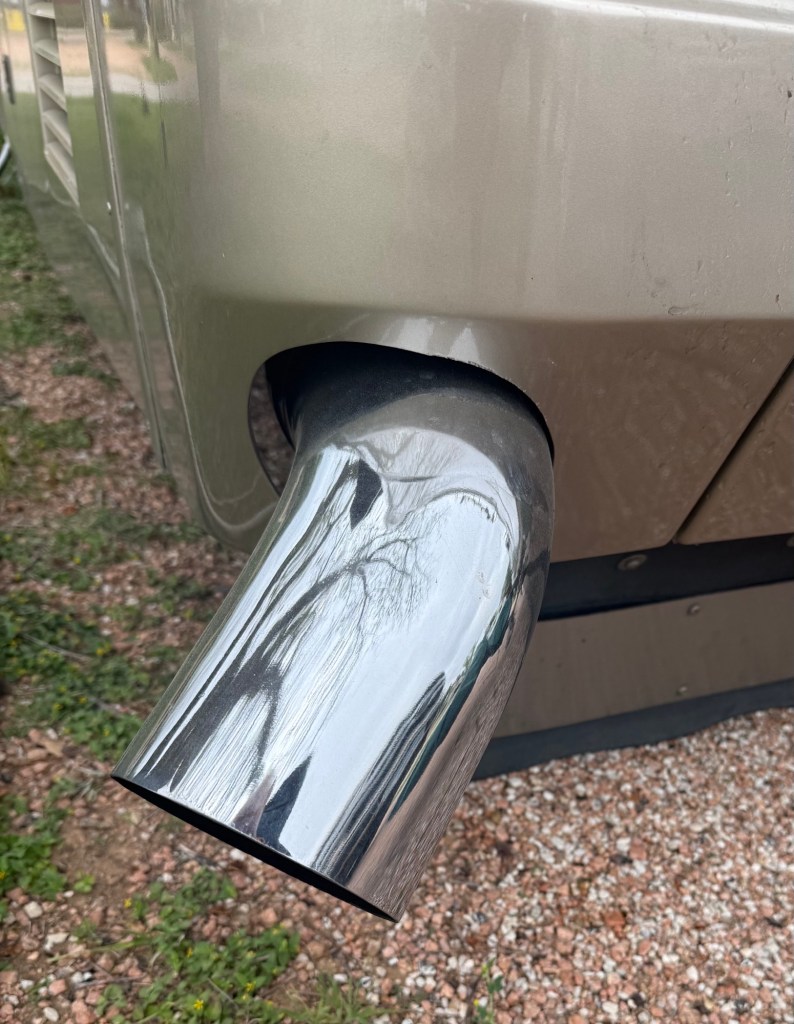
The exhaust tip is not quite centered in the hole but there is clearance all around. I needed more clearance near the AC fan shroud. An extra quarter inch in the offset pipe would have helped. These are some of the fit issues you just can’t see until you start putting things together.
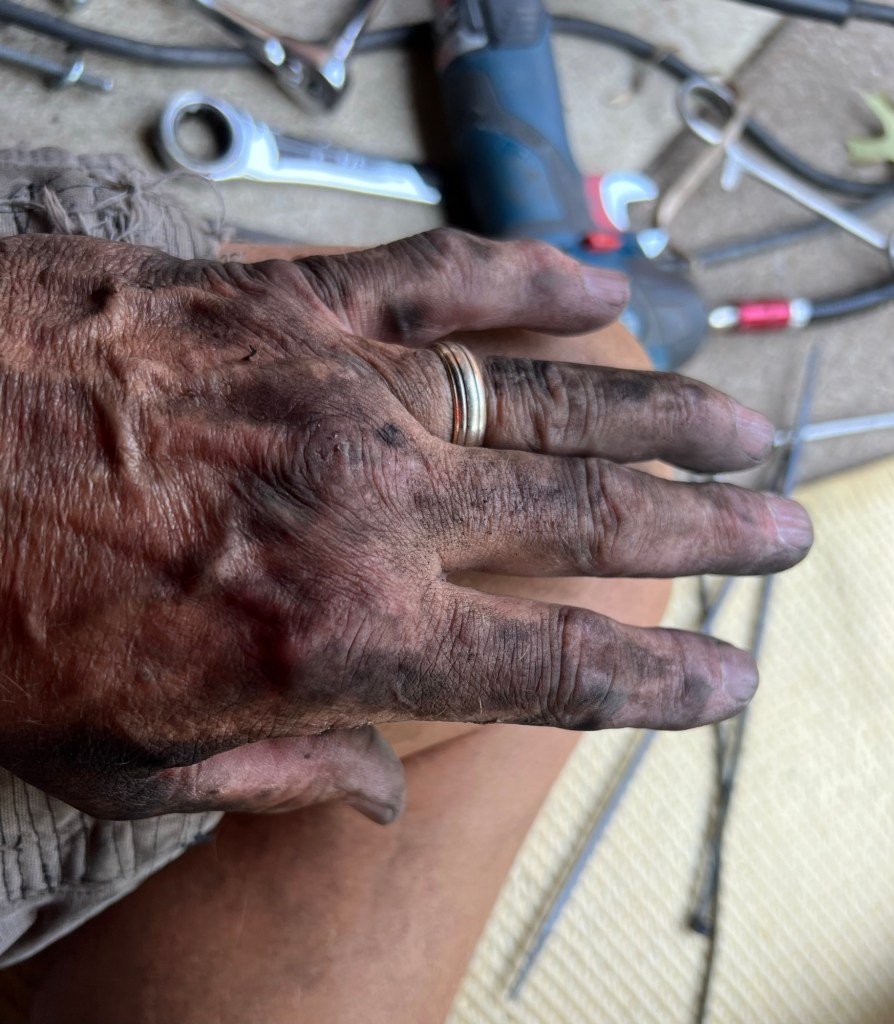
This project took three days to do. I was short a couple of parts and had to order them. The total time was maybe 6 hours. I scraped up a knee, a couple of knuckles, and got dirty. All common results working on under the coach projects.
I double-checked all of the nuts and bolts to make sure they were tight. I drove the coach for about 40 miles to make sure it got warmed up and then tightened everything again. I did the same after a longer drive later in the fall.
Did it work? Nothing fell off and the nuts and bolts are staying tight. It is much quieter than just using a resonator. I think it is about the same noise level as the OEM muffler but that is very subjective. It sounds different from the OEM muffler, I can hear a bit more of a roar going through a tunnel or under a bridge but in normal driving little if any difference.
All of the parts were about $800. I could have saved a hundred bucks or so if I had not used the most expensive muffler. I have several band clamps left over and a hanger clamp. That might be $100 worth of spare parts. Taking the coach to the factory or one of the service places in Nacogdoches to have this done would have been at least $2,000.
Another project checked off the summer list, Bob’s your uncle.
More Later. Much Love.
Roger, Susan, and Maggie

My comment is I’m glad the photo shows all five fingers! Where you got those skills I do not know…Dad? I think self taught? Not anything I was born with and neither was Bruce. Anyway I’m impressed th
LikeLike